
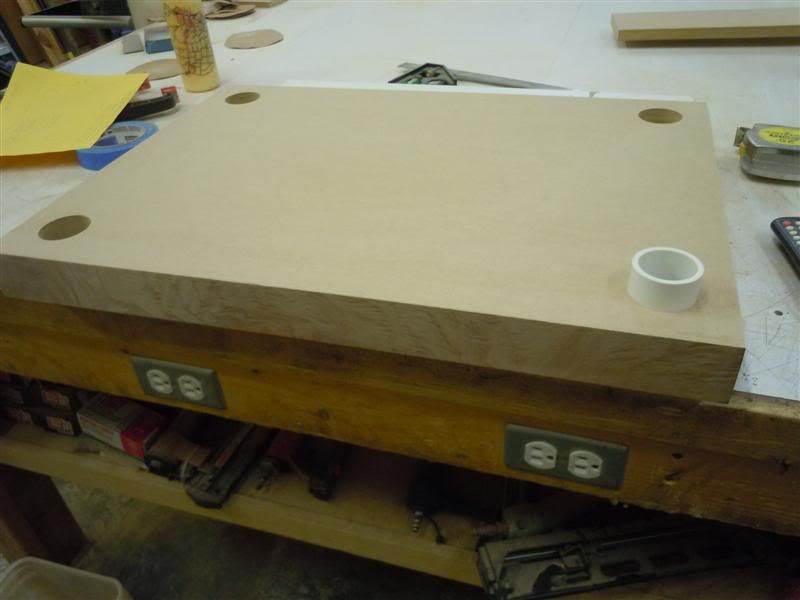
Hey Guys, I thought you guys might like to see some One-Off shelves Im building for a customer of mine. This is the first of many projects he and I have in the works so lots more will be posted in the future, but anyway .... The first in the "Projects" is replacement Component shelves. The shelves are 18" Deep X 25" wide X 2" thick HDF (high density fiberboard) most of you are familiar w/ MDF. This stuff is a lot more dense and stiffer not to mention heavier. I started off by Vacuum pressing 2 - 1" pieces together, did I mention this stuff is Heavy???
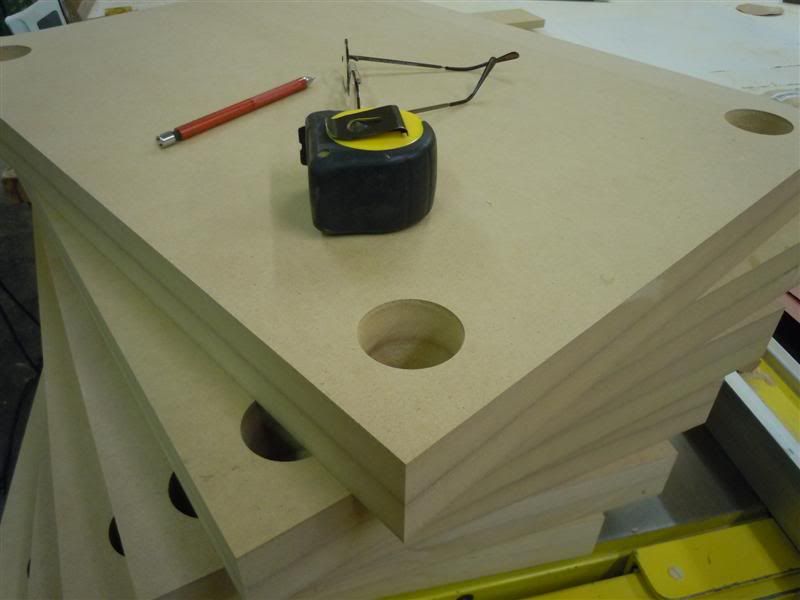
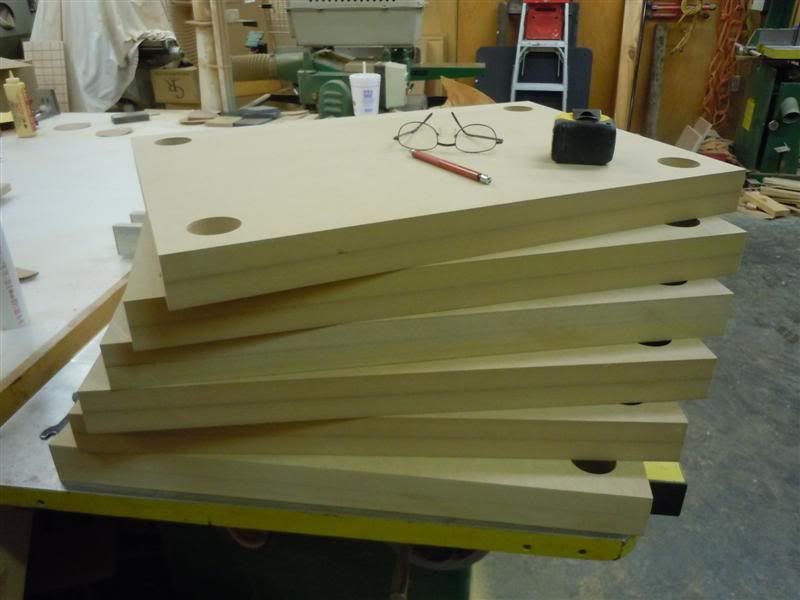
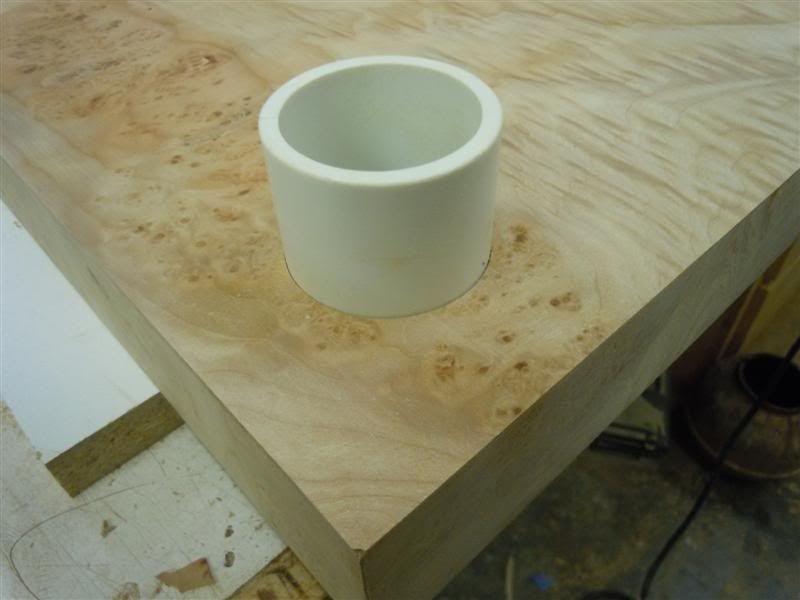
And heres what you have after a lot of cutting and Vacuum pressing. The wholes are 2" off each corner to the center and are an 1 7/8" OD with an ID of 1 1/2".Each hole will have a nylon bushing installed to to protect the Veneer from the threaded rod from chipping the veneer when installed.
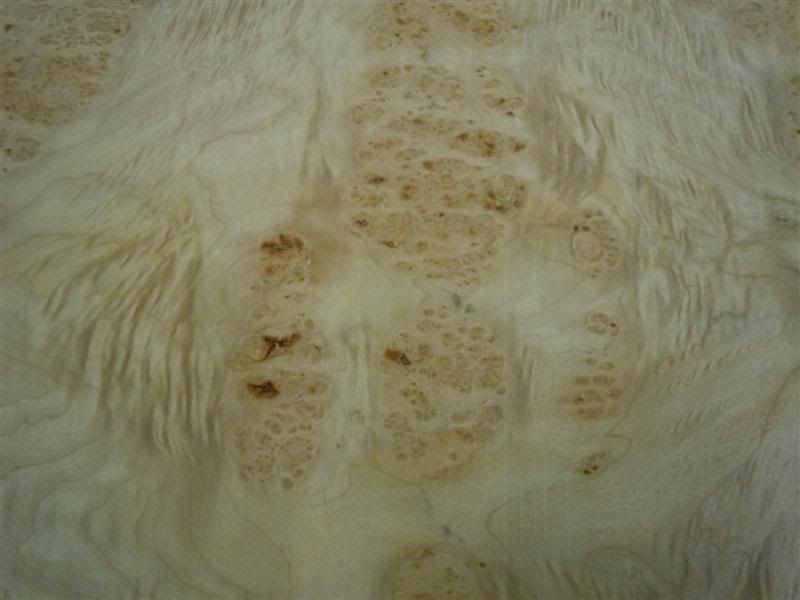
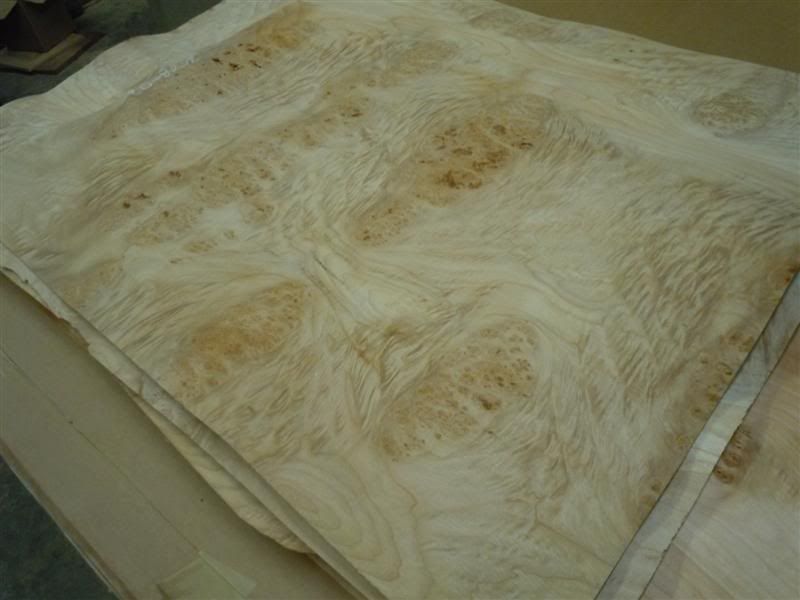
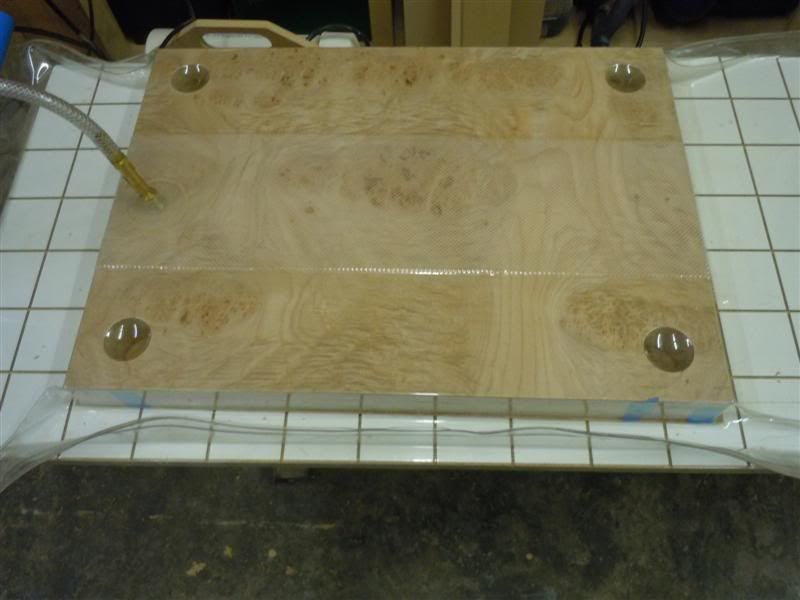
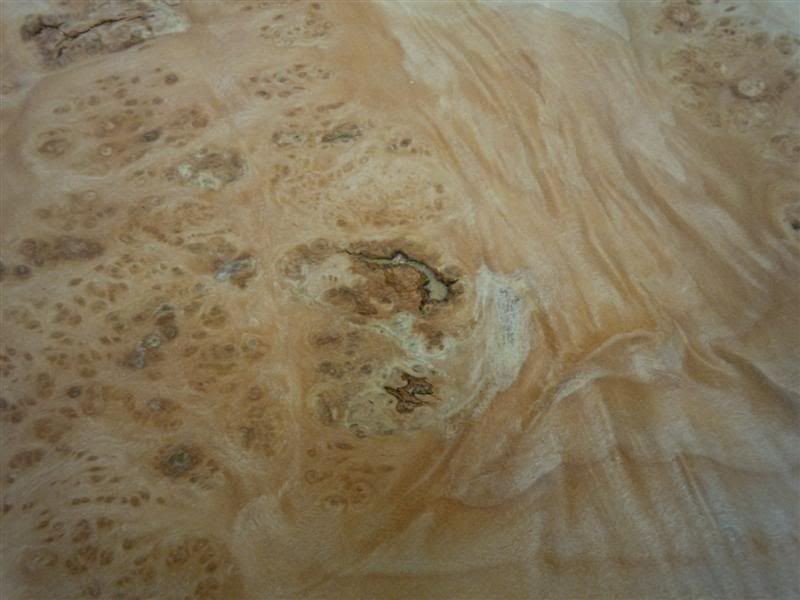
The Veneer my client chose is "Angel Step Burl" Maple. Very beautiful and highly figured.
Here you can see the first edge after it has been veneered, you can do it either way but I like doing the edges then the flats.
After all the edge banding is done and flush cut its time for the Vacuum press. Now ill tell you if you can ever find yourself in the position to buy one , buy one. It will evermore change the way you do veneer work. To do it and do it right you will have between $ 800 - $ 1000 invested but its worth every penny if you do much of it. The first 3 pix show the veneer being pressed @ 20" of mercury.
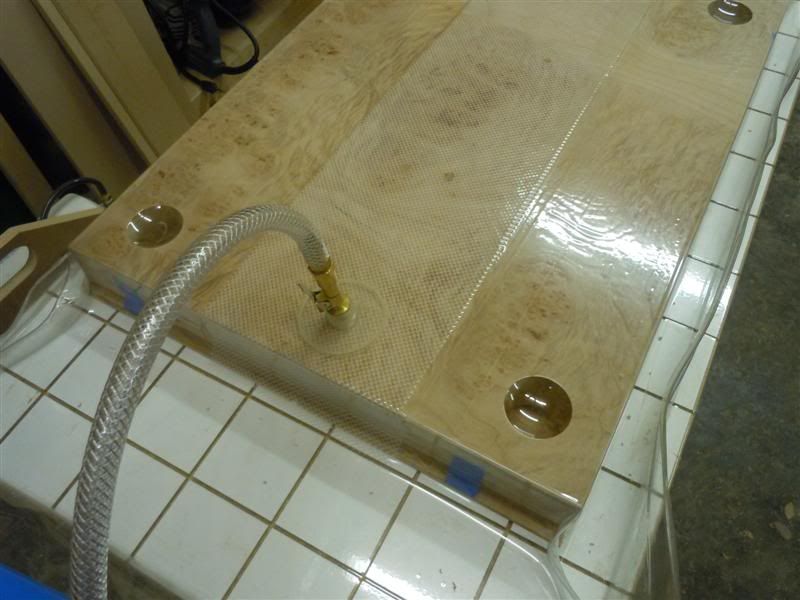
The next few pix is 45 min later, the cold press glue is Rock hard, the shelves have been removed and the edges can now be flushed trimmed.
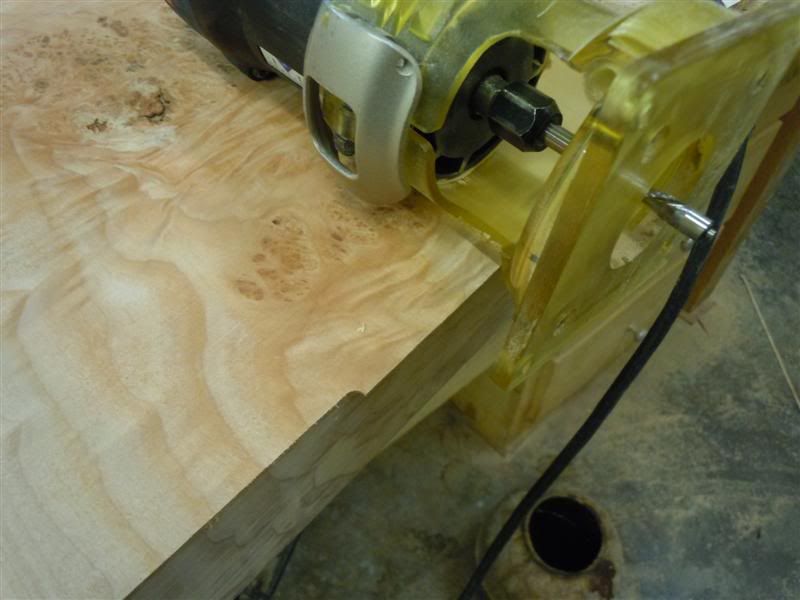
For those who may be wondering , the bit im using isnt your typical flush trim bit. A flush trim bit will work pretty good on most veneers but when it comes to Burls or any figured wood there is a good chance of tearout. This bit is a "Downward spiral" not an "Up spiral" w/ a bottom bearing. What this does, is as the bit cuts its cutting in a downward sheering motion which the veneer is supported by the substrate. An up spiral tend to want to try to "Lift" the unsupported veneer resulting in chipping or tearout.
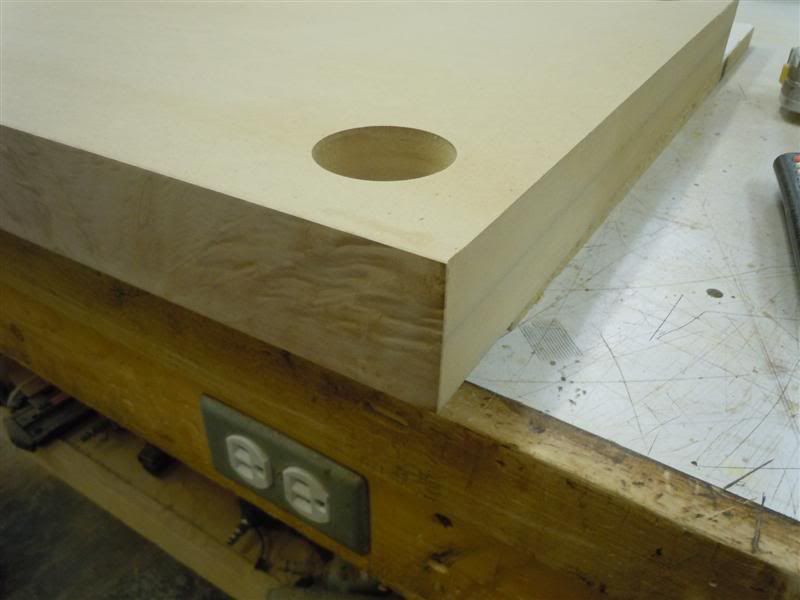
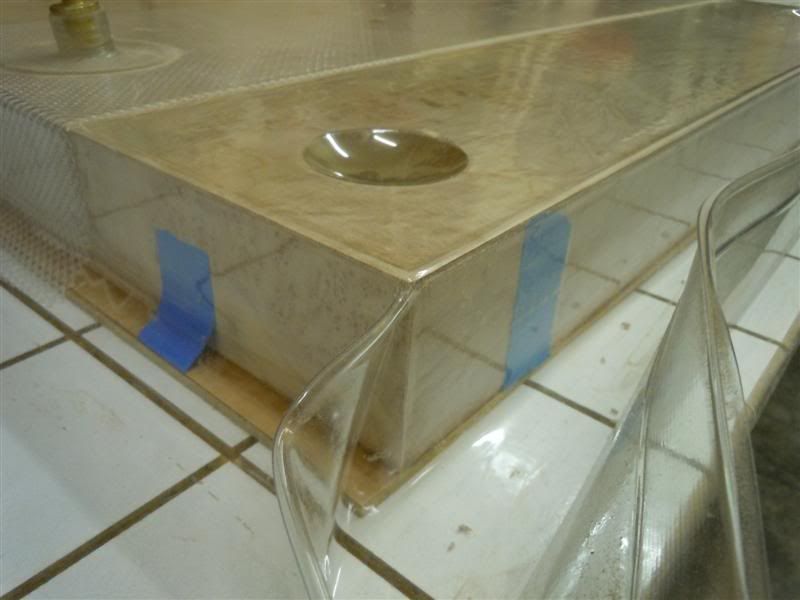
The next 2 pix shows where the center of the hole has been located and punched through.

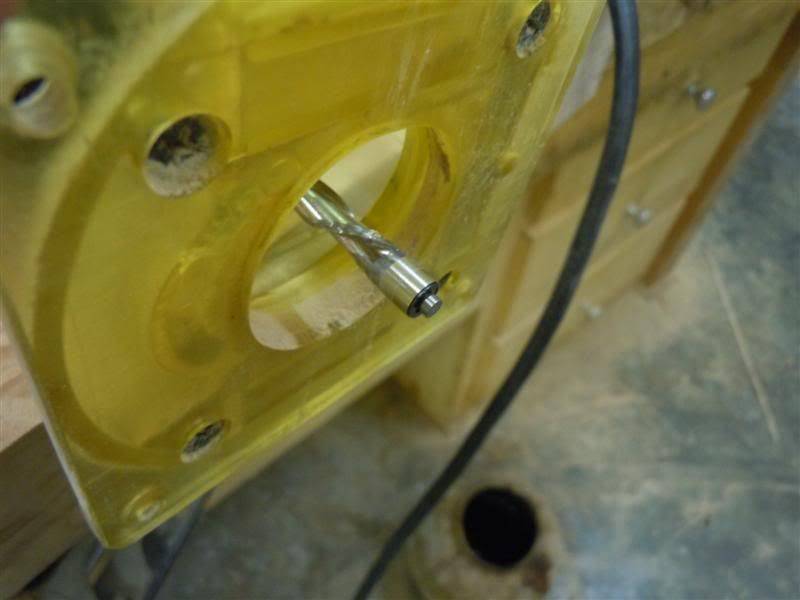
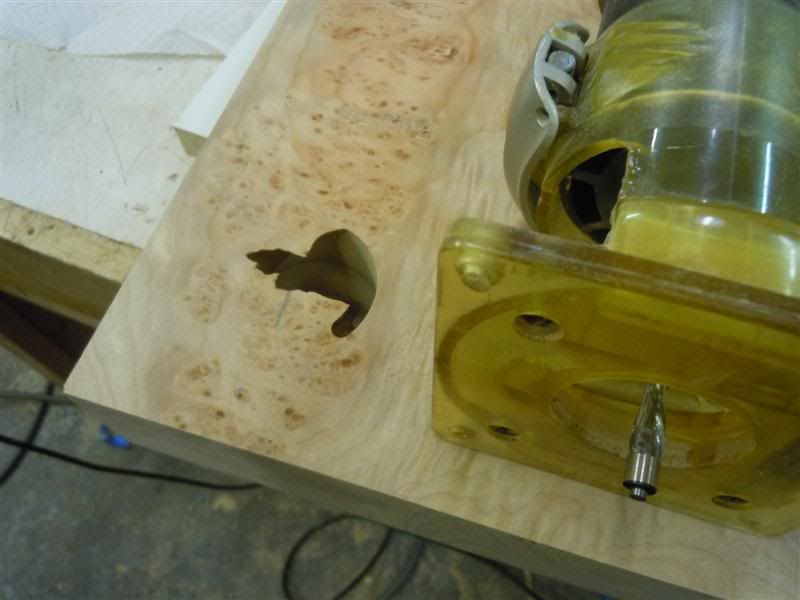
Next the router has been inserted w/ the same bit and the hole can be cut. In the last pix you can see the nylon bushing fits like a glove , ready for glueing in place once the shelf has been finished.
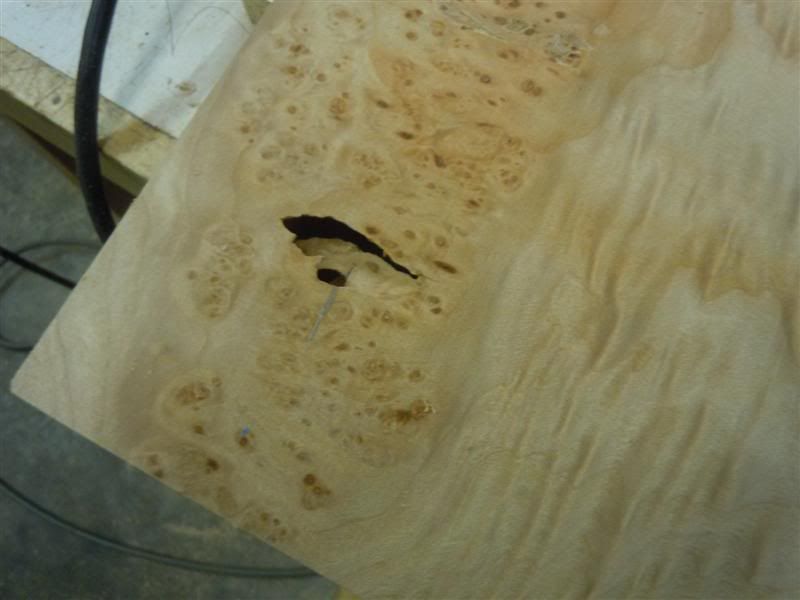
This last pix in this portion shows a common problem in working w/ burl. In all my yrs working w/ veneer I have yet to get in burls that I didnt have to deal w/ a hole somewhere in the burl. In the next few days Ill show you how I deal with this to achive a perfect match which will make this invisible.
to be continued. R.K.
And heres what you have after a lot of cutting and Vacuum pressing. The wholes are 2" off each corner to the center and are an 1 7/8" OD with an ID of 1 1/2".Each hole will have a nylon bushing installed to to protect the Veneer from the threaded rod from chipping the veneer when installed.
The Veneer my client chose is "Angel Step Burl" Maple. Very beautiful and highly figured.
Here you can see the first edge after it has been veneered, you can do it either way but I like doing the edges then the flats.
After all the edge banding is done and flush cut its time for the Vacuum press. Now ill tell you if you can ever find yourself in the position to buy one , buy one. It will evermore change the way you do veneer work. To do it and do it right you will have between $ 800 - $ 1000 invested but its worth every penny if you do much of it. The first 3 pix show the veneer being pressed @ 20" of mercury.
The next few pix is 45 min later, the cold press glue is Rock hard, the shelves have been removed and the edges can now be flushed trimmed.
For those who may be wondering , the bit im using isnt your typical flush trim bit. A flush trim bit will work pretty good on most veneers but when it comes to Burls or any figured wood there is a good chance of tearout. This bit is a "Downward spiral" not an "Up spiral" w/ a bottom bearing. What this does, is as the bit cuts its cutting in a downward sheering motion which the veneer is supported by the substrate. An up spiral tend to want to try to "Lift" the unsupported veneer resulting in chipping or tearout.
The next 2 pix shows where the center of the hole has been located and punched through.
Next the router has been inserted w/ the same bit and the hole can be cut. In the last pix you can see the nylon bushing fits like a glove , ready for glueing in place once the shelf has been finished.
This last pix in this portion shows a common problem in working w/ burl. In all my yrs working w/ veneer I have yet to get in burls that I didnt have to deal w/ a hole somewhere in the burl. In the next few days Ill show you how I deal with this to achive a perfect match which will make this invisible.
to be continued. R.K.
")