You are using an out of date browser. It may not display this or other websites correctly.
You should upgrade or use an alternative browser.
You should upgrade or use an alternative browser.
homemade
-

Turner's Slide-Rest, Homemade in Wood
There are times when I wished I had a cross-slide rest for my wood-lathe, for those special cuts where precise repeatability is wanted, such as cutting an identical, angular groove in several pieces (it is this feature that I need to be able to put "dish" into model wagon-wheels, for example)...- johnpipe108
- Thread
- homemade sliderest turner wood
- Replies: 5
- Forum: Power Tools and Their Use
-

Homemade sysport (Festool Dock)
Until recently my miter saw has resided on an old kitchen cart, At the same time I had a Festool MFT (Multi-function table) resting on its side when not in use and the systainers (containers that the Festool tools come in) sitting on the floor with the Festool vacuum. I got the idea to...- Douglas Robinson
- Thread
- dock festool homemade sysport
- Replies: 37
- Forum: Workshop Discussion
-
PIC 48 - Routing Done
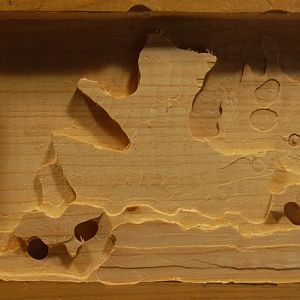
Ready to hand carve the details now.- MT native
- Media item
- carving drill foredom homemade press relief
- Comments: 0
- Album: Homemade Relief Carving Jig
-
PIC 47
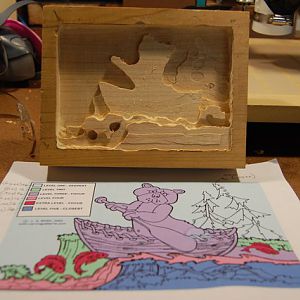
Here you can see the levels I identifed in the drawing before actually doing any cutting. I removed the deepest background (level 1) first then removed each subsequent (shallower) level until all levels were hogged out.- MT native
- Media item
- carving drill foredom homemade press relief
- Comments: 0
- Album: Homemade Relief Carving Jig
-
PIC 45 - start carving
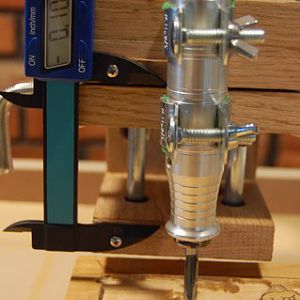
- MT native
- Media item
- carving drill foredom homemade press relief
- Comments: 0
- Album: Homemade Relief Carving Jig
-
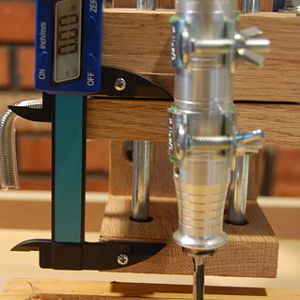
PIC 44 - Hog out a carving
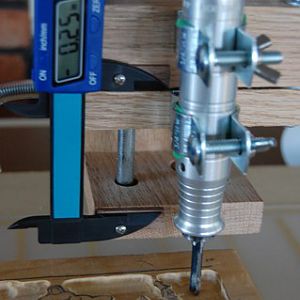
The bit is set on the surface of the wood block and depth is set to zero- MT native
- Media item
- carving drill foredom homemade jig press relief
- Comments: 0
- Album: Homemade Relief Carving Jig
-
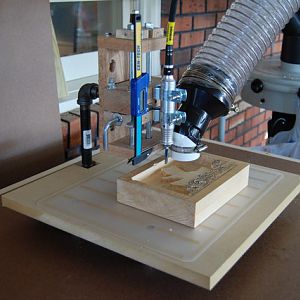
PIC 43 - Construction Finished!!
The 2" PVC Elbow (clamped to the jig) is taped to the 4" x 2" Reducer, which is hooked up to the Delta 50-760 via Flex Hose- MT native
- Media item
- carving drill foredom homemade jig press relief
- Comments: 0
- Album: Homemade Relief Carving Jig
-
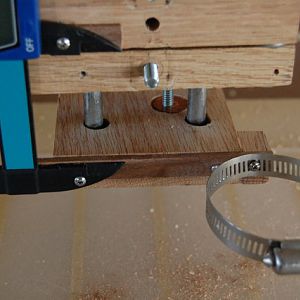
PIC 42 - Step 11c
I had to add a span so there was space between the Foredom Handpiece and the clamp SEE Followup Comments on Step 5. Pre-drill the holes on the clamp and the wood.- MT native
- Media item
- carving drill foredom homemade jig press relief
- Comments: 0
- Album: Homemade Relief Carving Jig
-
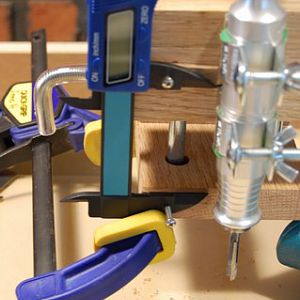
PIC 41 - Step 10b&c
Pre-drill holes in the wood with a 1/16in bit to prevent splitting. The clamp helps to hold the Gauge parallel for pre-drilling the wood. Use #6 x 1/2in screws to attach the gauge to the jig.- MT native
- Media item
- carving drill foredom homemade jig press relief
- Comments: 0
- Album: Homemade Relief Carving Jig
-
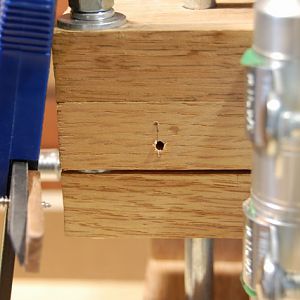
PIC 40 - Step 10a
The backs of the Gauge are not even so a spacer was added behind the end piece so it would be flush with the front of the jig.- MT native
- Media item
- carving drill foredom homemade jig press relief
- Comments: 0
- Album: Homemade Relief Carving Jig
-
S
home-made overhead blade guard
.- Sully
- Thread
- blade guard homemade overhead
- Replies: 9
- Forum: Workshop Discussion
-

WIP - Homemade Foredom Relief Carving Jig
INTRODUCTION I carve in-the-round. Now I want to do relief carving, with power tools. All of my web-based research repeatedly mentions the use of a router to ‘hog out’ the background wood in relief carvings. I do not own a router. I do not own a Dremel nor its plunge router base. The Foredom...- MT native
- Thread
- carving foredom homemade jig relief wip
- Replies: 31
- Forum: Woodcarving
-
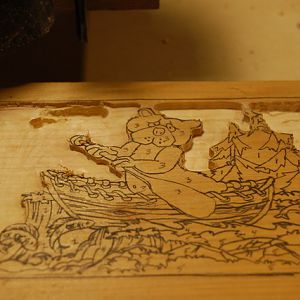
PIC 39 - Step 9
Run Test - IT WORKS!! I never doubted it would (haha) - NEXT STEP add a depth gauge and hose adaptor to dust collector- MT native
- Media item
- carving drill foredom homemade jig press relief
- Comments: 0
- Album: Homemade Relief Carving Jig
-
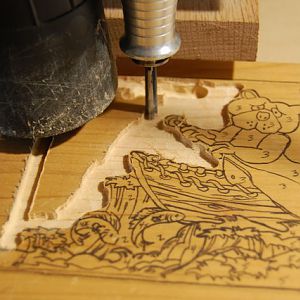
PIC 38 - Step 9
Run Test - I tried various depth cuts (back-left corner) before routing out an area at one depth- MT native
- Media item
- carving drill foredom homemade jig press relief
- Comments: 0
- Album: Homemade Relief Carving Jig
-
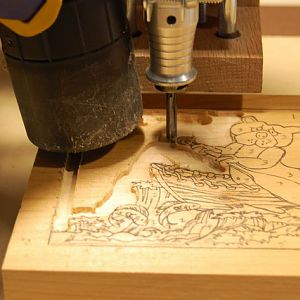
PIC 37 - Step 9
Run Test - I have no idea how deep the bit is but the wet-vac is working great- MT native
- Media item
- carving drill foredom homemade jig press relief
- Comments: 0
- Album: Homemade Relief Carving Jig
-
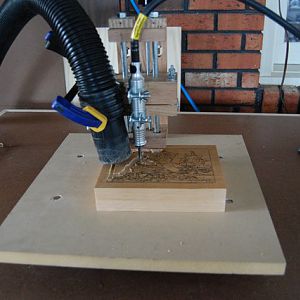
PIC 36 - Step 9
Run Test - It's ALIVE!! Dr. Frankenstein- MT native
- Media item
- carving drill foredom homemade jig press relief
- Comments: 0
- Album: Homemade Relief Carving Jig
-
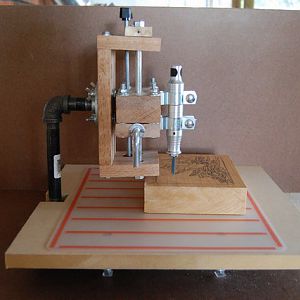
PIC 35 - Step 9
Side View - Homemade Foredom Relief Carving Jig- MT native
- Media item
- carving drill foredom homemade jig press relief
- Comments: 0
- Album: Homemade Relief Carving Jig
-
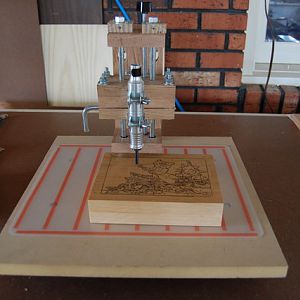
PIC 34 - Step 9
Front View - Homemade Foredom Relief Carving Jig. Depth Gauge and Dust Collector Hose still to be added.- MT native
- Media item
- carving drill foredom homemade jig press relief
- Comments: 0
- Album: Homemade Relief Carving Jig
-
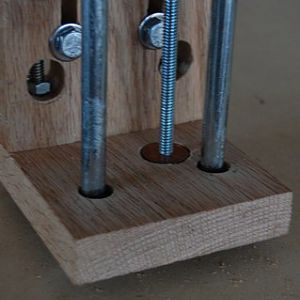
PIC 33 - Step 8
Jig Assembly - penny on bottom of Z-axis Support acts as a stop for the Depth Adjustment Rod- MT native
- Media item
- carving drill foredom homemade jig press relief
- Comments: 0
- Album: Homemade Relief Carving Jig
LATEST FOR SALE LISTINGS
-
-
NOS Square D H361N Heavy Duty Safety Switch(s) $125 ea.
- Started by Howie
- Replies: 0
-
-
Pending For Sale - SawStop PCS cast iron wings
- Started by Warped Woodwerks
- Replies: 0
-


