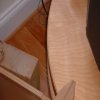
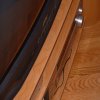
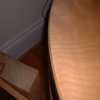
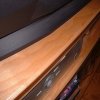
This is mainly for Travis Porte, but thought others may be interested. Travis was thinking about edging Birch ply with solid wood, but was concerned about it showing too obviously. These are pictures of a piece with Birch Ply shelves with hard maple edging and a black walnut inlay, I think the match is very good and looks even less noticable in real life.
You are using an out of date browser. It may not display this or other websites correctly.
You should upgrade or use an alternative browser.
You should upgrade or use an alternative browser.
- Status
- Not open for further replies.
It's almost undetectable when it runs with the grain of the ply. When it run cross the ply grain you can see it, but it still looks good, and I don't think there is anything that would blend in seamless in the orientation. DavidF, how did you do the Walnut inlay in the edging? It's a cool effect.
Dave
Dave
It does look good. It looks very good IMO.
Well, that is the way I will be going. I am having trouble with the dimensions my BIL is wanting for this entertainment center though. It is going to be 56" wide and 77" tall. He was wanting 2 doors, but laying it out, it looks like it will need 3 doors to look right. I am going to have to try a cad program again.
Well, that is the way I will be going. I am having trouble with the dimensions my BIL is wanting for this entertainment center though. It is going to be 56" wide and 77" tall. He was wanting 2 doors, but laying it out, it looks like it will need 3 doors to look right. I am going to have to try a cad program again.
That edging looks good to me. I like the inlay in it also.
Does anybody know of any free versions of a program like this?
I am going to have to try a cad program again
Does anybody know of any free versions of a program like this?
M
McRabbet
There is a free version of TurboCAD Learning Edition (2-D only) and an excellent downloadable manual at www.al-ki.com/TCAD/links.php. Scroll well down the page to find the following paragraph:
Complete Guide to Learning CAD… -- free book in PDF format about TurboCAD v4, which also explains the free TurboCAD LE (Learning Edition) and many 2D features of later TurboCAD versions. PDF file size: 1.5Mb.
The Manual is 1.5 Mb, so wait for the download (you need Adobe Acrobat Reader on your PC). You must recognize that there is a learning curve here, but it is a good free program (I know, I'll create a stir over which CAD program is best, but this is free!).
Rob
I was fortunate enough to pay a visit to David's house following or Spring Fling and saw this TV stand in person. David is correct in saying that the match is very good and less noticeable in real life. His TV stand, coffee table, plant stands and demilune table a all truly works of art.
D L
D L
you can do a google on sketchup and download the free version, but I have not had a lot of success with it.:BangHead: Maybe you will have a better chance than me.
D L Ames said:I was fortunate enough to pay a visit to David's house following or Spring Fling and saw this TV stand in person. David is correct in saying that the match is very good and less noticeable in real life. His TV stand, coffee table, plant stands and demilune table a all truly works of art.
D L
Thanks for the kind comments DL
The maple is 3mm (1/8) thick and glued and clamped in stages around the edge using edge clamps and "C" clamps with wedges. I then used a bearing guided 4mm slot cutter to cut a 3mm deep slot. The Black walnut was planed to size and left a little proud before using a flush trim bit to level it with the maple. Last thing was to put the small champher around the top edge which really stops the shelves looking like plywood.DaveO said:It's almost undetectable when it runs with the grain of the ply. When it run cross the ply grain you can see it, but it still looks good, and I don't think there is anything that would blend in seamless in the orientation. DavidF, how did you do the Walnut inlay in the edging? It's a cool effect.
Dave
:eusa_doh: Oh no, does that mean that i need a set of metric router bits to do inlays like that? :eusa_doh:
DaveO said:Thanks, I wasn't sure if you did the inlay before or after mounting the edge banding. I have a slot cutter, I might have to try that. 3mm is about 3/32" right???:eusa_thin
Dave
It's nearer to an 1/8 (3.2mm)
chris99z71 said::eusa_doh: Oh no, does that mean that i need a set of metric router bits to do inlays like that? :eusa_doh:
Yep. Just don't don't do what NASA did with the shuttle and mix the two.
- Status
- Not open for further replies.
Similar threads
- Replies
- 10
- Views
- 427
LATEST FOR SALE LISTINGS
-
Pending For Sale - SawStop PCS cast iron wings
- Started by Warped Woodwerks
- Replies: 0
-
-
-
-


