
For the first 2 posts please see...
http://www.ncwoodworker.net/forums/f29/das-booth-ongoing-saga-17889/
Well, it’s been a while since I last posted any progress on Das Booth, so here we go…
To quote Jim Morrison… “This is the End.”
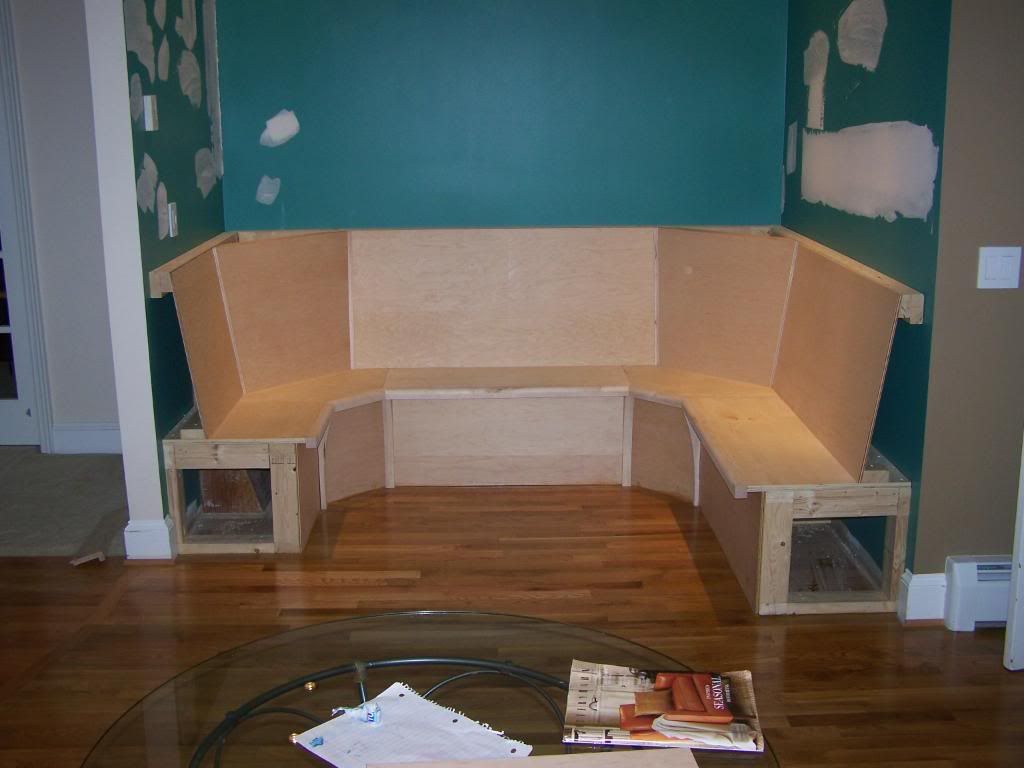
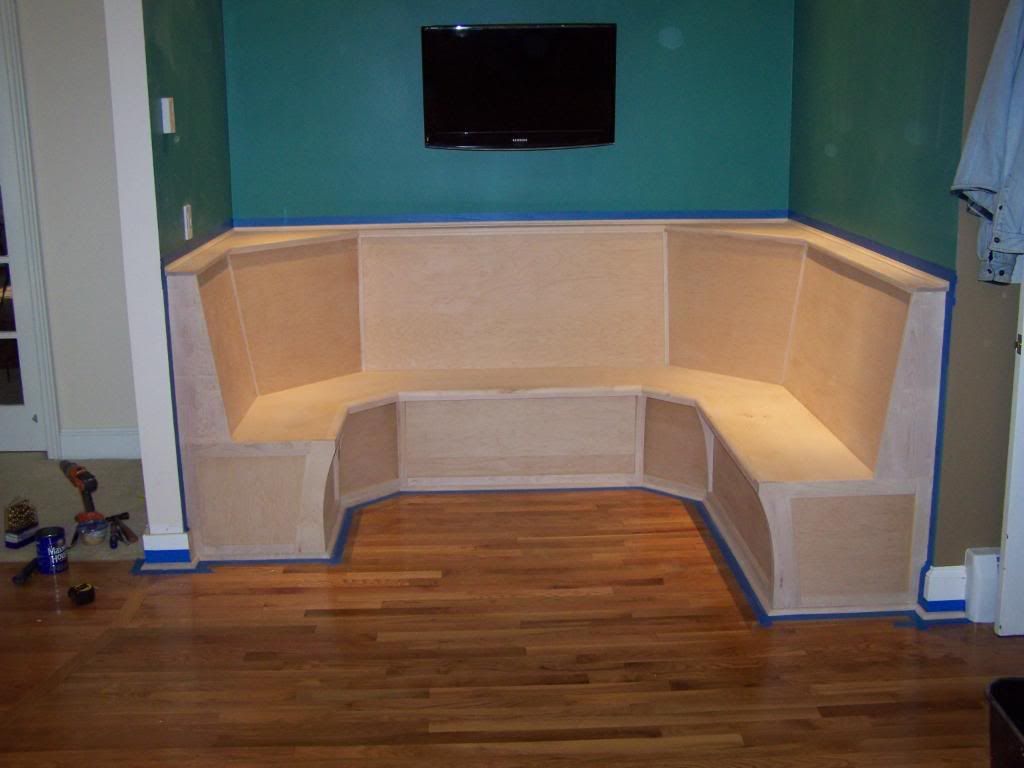
The next part that I decided to tackle was getting the bottom curved pieces in to try and mimic the inspiration. Not terribly difficult, but I was glad that I was doing the work at my brothers house. He was at home when I was trying to figure out the curve that would look “right”. I had him come out to the shop after I had drawn and erased several ideas. We settled on a pleasing curve that we thought following the picture supplied by Lisa.
A quick bit of work on the band saw and I thought I was on my way. The key word there is THOUGHT. The original piece was cut from MDF as a template so I could run all of the pieces through and have them all the same. At least that was the theory. This was one of those instances where I found the unfortunate limitations of my tools. The bottom of the curve at its most narrow point is only about half an inch. When I ran the first piece it was going perfect until I reached that area, and then started wobbling and really messed up the piece. I quickly came to realize that the table on my router table was not flat. I guess this was the first time that I had tried to run something so narrow across it. I found that the table has about a quarter inch in bow in the middle of it. So I scratched the whole router table idea and ran each piece on the spindle sander. Granted, they aren’t all exactly the same like I wanted them to be but it worked.
After the center curves were installed I had to do the end pieces. There were a bit more challenging. The basic shape of the curve was the same but the edges are exposed and had to be cut in around everything else on the ends of the benches along with a rabbet for the plywood end cap. Lots of trips back and forth to the shop and they went in with all of there corresponding trim pieces.

and
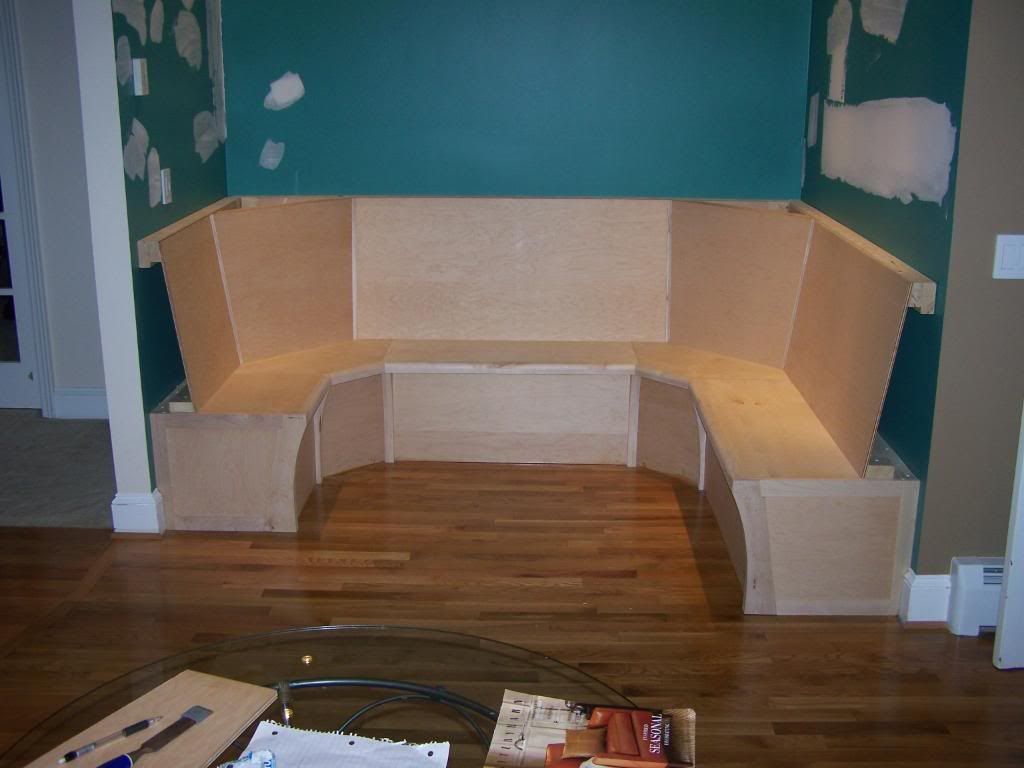
The last “major” pieces were the vertical, angled pieces to close in the ends of the benches. Nothing terribly difficult here. Set them in place, mark the angles cut and install.
and

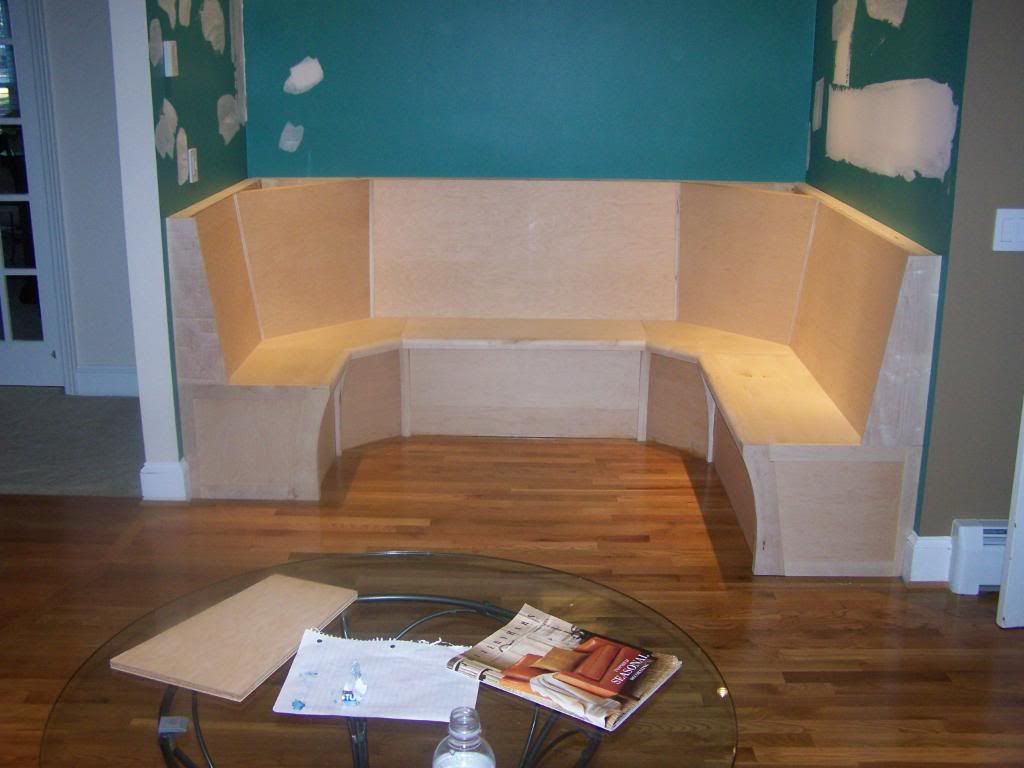
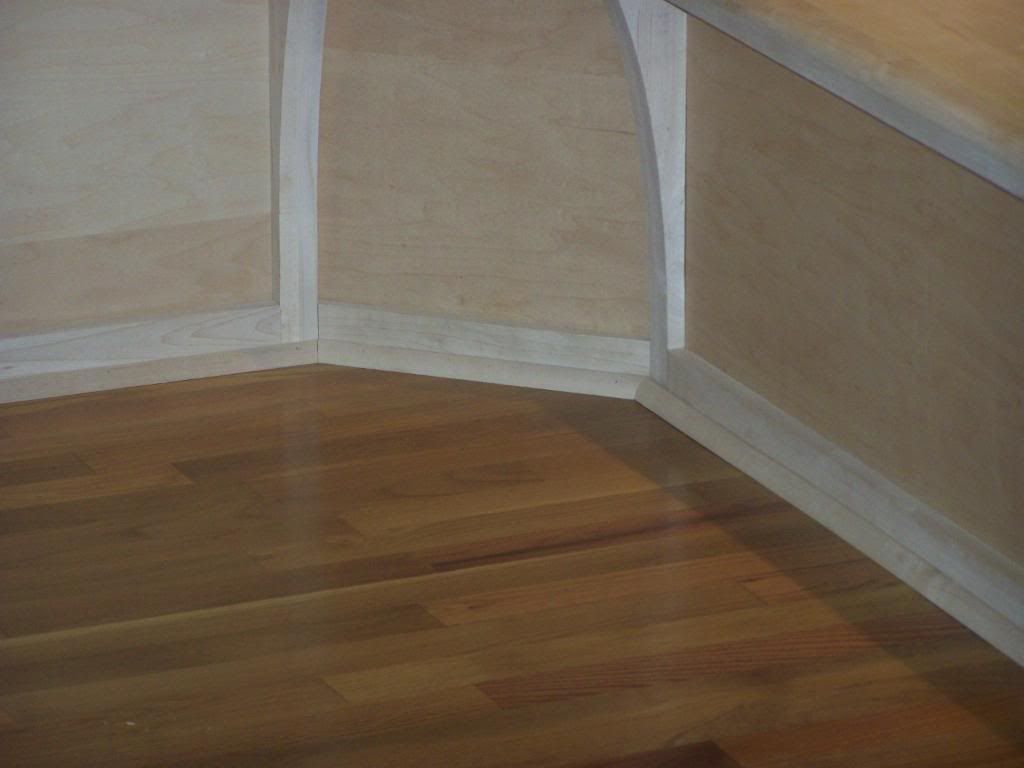
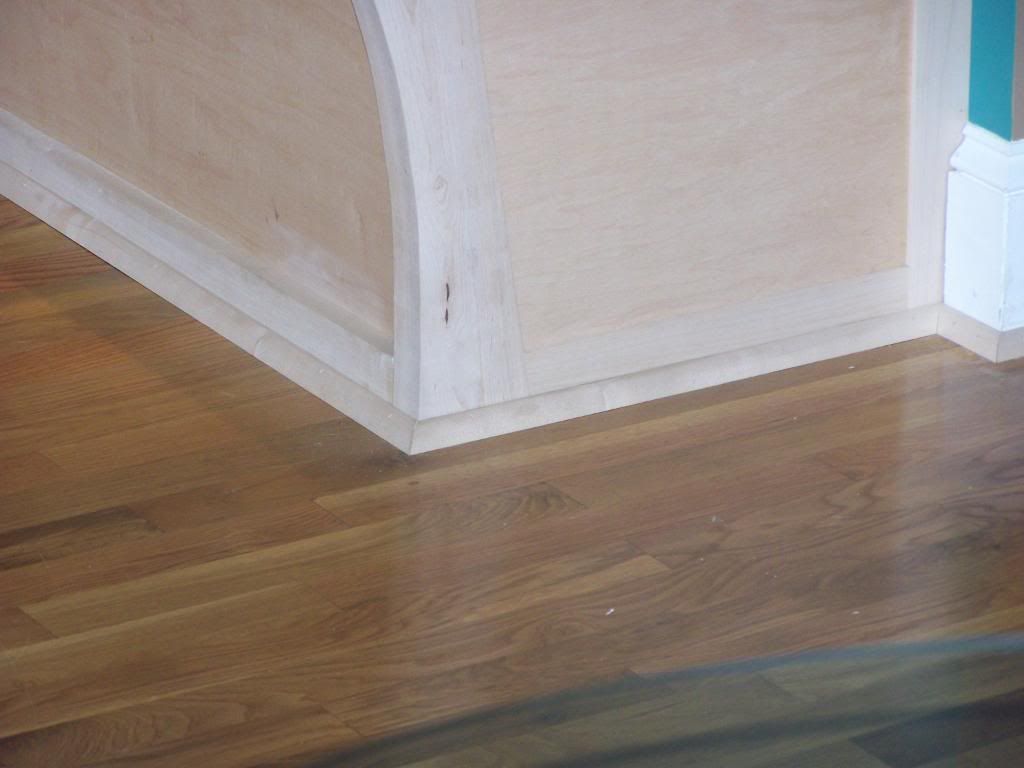
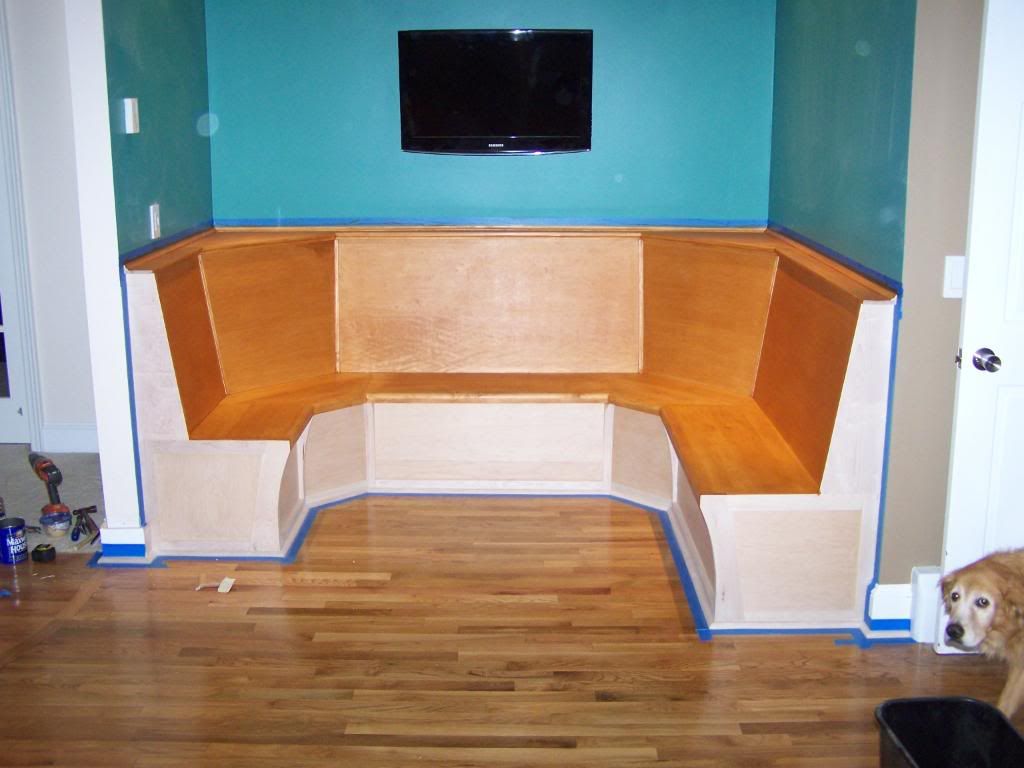
Time to start wrapping the bottom… After discussing it with Pat, we decided to change the original thought process and make sure that a broom and mop would make for easy clean up of the floor, and not have crud gathering up in the corners. Remember how my router table wouldn’t work, so all of the center curve pieces were a little different? Well, here’s where that comes back into play. Each of the pieces between the curves like…
had to be shaped to fit. Not only that but they had to be shaped to fit on both ends. Something I didn’t take into account when I was milling material was the difference in thickness of the long pieces to the thickness of the pieces that go in the short 45-degree sections, as in the picture above. That angle reduced the thickness of the pieces by something like half. Not a big deal but it was surprising (and shouldn’t have been).
A little bit of three-quarter quarter round around the base dresses things out nicely.
and
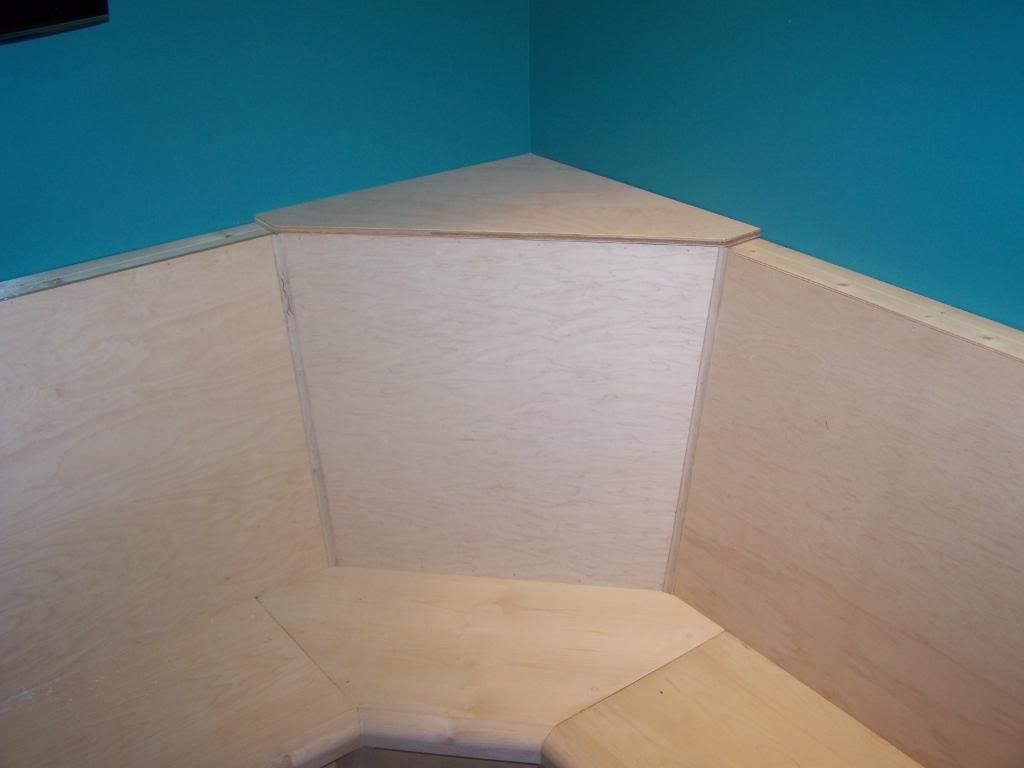
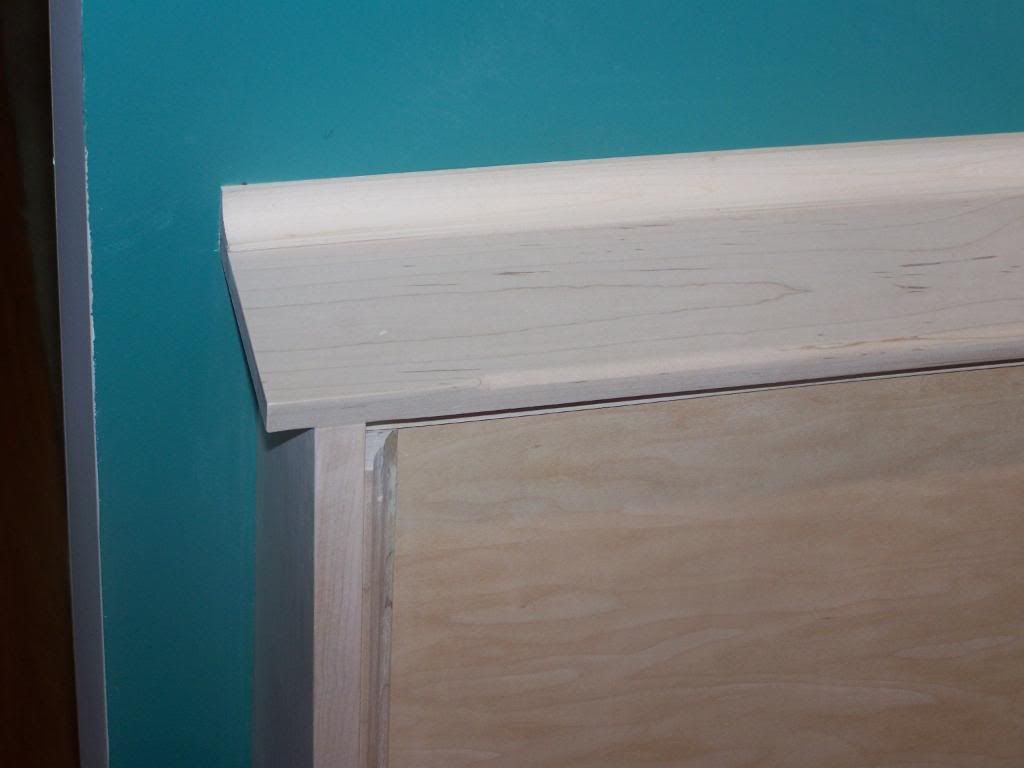
I guess I was wrong above. The last “major” pieces were the parts for the top shelf. I used the same piece of hardi-board that I used to make a template for the seating corners to make the template for the top shelf corners. It worked out pretty well. I just had to cut it down a little smaller. And since this is most definitely a one-off piece I won’t need those templates again. As a side note, when I made the joint connections for the seating areas I used biscuits to keep everything aligned. It worked pretty well, but I need practice. For the top shelf I decided to use pocket screws.
My thought process was that being able to screw the pieces together would help draw the joints together a little tighter than the seating area pieces were. It worked OK, but this is another area where I need some practice. One of the screws came through the surface. Not bad, and I was able to hide it, but it certainly let me know that I didn’t know what I was doing.
and
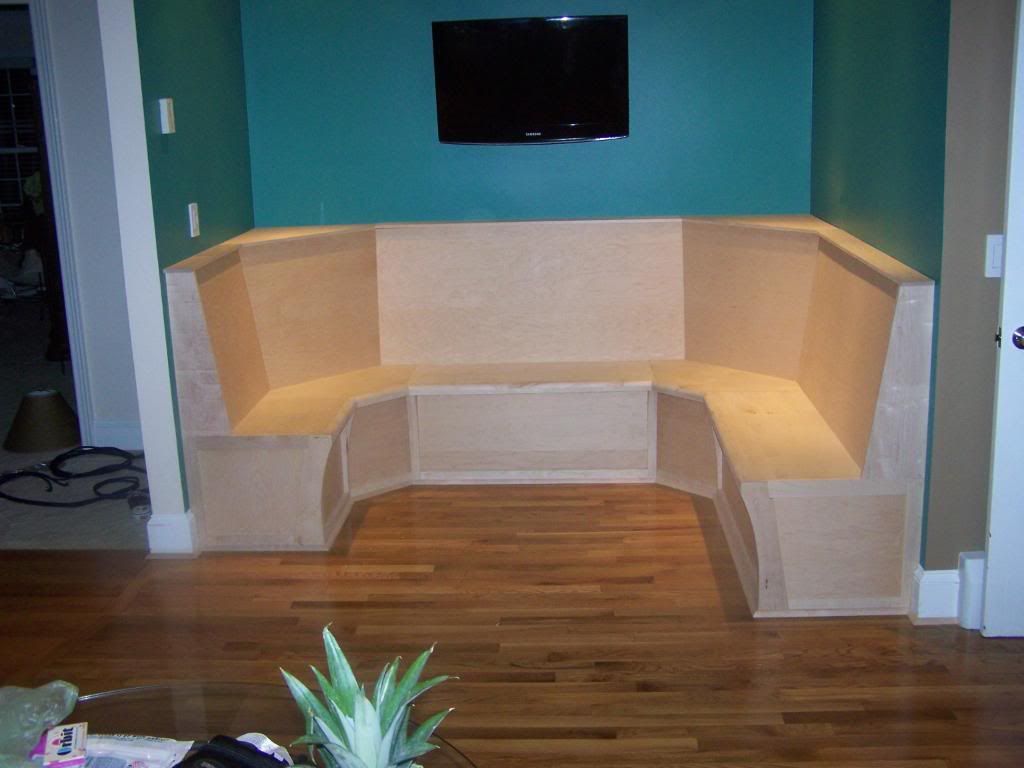
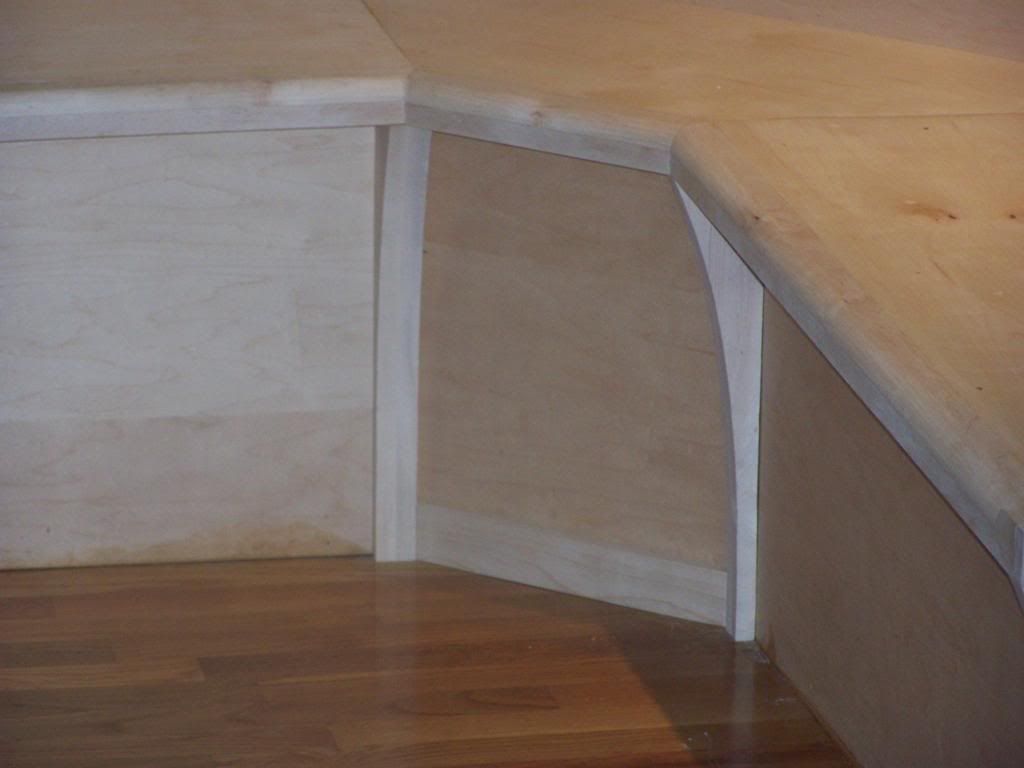
Last but not least a little trim around the top perimeters. I decided to go with a simple half-inch cove mold for both pieces. I needed something around the very top exposed edge to help close a gap on the right side of the booth. The wall on that side would make a football stadium crowd proud with the wave that it’s doing. That wall waves back and forth about an inch, 3 times in 6 feet. Fortunately the cove mold hides it nicely. The same molding was used on the bottom side of the top shelf just to even things up visually.
and
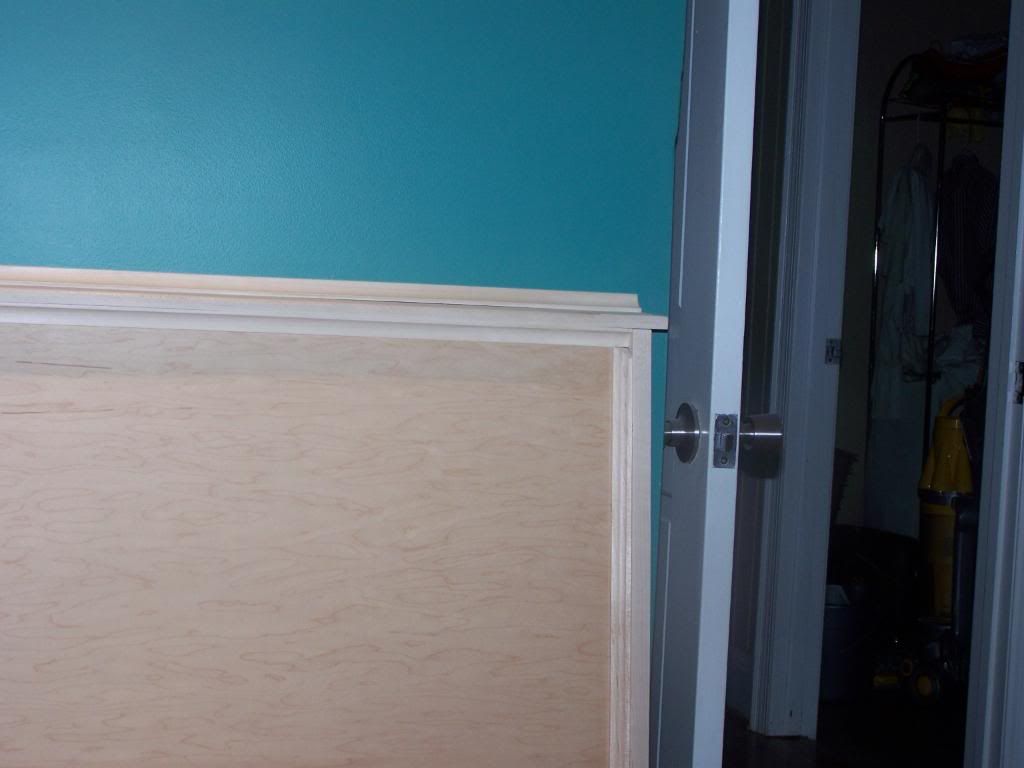
I wasn’t counting on putting molding on the underside of the top shelf, so I had to pull all of the really super cool double cove molding from the vertical joints around the back rest in order to install it. As luck would have it, I broke two of the pieces. It was really fun trying to reproduce my steps exactly to make those bits of trim again. Remember, it was a screw up to begin with. It took me a while but I managed to “screw it up again” and I eventually got it right.
Matt
http://www.ncwoodworker.net/forums/f29/das-booth-ongoing-saga-17889/
Well, it’s been a while since I last posted any progress on Das Booth, so here we go…
To quote Jim Morrison… “This is the End.”
The next part that I decided to tackle was getting the bottom curved pieces in to try and mimic the inspiration. Not terribly difficult, but I was glad that I was doing the work at my brothers house. He was at home when I was trying to figure out the curve that would look “right”. I had him come out to the shop after I had drawn and erased several ideas. We settled on a pleasing curve that we thought following the picture supplied by Lisa.
A quick bit of work on the band saw and I thought I was on my way. The key word there is THOUGHT. The original piece was cut from MDF as a template so I could run all of the pieces through and have them all the same. At least that was the theory. This was one of those instances where I found the unfortunate limitations of my tools. The bottom of the curve at its most narrow point is only about half an inch. When I ran the first piece it was going perfect until I reached that area, and then started wobbling and really messed up the piece. I quickly came to realize that the table on my router table was not flat. I guess this was the first time that I had tried to run something so narrow across it. I found that the table has about a quarter inch in bow in the middle of it. So I scratched the whole router table idea and ran each piece on the spindle sander. Granted, they aren’t all exactly the same like I wanted them to be but it worked.
After the center curves were installed I had to do the end pieces. There were a bit more challenging. The basic shape of the curve was the same but the edges are exposed and had to be cut in around everything else on the ends of the benches along with a rabbet for the plywood end cap. Lots of trips back and forth to the shop and they went in with all of there corresponding trim pieces.
and
The last “major” pieces were the vertical, angled pieces to close in the ends of the benches. Nothing terribly difficult here. Set them in place, mark the angles cut and install.
and
Time to start wrapping the bottom… After discussing it with Pat, we decided to change the original thought process and make sure that a broom and mop would make for easy clean up of the floor, and not have crud gathering up in the corners. Remember how my router table wouldn’t work, so all of the center curve pieces were a little different? Well, here’s where that comes back into play. Each of the pieces between the curves like…
had to be shaped to fit. Not only that but they had to be shaped to fit on both ends. Something I didn’t take into account when I was milling material was the difference in thickness of the long pieces to the thickness of the pieces that go in the short 45-degree sections, as in the picture above. That angle reduced the thickness of the pieces by something like half. Not a big deal but it was surprising (and shouldn’t have been).
A little bit of three-quarter quarter round around the base dresses things out nicely.
and
I guess I was wrong above. The last “major” pieces were the parts for the top shelf. I used the same piece of hardi-board that I used to make a template for the seating corners to make the template for the top shelf corners. It worked out pretty well. I just had to cut it down a little smaller. And since this is most definitely a one-off piece I won’t need those templates again. As a side note, when I made the joint connections for the seating areas I used biscuits to keep everything aligned. It worked pretty well, but I need practice. For the top shelf I decided to use pocket screws.
My thought process was that being able to screw the pieces together would help draw the joints together a little tighter than the seating area pieces were. It worked OK, but this is another area where I need some practice. One of the screws came through the surface. Not bad, and I was able to hide it, but it certainly let me know that I didn’t know what I was doing.
and
Last but not least a little trim around the top perimeters. I decided to go with a simple half-inch cove mold for both pieces. I needed something around the very top exposed edge to help close a gap on the right side of the booth. The wall on that side would make a football stadium crowd proud with the wave that it’s doing. That wall waves back and forth about an inch, 3 times in 6 feet. Fortunately the cove mold hides it nicely. The same molding was used on the bottom side of the top shelf just to even things up visually.
and
I wasn’t counting on putting molding on the underside of the top shelf, so I had to pull all of the really super cool double cove molding from the vertical joints around the back rest in order to install it. As luck would have it, I broke two of the pieces. It was really fun trying to reproduce my steps exactly to make those bits of trim again. Remember, it was a screw up to begin with. It took me a while but I managed to “screw it up again” and I eventually got it right.
Matt


")