a quick checkering job.

Status
Not open for further replies.

chillypepper

New User
steve
This is an AK-47 pistol grip a friend sent me to work on. Checkered 20 lpi, in a classic double diamond pattern. This is a quickie from start to finish.

Working out the pattern:
022.jpg


Here (yeah, it's kinda fuzzy, but you get the idea) is lightly cutting the master lines, and the border lines. The diamond at the bottom isn't cut with the hobby knife yet, as the lines tend to move and wont be where you want them to be, once the field is started. By waiting until I actually get there it comes out close enough that you cant tell it's just a smidgen off sized from the first one.
023.jpg


In this pic you can see that I'm off to a good start. The lines kept true to straight and a nice even 3.5"-1" diamond pattern. You can also clearly see the taped diamond at the bottom grip acting as placeholder until the lines work out to the exact placement of the diamond.
027.jpg


Now all the pattern is filled in, waiting to be "pointed up" (stock worker for final cutting).
031.jpg


Almost finished, a couple oops's happened, so I had to erase a couple over-runs and one scratch. This is with a first finish coat of Tru-oil mixed 50-50 with mineral spirits and applied with a wore-out toothbrush. The over-runs and scratch were patched and blended with a mix of Tru-oil and Armor All, and hand rubbed. It'll take 4 or 5 applications to fix those. The checkering gets two light coats of the thinned version, using a brass wire brush between the two coats.
034.jpg


the other side, after completion.
035.jpg


I'm hoping to do a more in depth thread some time in the future. I'm wanting to show more of the how to. I'm just waiting on nice hunk of walnut to get here to work on. These laminants are real tricky to photograph and show any detail.
 

scsmith42

New User
Scott Smith
Steve, that's pretty fascinating. Thanks for posting; I always wondered how parts were checkered.

Scott
 
T

toolferone

Very nice. I have alway wanted to learn to do that. I have a couple of pistols I would like to make my own grips for. Do you make the grip panels too. I look forward to seeing more details when you have time to do it.
 

chillypepper

New User
steve
Thanks for the kind words. Checkering is actually pretty simple. but like anything else, it just takes some practice. I'm wanting to get my brother to take pics of the next project in progress, so I can show a more instructional type of thread.
I'll get a pic of the grip tomorrow in natural light after the final coat of finish has hardened up more. then it'll get shipped out to cali in the afternoon.
 

RandyJ

Randy
Corporate Member
Nice work, Steve. I could have messed that up 40 different ways had I been working on it!:gar-Bi
Would love to see more of the how-tos.

Ummm, I do believe my 10/22 has a walnut stock on it. You wanna practice on it???:wink_smil
 

chillypepper

New User
steve
Randy, 10/22's are my first love, I've, uh, got, uh, a few. and I always get a little goofy at the mention of 'em.
001.jpg

002-1.jpg


001-2.jpg

006.jpg


006-3.jpg

001-2.jpg


006-1.jpg


there's more, but, I think you get the idea.:gar-Bi
 

RandyJ

Randy
Corporate Member
Great job! So, I guess you don't need the practice...Huh?

Please keep sharing your work. Maybe I'll get inspired and try it myself.:wrolleyes:
 

chillypepper

New User
steve
here it is all done and in natural light, so at least it can be seen better.

003-4.jpg


001-4.jpg


Randy, if you really want it checkered, get a hold of me we'll work something out for ya'.
 

MT native

New User
Jane
Steve,
I have never done checkering before but a friend recently suggested I try it after hearing me complain about how much trouble I had making the seeded center to my 6x7in sunflower relief carving.


Do you think I could use a checkering tool to make the center of the flower? My concern is the pattern starts in the very center and fans outward with the lines getting farther apart in a swirl. Is there a checkering tool that would allow for that type of line motion? Any advise would be greatly appreciated.
Jane
 
Last edited:

chillypepper

New User
steve
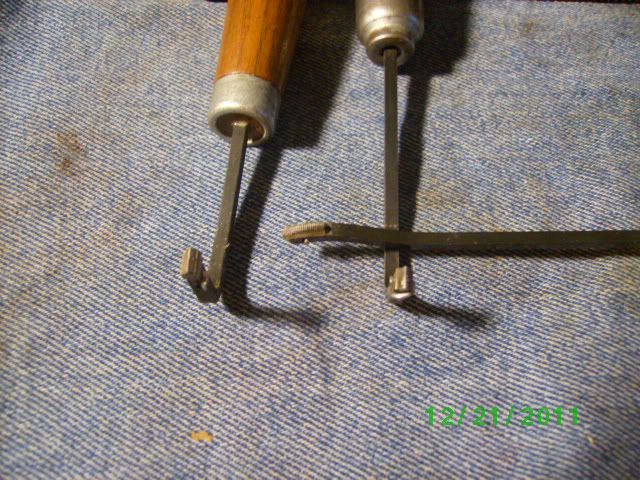
There are a couple types of checkering tools that should help. The first one is known a veiner, it's a tiny little "V" carver thats used for tight curves and short lines. I also use it for lettering (that I really suck at). Hope the pics are clear enough to see.
006-4.jpg

003-5.jpg

The veining tool runs about $20. and can be gotten from Brownell's or Midway USA or direct from Gunline or Dem-bart tools. It's the most used tool in my checkering tool box.
http://www.midwayusa.com/product/813746/dem-bart-veiner-tool-90-degree

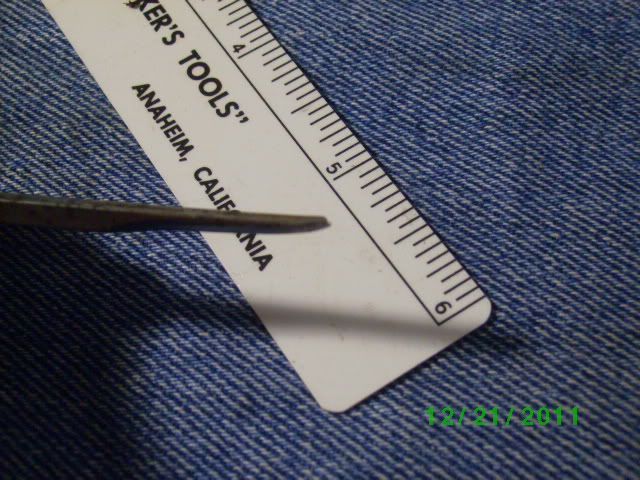
The other that I think will help the most for what your doing is called an S-1 cutter by Dem-bart and Gunline calls a short pointer. They are really small files that are just over 1/8" long and work well for all but the tightest curves. This is a shot of one of each brand, along with a regular length pointer cutter (3/8"). I use 2. One set up to cut on the pull stroke, and one for the push stroke.
001-5.jpg


I personally prefer the Gunline brand as the cutters stay sharper longer for me. Though replacement cutting heads run $6 or less. It gets aggravating to have to change a cutter in the middle of a job. There are also two types of cutters, the file type and the saw type. The file works well all around and better for softer woods or wood that has soft and hard spots in it, with less line drift and tear out. The saw type works better for the harder woods.
Before you use any of 'em put a coat of finish on and allow to dry completely. The finish will give the small points and ridges some extra body and will be less likely to tear out. The excess finish can be striped off later for your painting.
 

MT native

New User
Jane
Steve,
Thanks for the great information. I am leaving for vacation but will check the links when I return.
Jane
 

Truefire

New User
Chris
Thanks for expounding a little on the tools, the various types and their usages. I have planned on delving into this realm of working wood for some time, implementing this into my game calls. Your information provided will save me much headache, i was not familiar with some of the intricacies involved in checkering. Even taking the time to share such things as the application of finishes prior to cutting will save me much heartache in the future i am certain.

Always nice having an ol' veteran onboard....

I appreciate your work by the way, very professional looking. :icon_thum

Thanks for sharing.

Chris
 
Status
Not open for further replies.

Premier Sponsor

Our Sponsors

LATEST FOR SALE LISTINGS

Top