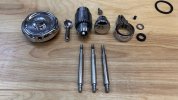
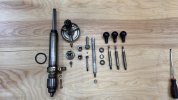
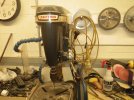
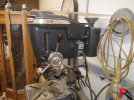
1956 Craftsman Drill Press Rebuild - Completed

NYTransplant

Tim
Corporate Member
Picked up a drill press from fellow forum member @Rick_B early this week. It's a 1956 (as close as I can tell) Craftsman 100 Benchtop made by King Seeley. Model 103.24810. It came with a Vari-Slo variable speed drive which is quite an engineering marvel.

It runs well other than some noisy bearings, so I'm starting a full rebuild and will share the journey here. I'm amazed at the amount of information there is on these 'Classic Craftsman" drill presses on YouTube and Garage Journal.

I've already mostly disassembled the machine and soaked many of the parts in Simple Green, so I'm a few days into it now.

Here are some before photos:

IMG_1584_1.JPG


IMG_1590_1.JPG
IMG_1586.JPG
IMG_1591_1.JPG
IMG_1575_1.JPG


And After...
IMG_1873.JPG


Here is a before and after video of the machine running..
 
Last edited:

NYTransplant

Tim
Corporate Member
Prepping the head casting ...

Stripped all the parts out of the head and soaked it in Simple Green for a day on each side. You can get a good idea of the original color where the trim was covering the paint before the soak.

IMG_1626_1.JPG


After a good scrubbing inside and out with a Scotchbrite pad, I Pulled it out and dried it off. It mostly took on the original color where the paint was still on the cast iron. The paint that's left on the head is solid, so I shouldn't need to do any more than scuff it prior to painting.

IMG_1649_1.JPG


Since this machine is from 1956, I plan to give it a retro '50s two tone paint job (Color TBD). I filed the nose to make it more pronounced so it looks like it was meant to be painted two-tone. This will also make it easier to mask.

IMG_1650_1.JPG


IMG_1654_1.JPG


Once I get all the other items to be painted cleaned up, I'll clean out all the bores in the head and begin masking them.
 

NYTransplant

Tim
Corporate Member
Cleaning some of the smaller parts

The small parts soaked in Simple Green for a day, then I buffed most of them on a brass wire wheel and buffing wheel. The "chrome parts got a wipe down and polish with Flitz.

For the close tolerance parts, I really didn't give them more than a wipe down and a spray of oil.

Before:
IMG_1599_1.JPG


After:
IMG_1621_1.JPG


There's some pitting on the chrome, but they cleaned up relatively well for 68 years old ;-)

I also soaked the column in Evaporust overnight. I capped off a 3" PVC pipe and a gallon covered the entire height of the benchtop column.
IMG_1627_1.JPG


Before:
IMG_1616_1.JPG


After soaking:
IMG_1661_1.JPG


And after a quick machine buffing with rubbing compound and a coat of wax:
IMG_1666_1.JPG


The table is currently soaking in Simple Green and will come out next. There are still quite a few parts to clean up as well.

More to come...
 

Attachments

  • IMG_1613_1.JPG
    IMG_1613_1.JPG
    3.6 MB · Views: 37
  • IMG_1599_1.JPG
    IMG_1599_1.JPG
    3.5 MB · Views: 29
Last edited:

NYTransplant

Tim
Corporate Member
More parts cleaned...

The table and base are done soaking and have been cleaned up. There is an interesting repair on the base. It looks like a crack or a void was brazed. I can't tell if it's from the factory or if it's a later repair.
IMG_1676_1.JPG

IMG_1704_1.JPG

IMG_1705_1.JPG


I disassembled the motor since it needs bearings as well. The stator band is in pretty rough shape so this is as good as it will look after cleaning it up:
IMG_1659_1.JPG


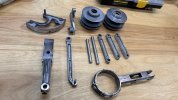
This is most the parts of the drill press laid out other than the motor internals and the Vari-Slo unit, which is next to be disassembled and cleaned.
IMG_1709_1.JPG


Getting close to paint. All the parts to the right of the column (except the stator band) will be painted.

Stay tuned for the Vari-Slo disassembly. I'm keeping it separate from the drill press parts because it's an accessory, and a bit more intricate (and delicate).
 

tghsmith

tghs
User
here's a pretty much untouched 1966 floor model.. still gets used quite a bit!!!! looks like they used the same castings for a long time!!!
 

Attachments

  • IMGP0107.JPG
    IMGP0107.JPG
    2.2 MB · Views: 69
  • IMGP0108.JPG
    IMGP0108.JPG
    2.2 MB · Views: 66

Hmerkle

Board of Directors, Development Director
Hank
Staff member
Corporate Member
Tim,
That looks like a lot of fun.
 

NYTransplant

Tim
Corporate Member
Great job Tim - looking good

Rick
Thanks Rick!

here's a pretty much untouched 1966 floor model.. still gets used quite a bit!!!! looks like they used the same castings for a long time!!!
Yes! Craftsman drill presses built by King Seeley used the same casting from 1946 to 1964, then Emerson continued the same style for Craftsman until 1966. You've got the last year of the "Classic Craftsman". It looks very original.

Tim,
That looks like a lot of fun.
Yes it is Hank. And, being a car guy at heart, it's way cheaper and faster than restoring a car, with a similar amount of satisfaction ;-)
 

patlaw

Mike
Corporate Member
I have the same drill press with the Vari-Slo attachment. I could use your expertise when you're done. It bogs down on low speed because of the Vari-Slo, but I can't get some of it apart to clean it.
 

NYTransplant

Tim
Corporate Member
I have the same drill press with the Vari-Slo attachment. I could use your expertise when you're done. It bogs down on low speed because of the Vari-Slo, but I can't get some of it apart to clean it.
Funny you should mention that. I had a bear of a time getting some of the parts of mine apart to clean it, and my next post will cover the Vari-Slo unit ;-)

If you haven't seen this video series on the Vari-Slo rebuild, it's a great reference. I watched it a few times before tearing mine down. The only issue is his is already half torn down when he starts the rebuild. Watching him reassemble and adjust it will help you get a better understanding of the way it comes apart though.
 

CaptainCalf

New User
Rick
Tim, it is real nice to see the high level of detail in your restoration. I’ve got a feeling this will be a labor of love for you if it’s not already and I’m sure it will be a very good looking and great performing addition to your shop.

Please keep those pic’s coming…
RC
 

NYTransplant

Tim
Corporate Member
Vari_Slo Rebuild

The Vari-Slo unit is a relatively rare accessory for the older Craftsman drill presses. For those of you who are from up north, the unit functions similarly to a snowmobile drive, but using a lever rather than centrifugal weights to change the drive ratio.

This one has been assembled for quite some time based on the accumulated grime, and the difficulty in getting the pulleys off.


One thing I was concerned with was removing the self-locking fasteners holding the speed adjustment levers in place. Thankfully, they have a good bit of flexibility and came off without breaking.
IMG_1685.JPG


The next step was removing the upper shaft connector. It's not held on by any fasteners, so theoretically, it should come off "easily". Not this one. I soaked the bores in penetrating oil to see if that might help.
IMG_1696_1.JPG


I was able to finally get the upper shaft connector off by wedging a flat blade screwdriver between the connector and the pulley boss. I gently rocked the screwdriver up and down on each end to drive the "wedge" of the screwdriver in a little bit at a time. I hated doing it this way, but it was a last resort and ended up successfully removing the connector without leaving any marks on the pulley. This connector must come off to change the belts, so I'm guessing these belts have some miles on them.

Here's a photo of the unit after removing the lever linkage and shaft connector. You can see it's pretty dirty.
IMG_1697_1.JPG


Taking the lower linkages off is very straightforward. The only thing to be aware of is the pivot pins are staked on one end, so they need to be driven out from the opposite end of the pin. I drilled a hole in a doubled up 2x4 as the backer for diving the pin into the hole.
IMG_1692_1.JPG


IMG_1694_1.JPG


After removing the set screws, the shafts came out of the top of the upper bracket with a little coaxing. The most difficult part of the process was getting the shafts out of the pulley bearings. I have a hydraulic press, so I set up a socket that put all the force on the bearing, rather than the pully, and pressed it out. It came out without a bunch of force, but I could hear it complaining as it moved.
IMG_1698_1.JPG


I finished it off with a hammer and punch, then knocked the bearings out using the hammer and punch as well. The pulley looks clean because I did this step after soaking everything in Simple Green.
IMG_1710_1.JPG


Here are all the parts after soaking. Note: the red speed indicator panel in the background DID NOT go into the Simple Green. I assume it would have taken the paint off if I made that mistake.
IMG_1707_1.JPG


I chucked the pulley shafts in my small drill press and used some oil and wet/dry sandpaper to clean them up.
IMG_1718_1.JPG


I took them down to the point where the bearing slid onto the shaft easily, but not enough to slide back off.
IMG_1720_1.JPG


Here's a shot of one of the shafts unfinished next to a finished one. You can see how buggered up they were. I thought I'd have to make new shafts, but they turned out fine.
IMG_1717_1.JPG


I cleaned up the indicator using a very light rubbing of Flitz, then a coating of wax and it came out well. A 3lb. coffee can has a the perfect curvature to support the indicator.
IMG_1724.JPG


I polished the indicator lever mount and assembled it. You can see there are a few gouges in the clamping area, but it still looks good. The tiny little drive screws are a pain to work with, but at least I didn't lose any. That's it sitting on the 2x4.
IMG_1732_1.JPG


IMG_1734_1.JPG


The moveable center pulleys were very stiff, so I cleaned them up with brake cleaner and lubed them with Super Slick Stuff. I need to do a little more research to see if there's any special lubricant for them. The bores of the pulleys were packed with grease, so I thought there might be a way for that grease to get to the sliding surface, but there are no passageways in the bore. I'm not sure why they were so packed. I can't imagine it's to lubricate the shielded bearings. Especially since the upper bearing would never see any of that grease due to gravity.
Screenshot 2024-01-10 093120.jpg


The rest of the parts went together quickly & easily. I'm still waiting on the pulley bearings, so the last step will be to press those in and slide the pulleys onto the shafts. I'll also purchase new belts and install them.
IMG_1736_1.JPG


Everything moves smoothly and freely now. It should be easier to adjust now compared to the effort it took before to change speeds.
 

Attachments

  • IMG_1725_1.JPG
    IMG_1725_1.JPG
    2.8 MB · Views: 30
Last edited:

Hmerkle

Board of Directors, Development Director
Hank
Staff member
Corporate Member
That is SO cool - why didn't companies continue to use this version of speed control?
(thinking of the Delta DP-300 where the "reeves drive" [it is a CHEAP imitation] LITERALLY tears itself apart!)
 

NYTransplant

Tim
Corporate Member
As expected, this project is WAY beyond my ability. At least THAT'S good to know!
I believe if you can gather the knowledge, have the patience, and collect the tools, you can do anything... the only thing that costs money is the tools :D
 

NYTransplant

Tim
Corporate Member
Paint Color Test

OK, here comes the fun part...

I ran a test on the motor mount plate to see if my vision of the main color will work.

The bare mount:
IMG_1740_1.JPG


First coat is etching primer:
IMG_1741_1.JPG


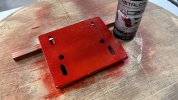
Next comes the Metallic Gold:
IMG_1743_1.JPG


But that's not the final color...


IMG_1746_1.JPG


A coat of transparent red over the gold gives a candy apple effect. The first coat was more of a copper-tinted red.

The second coat deepened the red somewhat...
IMG_1746_1.JPG


And a third gave me the desired color. It's a deeper maroon candy with a little bit of a copper tint.
IMG_1748.JPG


It's very difficult to see the candy effect from the photos. I took a couple more in different light. This one is outdoors in a hazy sunlight.
IMG_1749_1.JPG


I think this one captures it best. In a dark garage with light shining through a window onto the piece. The paint "lights up" in the right light. Maybe I'm overthinking this since the drill press will never see sunlight in my basement shop. :D
IMG_1751_1.JPG


I'm happy with the color.

The next step is to find a complementary color for the two-tone trim areas. I'm thinking a hammered copper metallic or a simple cream.
 

Attachments

  • IMG_1747_1.JPG
    IMG_1747_1.JPG
    3.8 MB · Views: 27

Premier Sponsor

Our Sponsors

LATEST FOR SALE LISTINGS

Top