
installation
-

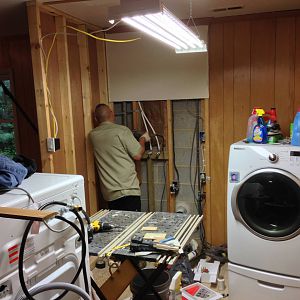
Setting up new shop
Nearly done with moving the workshop in the house.- blbradford
- Media item
- basement installation set up workshop
- Comments: 0
- Album: Basement workshop
-
Setting up new shop
Nearly done with moving the workshop in the house.- blbradford
- Media item
- basement installation set up workshop
- Comments: 0
- Album: Basement workshop
-

Drawer Installation
Ok this is going to be a first for me. I have made drawers before but I have never used slides. I was looking to figure out how to know the size of the drawer and the slide. I have openings of 15” deep so I figure I will use 14” full extension slide, but the question is it better to install...- Luckbox72
- Thread
- drawer installation
- Replies: 8
- Forum: General Woodworking
-

Duct Installation Nearly Complete
Today was a good day! Rick (thesource), Phillip (ptt49er) and his buddy Jeremy (not me :gar-La;) showed up at my place bright and early to help with the installation of some duct. Rick promised me that it wouldn't take but a few hours ... and he was right. Two hours later and the duct was...- WoodWrangler
- Thread
- complete duct installation
- Replies: 9
- Forum: General Woodworking
-

Good book on door installation
I have a pocket door between two rooms in my new workshop. On the one hand it's nice because it maximizes space, since I don't have to allow for the door swinging open. On the other hand the door is pretty narrow (29"), meaning it will be a pain getting tools & projects in and out. When I...- Bas
- Thread
- book door good installation
- Replies: 12
- Forum: DIY- Home improvement
-

Tileboard Installation
We are redoing a bathroom in a trailer my in-laws own down at the beach. We replaced the tub and ran into some problems with the tile board. we are installing the white stuff with checks from lowes it's similar to this: and i bought the caps for the edges and corners and need to join two...- ashley_phil
- Thread
- installation tileboard
- Replies: 3
- Forum: DIY- Home improvement
-
KC - 21 Testing the Doors
Yep -- they even open and close! I installed some simple knobs to facilitate access when doors are opened for posting information.- McRabbet
- Media item
- board bulletin installation kellogg
- Comments: 0
- Album: Outdoor Bulletin Boards
-
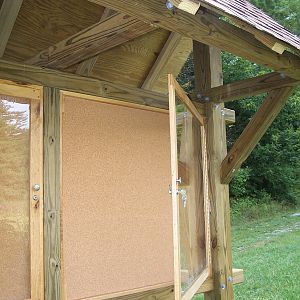
KC - 20 Finishing the Job
The center post was installed and the frames installed -- clearance was less that 1/8" and they actually fit! Because of some minor warping in the PT wood, I used construction shims to insure the frames stayed square as they were locked in with 3'' deck screws.- McRabbet
- Media item
- board bulletin installation kellogg
- Comments: 0
- Album: Outdoor Bulletin Boards
-

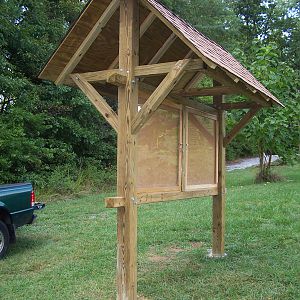
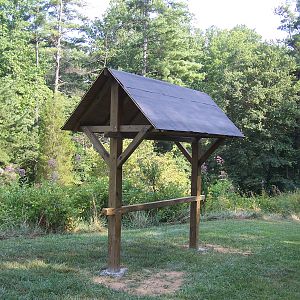
KC - 19 Final Roofing
Next, 30-year fiberglass reinforced architectural tab shingles were installed with a matching roof shingle cap. Ready for the bulletin board frames with their doors.- McRabbet
- Media item
- board bulletin installation kellogg
- Comments: 0
- Album: Outdoor Bulletin Boards
-
KC - 18 Roof Installation
A ten-foot ridge board was dropped into a slot in the 6x6 post tops and 2x4 rafters cut with seats to fit on top of the rectangular frame shown in KC - 17. Then I installed 1/2'' PT plywwod sheathing and 30# tar paper.- McRabbet
- Media item
- board bulletin installation kellogg
- Comments: 0
- Album: Outdoor Bulletin Boards
-
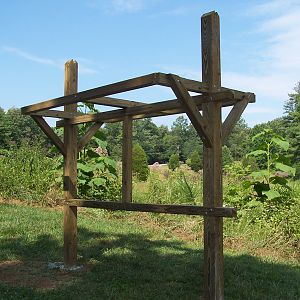
KC - 17 Stage Two of Installation
Next, the roof support frame and diagonals were installed -- all in 4x4 PT material. Center upright will separate the door/frame sets.- McRabbet
- Media item
- board bulletin installation kellogg
- Comments: 0
- Album: Outdoor Bulletin Boards
-
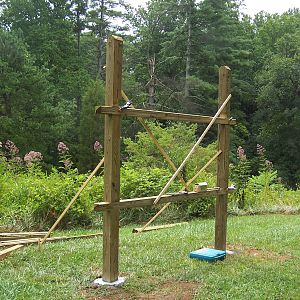
KC - 16 Starting the Installation
The first step to install the kiosks was to dig the holes (2-man auger), drop the 6x6 posts into the two holes and clamp the two horizontal half-lapped beams in place to form the Bulletin Board openings -- the diagonal bracing insured these opening were square and braces to ground maintained...- McRabbet
- Media item
- board bulletin installation kellogg
- Comments: 0
- Album: Outdoor Bulletin Boards
-

Rikon 10-325 and Carter Stabilizer Installation
Have any of you Rikon 10-325 owners installed the approriate (RIK1) Carter Stabilizer? O.K., I'm not a mechanical genius but usually I can eventually figure things out. The instructions for the stabilizer seem to be the same for all the units whether the BS has roller guides or blocks. Can...- Ken Massingale
- Thread
- carter installation rikon stabilizer
- Replies: 0
- Forum: Power Tools and Their Use
-
Bandsaw Power Feeder Installation
Last week Curt (woodydiver) so graciously came by and installed a phase converter and variable speed controller for the power feeder. Thanks Curt! :icon_thum I owe you one! Today was the day ... after the Invicta jointer pickup (for Travis, not me) ... Scott & Travis came by my place...- WoodWrangler
- Thread
- bandsaw feeder installation power
- Replies: 6
- Forum: General Woodworking
-

Progress on ZCyclone Installation
I got the new 220V line ran alone the outside shop wall. It would have been fast except for the firebreak in the wall. Had to take down part of the plywood sheathing. After that I attached the Cyclone to the wall. Still working on the angle of the unit relative to the wall. I have to get more...- Douglas Robinson
- Thread
- installation progress zcyclone
- Replies: 22
- Forum: Workshop Discussion
-

Clearvue installation w/ pics
Little by little I make progress on the installation of the Clearvue. I became frustrated in my efforts to find 6" ports, and decided to make them myself. As luck would have it, McMaster Carr carries acrylic tubing with an outside diameter of 6", which fits splendidly into the 6" 2729 pipe. I...- Jim Murphy
- Thread
- clearvue installation pics w or
- Replies: 10
- Forum: Workshop Discussion
-
A
Shelix installation done!!! WOW!!!!! *pics*
I finished installing the Byrd Shelix head in my Delta 15" planer tonight. Here is the new journal waiting to be installed: Here is the old journal waiting to be shipped (to whoever buys it ) : I would have taken pics of my planer during the process, but the pics and step by step...- Alan in Little Washington
- Thread
- installation pics shelix wow
- Replies: 5
- Forum: Power Tools and Their Use
-

Byrd cutterhead installation on Grizzly 0490 jointer
I just installed a Byrd cutterhead in my G0490 jointer & thought it might help someone if I documented the expereince. It is not difficult but neither Grizzly or Byrd has written instructions. Removing the cutterhead is easy as the out/infeed tables lower easily to access the head and allow...- mike_wood
- Thread
- 0490 byrd cutterhead grizzly installation jointer
- Replies: 7
- Forum: Power Tools and Their Use
Premier Sponsors
Contact for your financial processing needs!
Our Sponsors
LATEST FOR SALE LISTINGS
-
 For Sale Electrical supplies (Are you building a new shop?)
- Started by DSWalker
- Replies: 0
-

-

-
-
 For Sale Powermatic PM 701 Mortiser, 4 Powermatic Chisels (3 unused in wrapper) $550
- Started by frankc4113
- Replies: 0