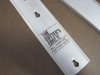
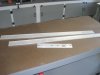
If you have room to store it, you can make a good one out of 1/2" ply.
1st, Cut about a 2" wide strip the length of a full sheet, using the straightest factory edge.
2nd, Cut another strip about 2" wider than the full width of your circular saw.
3rd, Screw the narrow strip to the wide strip with the straight factory edge. Position it so that it is the width of the blade to the motor side edge of the shoe + 1/2", and try to keep it as atright as possible. A long level or known straight edge is best to use as a reference.
4th, Sit the saw with motor side of shoe against the straight edge, and make a cut down the board.
This will give you a cutting gauge that you can set directly on the desired cut line, and because the saw rides on the gauge, it will not mar the surface of the sheet being cut. In addition, the guide also works to minimize chipout because the saw is cutting upwards against the guide. If you make a shorter one for cross cuts, I advise making it about 5' long to make it easier to get the saw shoe fully registered against the guide before starting the cut.
I recommend 1/2" ply to get the maximum cut depth from the saw, and recommend the total jig be wider than the full saw so that any clamps you use will not interfere with the saw movement during the cut. I made mine out of 3/4", which is fine for the base. But if you use 3/4 also for the guide strip, you will have to raise the saw motor from the shoe so it doesn't drag on it or tilt the saw, which then leaves you a little shy on the depth needed to go through 3/4 ply. The first one I made was also too narrow, so the clamps would interfere at the ends of the cut. (Lessons learned).
This web page has a pic of what I am talking about about 1/2 way down the page.
https://www.familyhandyman.com/tools/saws/two-essential-saw-cutting-guides/view-all
One tip: Raise the saw guard before starting the cut. Otherwise it may pull the saw off when it first contacts the guide.
Go