Ever since I saw a video of the Sisyphus Table, I wanted to make one. I've researched doing it off an on for a years now but never started. I came across a maker on Youtube (DIYMachines) who published a detailed video and instructions, complete with the source code you'd need to run the table and I jumped on it. He has two 30 minute videos (Part 1 Here) detailing the build, and other resources on his website. He also has a Discord chat server setup to ask others for help along the way (which I did). I spent the last 2 months working on it and it's finally complete - save for a piece of tempered glass to go on top.
A quick summary of the internals - the "head" of the CNC has a a few rare earth magnets. On top of the CNC assembly lays a 1/4" thick sheet of MDF, some pleather fabric to reduce noise, and sand. The magnets move around a steel ball bearing through the sand to make patterns. A lot of the components inside are 3D printed - motor mounts, rail mounts, controller boxes, even wire loops. It's all put into a table (Woodworking! Finally!) with an open top to view.
Electronics - There are two Arduinos (a R3 and a Nano) and one Raspberry Pi 3A+. The R3 Arduino has a CNC shield on it and controls it via a CoreXY system (two motors, one continuous belt). The Arduino Uno controls the lighting system, and the Raspberry Pi acts as a server (OctoPrint) to send the gcode files to the R3. The lighting is a strip of addressable LED lights that goes around the perimeter inside the table, and has the added benefit the frame it's on keeps the sand contained. There's a control panel on the outside that can start & pause the CNC, and controls for the lighting to change the pattern, brightness, and speed of the pattern.
The table itself is pretty simple - base is made from poplar and I painted it black. The top is peruvian walnut (from Kluttz lumber in Concord) with danish oil finish. The top is not attached to the base so you can access the internals if need be. It has some wood guides screwed to the bottom so it sits centered on the base and won't move.
Pictures!
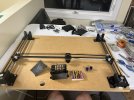
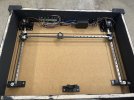
A view of the CNC being assembled on a 3/4" MDF. All the black plastic parts are 3D printed. Other components (pulleys, gears, rails, belt, motors) bought off amazon. All the mounts and the controller box double as the support platform for the 1/4" MDF that will sit on top.
Starting to wire up the CNC and mount the limit switches for homing the carriage. Wiring the back of the control panel (3 buttons and 2 potentiometers)
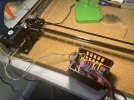
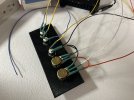
Table base constructed (sorry, no pics of that) and the MDF/CNC assembly inserted. The MDF sits on top of corner braces and is not physically attached to the base. This is so that everything can be removed if there's a need to fix something
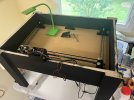
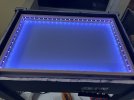
The top 1/4" MDF installed with white pleather for noise reduction, and lighting installed and being tested. The LED strip has 8 programmed patterns it can cycle through. Can add more patterns if desired.
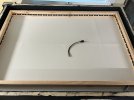
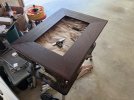
Constructing the table top
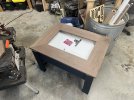
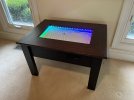
Assembly complete!
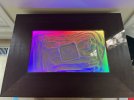
Closeup of a pattern - squares increasing in size and slightly rotated each iteration
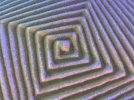
The duration of each "print" varies obviously by the complexity, but most are 15-30 minutes. There are also "eraser" patterns to reset the sand. Patterns can be designed on Sandify and uploaded to OctoPrint on the Raspberry Pi via a web browser.

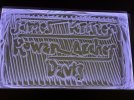
Printing our names. The slanted lines in the background is one of the eraser patterns
A few timelapse videos of it in action.
It was a long and gratifying project. I added a lot of learned skills like 3D printing, soldering, affixing dupont connectors, debugging using a multimeter and more. The woodworking was the easy part! My youngest loves sitting and watching it run.
A quick summary of the internals - the "head" of the CNC has a a few rare earth magnets. On top of the CNC assembly lays a 1/4" thick sheet of MDF, some pleather fabric to reduce noise, and sand. The magnets move around a steel ball bearing through the sand to make patterns. A lot of the components inside are 3D printed - motor mounts, rail mounts, controller boxes, even wire loops. It's all put into a table (Woodworking! Finally!) with an open top to view.
Electronics - There are two Arduinos (a R3 and a Nano) and one Raspberry Pi 3A+. The R3 Arduino has a CNC shield on it and controls it via a CoreXY system (two motors, one continuous belt). The Arduino Uno controls the lighting system, and the Raspberry Pi acts as a server (OctoPrint) to send the gcode files to the R3. The lighting is a strip of addressable LED lights that goes around the perimeter inside the table, and has the added benefit the frame it's on keeps the sand contained. There's a control panel on the outside that can start & pause the CNC, and controls for the lighting to change the pattern, brightness, and speed of the pattern.
The table itself is pretty simple - base is made from poplar and I painted it black. The top is peruvian walnut (from Kluttz lumber in Concord) with danish oil finish. The top is not attached to the base so you can access the internals if need be. It has some wood guides screwed to the bottom so it sits centered on the base and won't move.
Pictures!
A view of the CNC being assembled on a 3/4" MDF. All the black plastic parts are 3D printed. Other components (pulleys, gears, rails, belt, motors) bought off amazon. All the mounts and the controller box double as the support platform for the 1/4" MDF that will sit on top.

Starting to wire up the CNC and mount the limit switches for homing the carriage. Wiring the back of the control panel (3 buttons and 2 potentiometers)


Table base constructed (sorry, no pics of that) and the MDF/CNC assembly inserted. The MDF sits on top of corner braces and is not physically attached to the base. This is so that everything can be removed if there's a need to fix something


The top 1/4" MDF installed with white pleather for noise reduction, and lighting installed and being tested. The LED strip has 8 programmed patterns it can cycle through. Can add more patterns if desired.


Constructing the table top


Assembly complete!


Closeup of a pattern - squares increasing in size and slightly rotated each iteration

The duration of each "print" varies obviously by the complexity, but most are 15-30 minutes. There are also "eraser" patterns to reset the sand. Patterns can be designed on Sandify and uploaded to OctoPrint on the Raspberry Pi via a web browser.

Printing our names. The slanted lines in the background is one of the eraser patterns

A few timelapse videos of it in action.
It was a long and gratifying project. I added a lot of learned skills like 3D printing, soldering, affixing dupont connectors, debugging using a multimeter and more. The woodworking was the easy part! My youngest loves sitting and watching it run.
