So I have done allot of reading about this and everything I have read has been doing this to bowls and green turned wood. My big question is could it be done on wood that is thicker. Say a wood blank that is 2" thick or better as long as you had enough liquid and container to keep it submerged in?

You are using an out of date browser. It may not display this or other websites correctly.
You should upgrade or use an alternative browser.
You should upgrade or use an alternative browser.
Alcohol Soaking
- Thread starter 708custom
- Start date
- Status
- Not open for further replies.
Alcohol soaking... maybe I'm overly skeptikal on such matters, but I have never heard or read a really solid scientific explanation for why booze-soaking wood work for preventing cracking. That being said, plenty of people seem to swear by it. If it works like folks seem to think it does, I don't see why a larger blank wouldn't work, given sufficient volume of alcohol. Though, that starts getting expensive.
Forgive me if you've already tried this, but lots of people have good success using stretch film (cling wrap, etc) around their green-turned bowls. The theory goes that if you wrap around the grain (leaving the face grain exposed), this slows rate at which the moisture exists the wood, thus preventing cracking.
Forgive me if you've already tried this, but lots of people have good success using stretch film (cling wrap, etc) around their green-turned bowls. The theory goes that if you wrap around the grain (leaving the face grain exposed), this slows rate at which the moisture exists the wood, thus preventing cracking.
Well, I don't have a definitive answer to your question, but I have something that you can think about as you experiment. Usually a green bowl that has been roughed out is left 1" to 1 1/2" thick. Additionally, and perhaps more importantly, almost all the exposed surfaces are end grain. There's a little long grain on the sides and bottom, but not much. PEG was developed with the idea that it could be used to dimensionally stabilize lumber. Experiments, however, showed that while it would penetrate end grain to some extent, it would not penetrate the long grain very much. It has never found a commercial application matching the expectations of those who began the research. Ed Moulthrop (and his sons) from Atlanta Ga. used PEG to dimensionally stabilize their bowls. Ed would turn a bowl from a bolt of a tree, turning right into the end grain and including the heart center (pith) to about 1 1/2" or 2" of thickness, then immerse it in PEG, then re-turn. He developed a finish to use on these bowls which he would never discuss except to say that none of the other finishes he tried would give satisfactory results on PEG treated wood. I don't remember how long he would keep them in the PEG. I did a workshop with him quite a few years ago. He was a very interesting man and I learned a lot, but I wasn't interested in duplicating his methods. He would tell you all he knew about wood, lathes (he designed and built his own), and turning, but he wouldn't talk much about his finish. PEG is chemically related to DNA. One of our members is a chemist, and perhaps will give us more information on that. Your wallet is probably all that will be hurt if you try this though.
Well, I don't have a definitive answer to your question, but I have something that you can think about as you experiment. Usually a green bowl that has been roughed out is left 1" to 1 1/2" thick. Additionally, and perhaps more importantly, almost all the exposed surfaces are end grain. There's a little long grain on the sides and bottom, but not much. PEG was developed with the idea that it could be used to dimensionally stabilize lumber. Experiments, however, showed that while it would penetrate end grain to some extent, it would not penetrate the long grain very much. It has never found a commercial application matching the expectations of those who began the research. Ed Moulthrop (and his sons) from Atlanta Ga. used PEG to dimensionally stabilize their bowls. Ed would turn a bowl from a bolt of a tree, turning right into the end grain and including the heart center (pith) to about 1 1/2" or 2" of thickness, then immerse it in PEG, then re-turn. He developed a finish to use on these bowls which he would never discuss except to say that none of the other finishes he tried would give satisfactory results on PEG treated wood. I don't remember how long he would keep them in the PEG. I did a workshop with him quite a few years ago. He was a very interesting man and I learned a lot, but I wasn't interested in duplicating his methods. He would tell you all he knew about wood, lathes (he designed and built his own), and turning, but he wouldn't talk much about his finish. PEG is chemically related to DNA. One of our members is a chemist, and perhaps will give us more information on that. Your wallet is probably all that will be hurt if you try this though.
I have a large Moulthrop bowl and it is cracked and the finish is a wreck. I wrote to his son about repair. Was told he could do it, but never discussed fees. I believe there was an overall evolution in the drying and finishing process and that this might be an earlier bowl. Wood is such a variable material, I would be surprised if there is a one size fits all drying method.
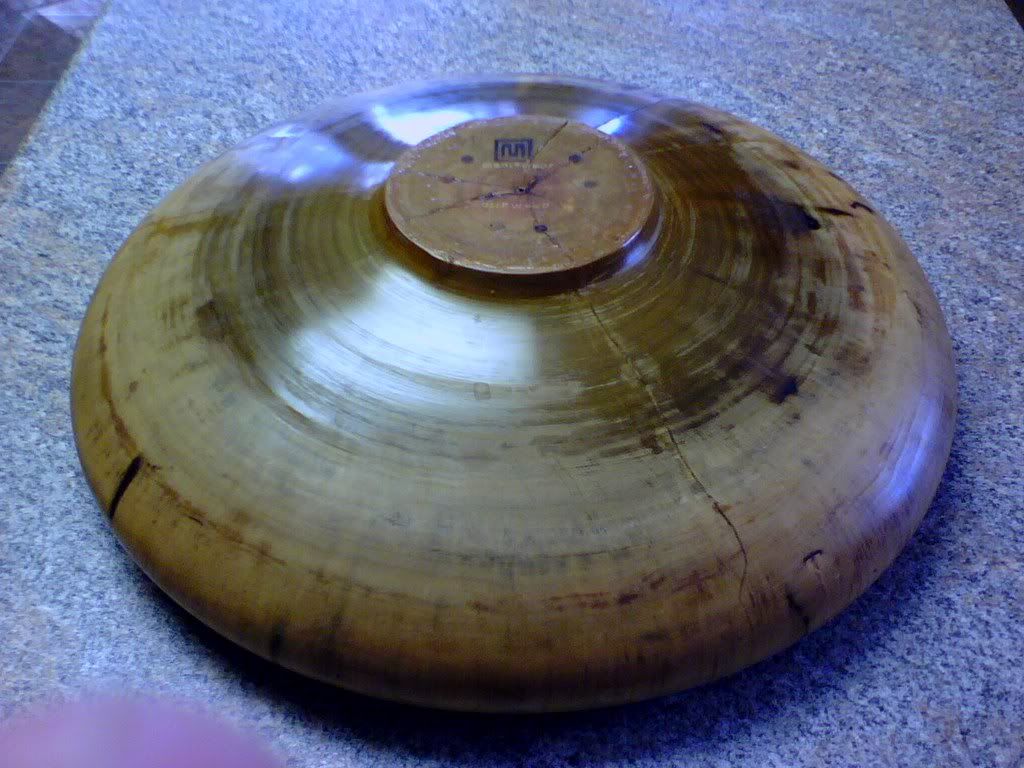
Mark, That's a very interesting piece. You can clearly see the heart center and the annular rings. The crack is where it would be expected - along a radial line. I can't see if it goes all the way to the rim. It hasn't opened up too wide. If you really want it repaired I wouldn't take it to anyone but one of his sons. Certainly he developed his methods over time. Your piece doesn't seem to be dated, but his later work seems to have a much thicker finish so I suspect you're right that this is an earlier piece. I have no idea about its value, but as such I would be inclined not to mess with it too much, or at all. Wax, while not a very hard finish, is the most resistant to moisture transfer, and could be easily applied to your bowl. It would not detract from the luster of the finish or the value of the bowl.
Well, in defense of Ed, I'll just say that at the workshop I did with him I rough-turned a poplar bowl about 24" or a little more in diameter from a green bolt. As I mentioned, I wanted to learn from Ed, not duplicate his methods. So I brought home my green blank, but did not soak it in PEG. It opened up radially just like Mark's bowl, but in stead of a small crack that you can see in the pic the crack went all the way out to the rim where it was 2" or 3" wide - like a slice of pie. So, over the years Mark's bowl has developed a small crack, but it's not the same as it would have been had the bowl blank not been treated with the PEG. I kept that bowl blank for quite a few years just as a reminder of working on Moulthrop's lathe, using his tools that were 4 or 5 feet long and would lever you up off the ground if you took too big a cut, but eventually it found its way to the wood stove.
This is why I haven't turned green wood bowls. I use smaller pieces and always air dried or kiln dried.
I would like to learn more and use green wood as there is so much more available.
I have heard of boiling the blank before ever turning which seems to be a different approach altogether.
Does anyone here have any experience with that?
I would like to learn more and use green wood as there is so much more available.
I have heard of boiling the blank before ever turning which seems to be a different approach altogether.
Does anyone here have any experience with that?
Never tried that one, Mike, but most of my work starts out green. I'll be glad to help you get started if I can. The important thing to see about Ed Moulthrop's work is that he is using a whole cross section of a log (some call these cookies, I guess if they're thin) which I would call a bolt. He turned into the end grain and left the heart center right going vertically through the piece. Without PEG this almost guarantees some level of failure. My work is oriented so that the grain goes across the piece not vertically through it. I split the bolt in two along the pith (heart center) and only use one half for each bowl - no pith. I won't say that I never lose any, but in the long run not all that many.
As a personal experiment, last winter I took six (10 to 16 inch dia.) fresh-cut short-leaf pine blanks, roughed them out and soaked them for an hour or so in DNA. Then I wrapped the exterior in brown grocery bags and left the interior exposed. My assumption was that this would be a worst-choice wood which would serve to prove or disprove the alcohol soaking theory for me. The result: a year later there is no cracking whatsoever in any of the six. I have not finish-turned the pieces because the wood has little distinctive character, but I do plan to finish them all in due time. I don't recommend turning green pine because of the gumming effect on tools, plus it often has pitch pockets which will quickly ruin bandsaw blades and dull turning tools.
Never tried that one, Mike, but most of my work starts out green. I'll be glad to help you get started if I can. I split the bolt in two along the pith (heart center) and only use one half for each bowl - no pith. I won't say that I never lose any, but in the long run not all that many.
This is basically how I turn except I let the bole dry for a few years before I split it. When I tried the other way I had a lot of splitting and followed others' advice but never had any success with green wood.
Yes, I will try to take you up on your offer of help. I see some obstacles though. I work from sunup to supper time mon -fri and many times my week end is shot.
But I will try to find time to get together.
I did not do a direct time and space control comparison with rough-turned and unsoaked blanks. However, some other pine and poplar blanks from the same load have cracked radially.
Robert,
Did you also have a control to see whether your DNA efforts might be the cause of the crack-free result?
So I have done allot of reading about this and everything I have read has been doing this to bowls and green turned wood. My big question is could it be done on wood that is thicker. Say a wood blank that is 2" thick or better as long as you had enough liquid and container to keep it submerged in?
Chris---------I have not tried the DNA route. I use the plastic bag method. I rough out the bowl with about 1" wall thickness regardless of the diameter. I then place the blank in a plastic bag-----every day I turn the bag inside out until I no longer see moisture on the inside of the bag when I turn it inside out. The grain is across the bowl rather than top to bottom. It works for me----I have not yet had failures after turning to finished size. Downside is you have to do it every day so it is more time consuming. It's a cheap way to do it though.
Jerry
A year + ago I started by roughing a bunch ( dozen) bowls from a green hickory log I ran across in January (IIRC).
I left them .75 to 1" walls on 7 - 11" dia bowls.
Packed them in their own shavings in brown paper grocery bags for 7 or 8 months per some discussion here.
When I opened them this fall I was amazed at how much they had distorted in drying and appreciated every bit of wall thickness in making them round again.
I was even more amazed to find that they are still moving.
One that I finished a month or so back is visibly twisted if you sight across the rim.
When I saw this I was concerned about one large bowl I had finish turned without the intermediate drying time and then gifted to a friend.
I was sure it must be a cracked mess but when I called to check learned that it was good as the day I delivered it.
Maybe its the structure since it came from a crotch, may be the many layers of shellac (or all the alcohol solvent in the shellac) or the carnauba wax finish.
Whatever, it has been more stable than the ones I let "dry"
Next time I'll go for longer drying in between rough and finish turnings
This is why I haven't turned green wood bowls. I use smaller pieces and always air dried or kiln dried.
I would like to learn more and use green wood as there is so much more available.
I have heard of boiling the blank before ever turning which seems to be a different approach altogether.
Does anyone here have any experience with that?
Mike no need to fear turning green wood. It is great fun! I am not a very good turner but have had excellent results. And the only almost failures I have had was when doing stoopid things like leaving the pith in the bowl. Note this is not a dig on those that know how to stabilize a bowl with the pith intact.
The basic recipe is turn to 1" thick, coat in anchorseal and leave it in a bag with it's shaving for a year. I have had zero failures this way (knock on wood). They end up oval but I think that is cool too.
The other fun thing is to turn smaller bowls (under 6" or so?) quickly down to less then 1/8 thick. All the woods I have tried (which isn't really many) have survived this.
Green wood is so much more fun to turn
") . With the exception of the stream of water you sometimes end up with .
. With the exception of the stream of water you sometimes end up with .Salem
- Status
- Not open for further replies.
Premier Sponsor
Our Sponsors
LATEST FOR SALE LISTINGS
-

-
-
-
-
 SOLD -- $75: Gast moa v113 Vacuum Pump Veneer, 60" bag and board
- Started by peterdnight
- Replies: 1