
harvest
-
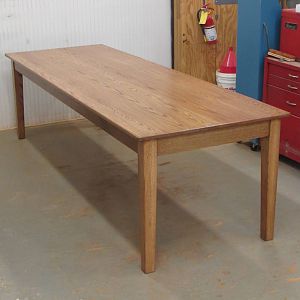
IMG_1002
Completed table before delivery. 108" x 36".- Bill Clemmons
- Media item
- dining harvest oak table
- Comments: 0
- Album: Oak Harvest Table
-
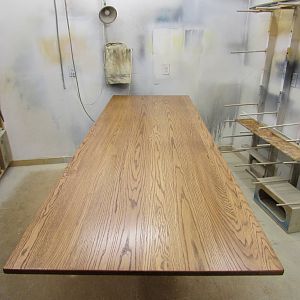
IMG_0999
Top in finish room. Walnut stain, followed by 3 coats of satin lacquer.- Bill Clemmons
- Media item
- dining harvest oak table
- Comments: 0
- Album: Oak Harvest Table
-
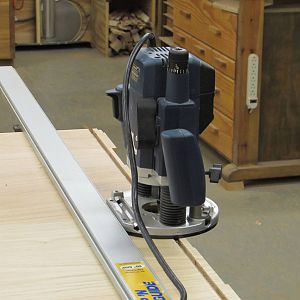
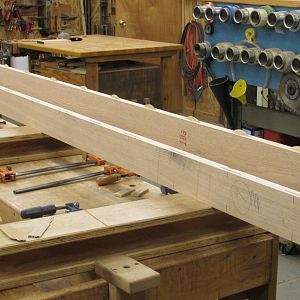
IMG_0996
Squaring ends of top w/ router and guide. Made 4 passes.- Bill Clemmons
- Media item
- dining harvest oak table
- Comments: 0
- Album: Oak Harvest Table
-
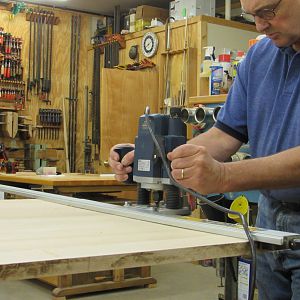
IMG_09941
Squaring ends of top w/ router and guide. Made 4 passes.- Bill Clemmons
- Media item
- dining harvest oak table
- Comments: 0
- Album: Oak Harvest Table
-
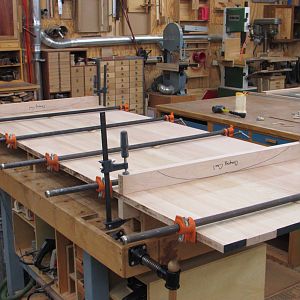
IMG_09892
Table top glue up, using cauls to help keep it flat.- Bill Clemmons
- Media item
- dining harvest oak table
- Comments: 0
- Album: Oak Harvest Table
-
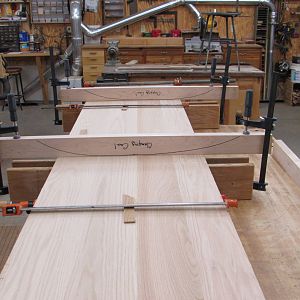
IMG_09821
Table top glue up, using cauls to help keep it flat.- Bill Clemmons
- Media item
- dining harvest oak table
- Comments: 0
- Album: Oak Harvest Table
-
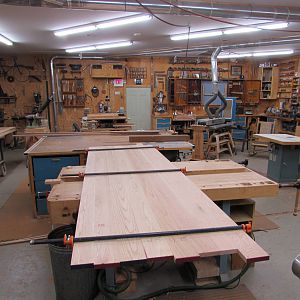
IMG_09763
Joining boards to form top. Biscuits every 8", 13 per joint.- Bill Clemmons
- Media item
- dining harvest oak table
- Comments: 0
- Album: Oak Harvest Table
-
IMG_09623
Laying out boards for top. Arranging for "best face".- Bill Clemmons
- Media item
- dining harvest oak table
- Comments: 0
- Album: Oak Harvest Table
-
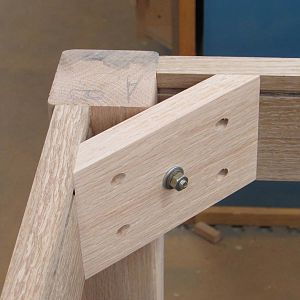
IMG_09603
Frame cross bracing attached to long rails. Pocket screws and glue blocks.- Bill Clemmons
- Media item
- dining harvest oak table
- Comments: 0
- Album: Oak Harvest Table
-

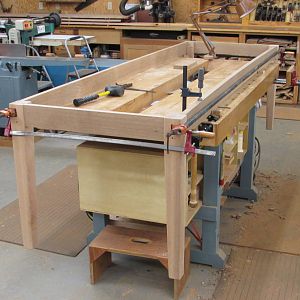
IMG_09582
Assembled table frame.- Bill Clemmons
- Media item
- dining harvest oak table
- Comments: 0
- Album: Oak Harvest Table
-
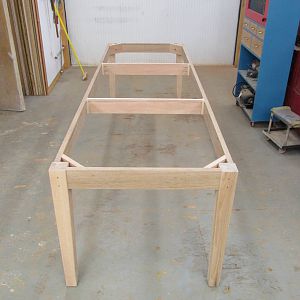
IMG_09574
Assembled table frame.- Bill Clemmons
- Media item
- dining harvest oak table
- Comments: 0
- Album: Oak Harvest Table
-
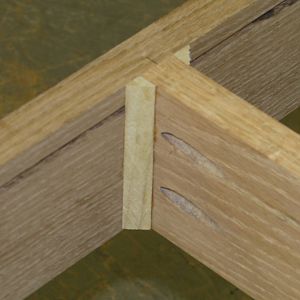
IMG_09555
Completed rail/leg joint. M&T, pinned, glued, w/ corner brace screwed and bolted.- Bill Clemmons
- Media item
- dining harvest oak table
- Comments: 0
- Album: Oak Harvest Table
-
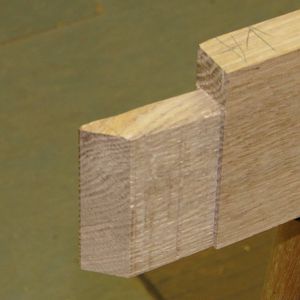
IMG_09524
Mitered tenons on rails.- Bill Clemmons
- Media item
- dining harvest oak table
- Comments: 0
- Album: Oak Harvest Table
-
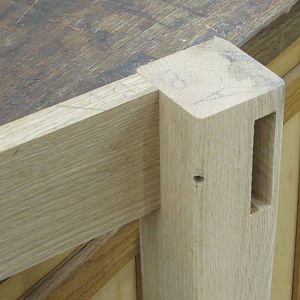
IMG_09502
Rail to leg joint.- Bill Clemmons
- Media item
- dining harvest oak table
- Comments: 0
- Album: Oak Harvest Table
-
IMG_09486
First test fit of legs and rails.- Bill Clemmons
- Media item
- dining harvest oak table
- Comments: 0
- Album: Oak Harvest Table
-
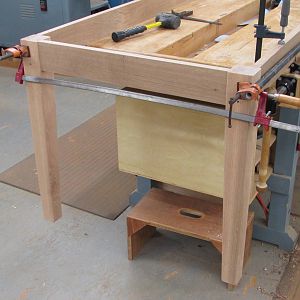
IMG_09474
First test fit of legs and rails.- Bill Clemmons
- Media item
- dining harvest oak table
- Comments: 0
- Album: Oak Harvest Table
-
IMG_09444
Rough wood acclimating to shop- Bill Clemmons
- Media item
- dining harvest oak table
- Comments: 0
- Album: Oak Harvest Table
-
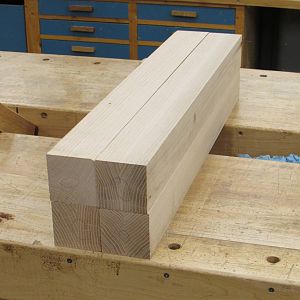
IMG_08892
4 leg blanks- Bill Clemmons
- Media item
- dining harvest oak table
- Comments: 0
- Album: Oak Harvest Table
-
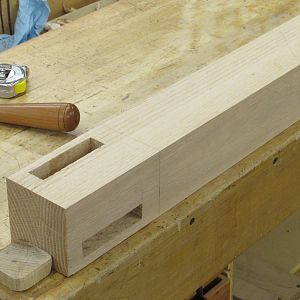
IMG_08884
Cleaning up mortises in legs.- Bill Clemmons
- Media item
- dining harvest oak table
- Comments: 0
- Album: Oak Harvest Table
-
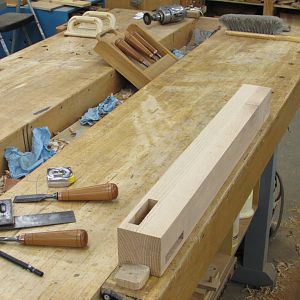
IMG_08875
Cleaning up mortises in legs.- Bill Clemmons
- Media item
- dining harvest oak table
- Comments: 0
- Album: Oak Harvest Table