
Thought I'd take a few minutes & create a thread to document the Unisaw restoration project that’s going on in the shop.
After extensive research on the Web - OWWM.com & .org, in particular. I've bitten off a Unisaw restoration. The current tablesaw is a '90s-era mostly plastic Craftsman 10" contractors saw - it's been good, but am looking at moving to the next level of quality.
The Unisaw in question, came from an auction, when a local window manufacturer closed and was sold off. Checking the serial number index on OWWM revealed that it was born in 1957.
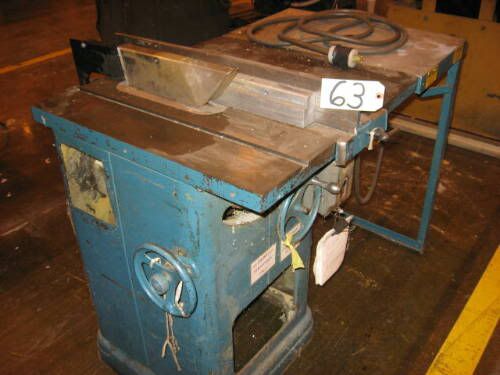
Here's a picture of it looking lonely as Lot #63 at the auction...
Motor works - had it tested at a local motor shop; unfortunately, it is 460v 3-phase. From what I can tell, it's a Rockwell 'stubby' TEFC - from the mid to late 1960's. A picture later in this thread shows the motor w/badge visible - unfortately, it's clean of color/logos - all that can be read are the engravings - model #87-310 & a later manually stamped enscription "460 Volt". Am looking into options to rewire - since the originally it would've been dual voltage 220/460v. Anyone have any ideas on whether this is possible or not? I know I'll have to invest in phase conversion capability of some kind, either static, rotary, or VFD.
Work's cut out for me - that's for sure.
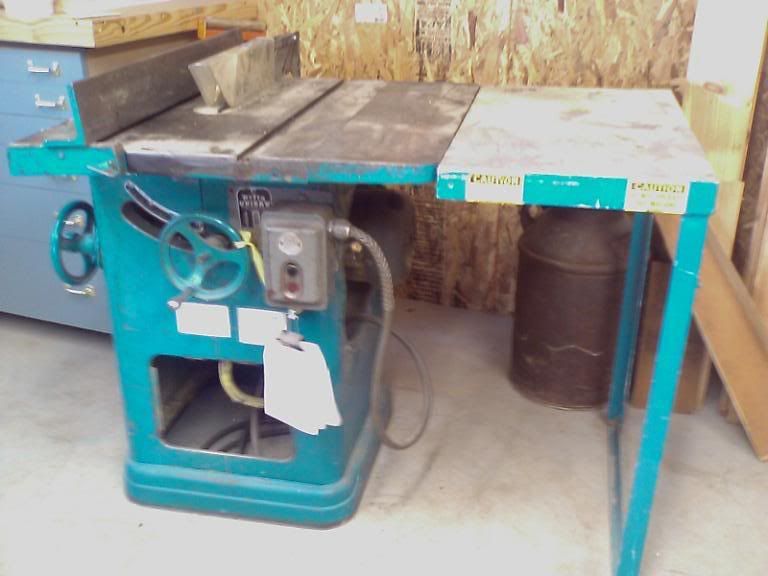
Here it is - sitting in my shop; after having been disassembed / reassembed to get it off the truck. Note the 20-pound+ angle iron fence.
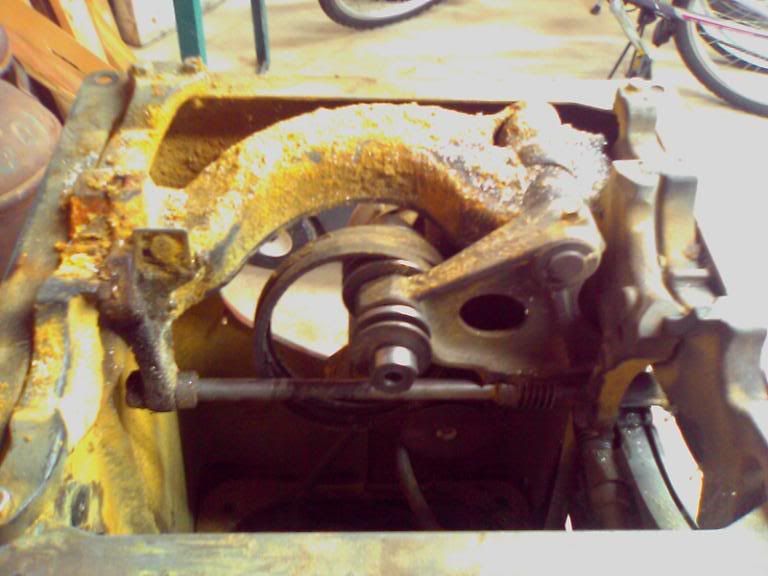
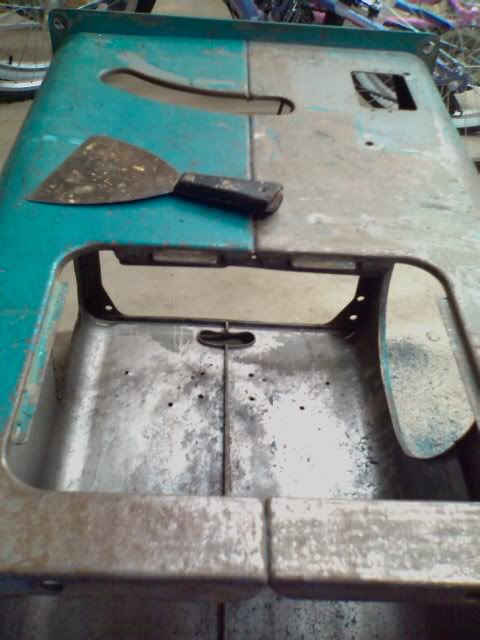
With the top removed, note the caked on pressure-treated sawdust & aluminum shaving mixture - in some places, the cake was 1/4" thick. Would guess we've vacuumed out several pounds of aluminum shavings...
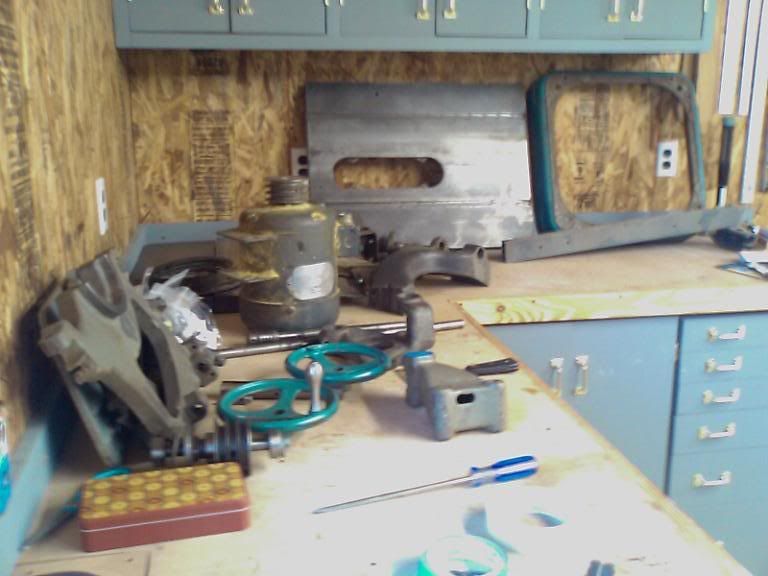
After nearly a day of disassembly, scraping off sawdust & aluminum shavings & a good cleaning with steel wool & mineral spirits, it looks like this...
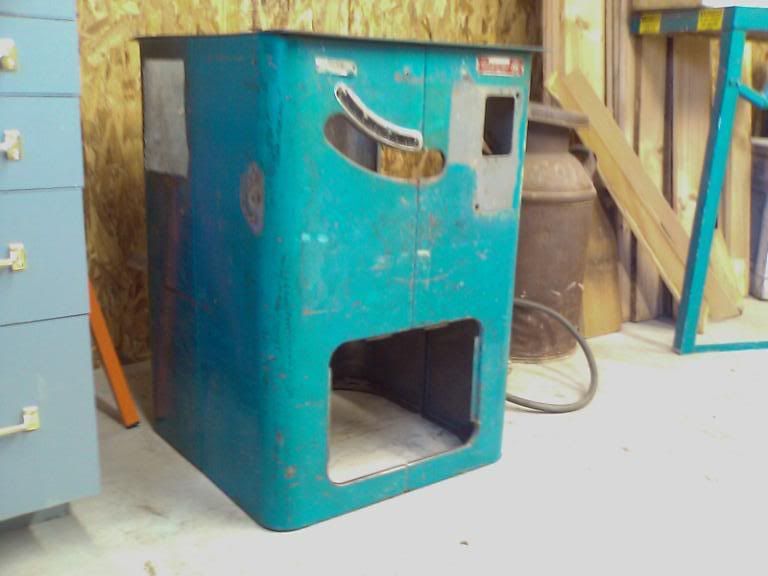
The cabinet...
Stripping paint the old-fashioned way... Paint scaper w/its edge filed sharp enough to shave with - paint flys right off.
Once we get down to metal, there's a few holes - like the gaping one in the side - that need to be filled. A little welding / body work & we'll be well down the path to paint & assembly.
Progress...
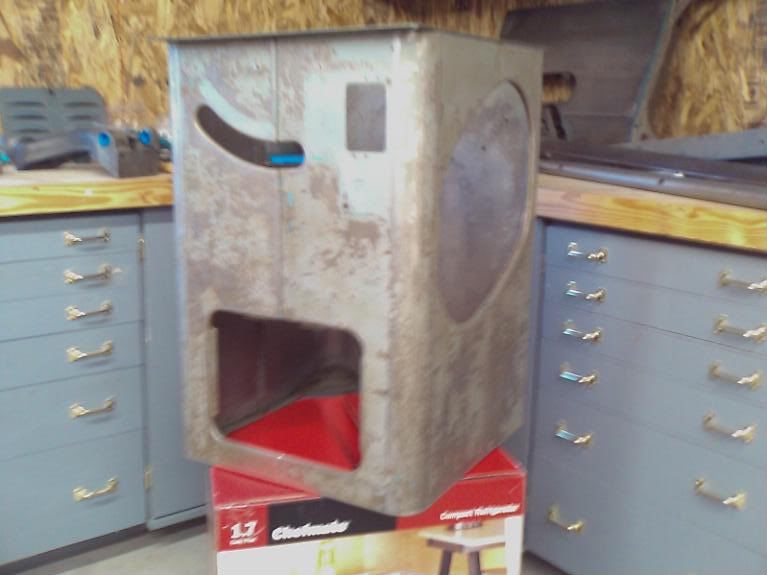
Finished up the paint stripping w/the scraper - probably have 2-3 hours in it.
Here's how we look now:
Since this picture, found a welder to fill all the unnecessary holes & have sanded the cabinet to bare metal, and am ready for primer/paint. Hopefully, will be able to find time this weekend to shoot it. Watch this space...
P.S. Anyone know anything about 3-phase motor winding / wiring that could help me get this motor running without breaking the bank? From what I understand, normally a dual voltage motor will have 6 leads & a single voltage will have 3. This motor has 3. I have not yet taken the motor apart.
After extensive research on the Web - OWWM.com & .org, in particular. I've bitten off a Unisaw restoration. The current tablesaw is a '90s-era mostly plastic Craftsman 10" contractors saw - it's been good, but am looking at moving to the next level of quality.
The Unisaw in question, came from an auction, when a local window manufacturer closed and was sold off. Checking the serial number index on OWWM revealed that it was born in 1957.
Here's a picture of it looking lonely as Lot #63 at the auction...
Motor works - had it tested at a local motor shop; unfortunately, it is 460v 3-phase. From what I can tell, it's a Rockwell 'stubby' TEFC - from the mid to late 1960's. A picture later in this thread shows the motor w/badge visible - unfortately, it's clean of color/logos - all that can be read are the engravings - model #87-310 & a later manually stamped enscription "460 Volt". Am looking into options to rewire - since the originally it would've been dual voltage 220/460v. Anyone have any ideas on whether this is possible or not? I know I'll have to invest in phase conversion capability of some kind, either static, rotary, or VFD.
Work's cut out for me - that's for sure.
Here it is - sitting in my shop; after having been disassembed / reassembed to get it off the truck. Note the 20-pound+ angle iron fence.
With the top removed, note the caked on pressure-treated sawdust & aluminum shaving mixture - in some places, the cake was 1/4" thick. Would guess we've vacuumed out several pounds of aluminum shavings...
After nearly a day of disassembly, scraping off sawdust & aluminum shavings & a good cleaning with steel wool & mineral spirits, it looks like this...
The cabinet...
Stripping paint the old-fashioned way... Paint scaper w/its edge filed sharp enough to shave with - paint flys right off.
Once we get down to metal, there's a few holes - like the gaping one in the side - that need to be filled. A little welding / body work & we'll be well down the path to paint & assembly.
Progress...
Finished up the paint stripping w/the scraper - probably have 2-3 hours in it.
Here's how we look now:
Since this picture, found a welder to fill all the unnecessary holes & have sanded the cabinet to bare metal, and am ready for primer/paint. Hopefully, will be able to find time this weekend to shoot it. Watch this space...
P.S. Anyone know anything about 3-phase motor winding / wiring that could help me get this motor running without breaking the bank? From what I understand, normally a dual voltage motor will have 6 leads & a single voltage will have 3. This motor has 3. I have not yet taken the motor apart.