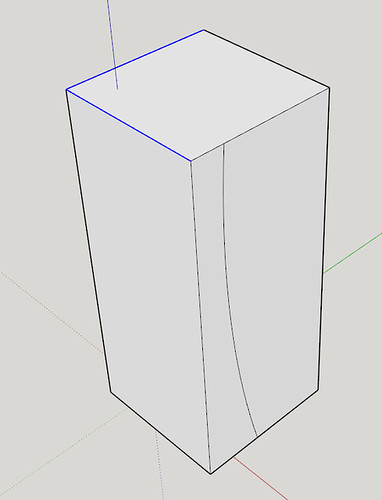
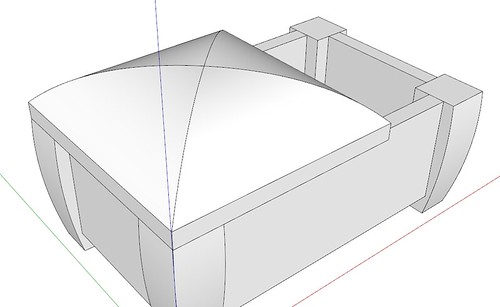
I don't know if this is the right place to post this but I'm totally new to using sketchup and am having an issue. I'm trying to create a model of the box I'm building to visualize the top. What I can't seem to figure out is how to create a curved surface. I have the lines drawn but they the surface doesn't appear like it does drawing a flat surface. I'm trying to attach the file so y'all can see. I want to color fill the two curved sides of the legs and the four curved panels of the top. Thanks

You are using an out of date browser. It may not display this or other websites correctly.
You should upgrade or use an alternative browser.
You should upgrade or use an alternative browser.
Sketchup help
- Thread starter Boomer76
- Start date
- Status
- Not open for further replies.
Hopefully Dave Richards will chime in. Your file is read only so I can't experiment with it. The problem is with curves that SU dosen't dray a continuous curve but it is segmented - zoom way in and you can see it. You could color each segment individually. After you draw it use the smoothing function.
The way I do it is: Raise the whole rectangle to the height of the apex, then on edge create the curve you're looking for (just from one side to the apex 90') and then you can take the follow me tool around the top to get rid of the wood you don't want.
The way I do it is: Raise the whole rectangle to the height of the apex, then on edge create the curve you're looking for (just from one side to the apex 90') and then you can take the follow me tool around the top to get rid of the wood you don't want.
Yes, I've come along to chime in. Hang on a bit and I'll do something to show you.
John, the reason the file opened as Read Only for you is it was saved somewhere SketchUp can't write to for Autosave. You could still edit it.
John, the reason the file opened as Read Only for you is it was saved somewhere SketchUp can't write to for Autosave. You could still edit it.
OK, There are better ways to draw the lid (and the legs) from the beginning but since you have it drawn this far, you can finish it.
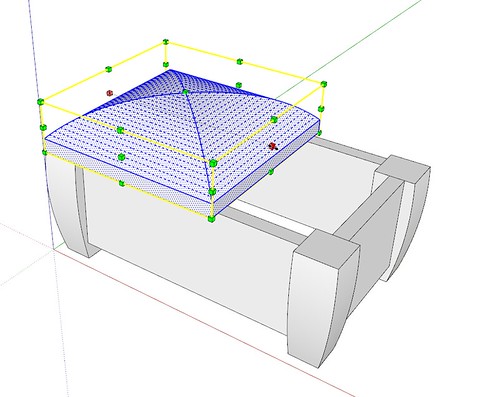
First, I opened the component for editing and using the Line tool, I connected the vertices on the arcs.

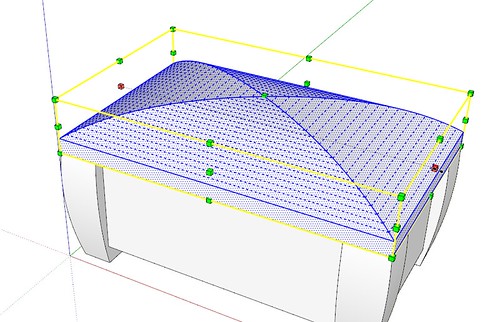
Repeat drawing the lines until you have finished filling in the faces.

The select all of the geometry by triple clicking on it with the Select tool. Right click on it and choose Soften/Smooth. Then click in space somewhere away from the component to close it.

Edit: at least for me, the images aren't showing up but the links work.
You can use the same process for the legs. It would make sense to make a leg a component instead of a group and then copy it around to the other positions to make the four. Then when you edit one, the other three get the same treatment.
I would suggest leaving the textures until the model geometry is complete, too.
First, I opened the component for editing and using the Line tool, I connected the vertices on the arcs.
Repeat drawing the lines until you have finished filling in the faces.
The select all of the geometry by triple clicking on it with the Select tool. Right click on it and choose Soften/Smooth. Then click in space somewhere away from the component to close it.
Edit: at least for me, the images aren't showing up but the links work.
You can use the same process for the legs. It would make sense to make a leg a component instead of a group and then copy it around to the other positions to make the four. Then when you edit one, the other three get the same treatment.
I would suggest leaving the textures until the model geometry is complete, too.
By the way, since I mentioned there's a better and easier way to draw the legs and the lid, here's a tutorial of sorts.
Start with the front left leg. Draw a slightly over sized blank. Draw the curve for the leg on the right side of it. Select the top front and left edges, shown in blue, below.
Get the Follow Me tool and flick on the waste side of the curve. Then triple click on the leg and make it a component.

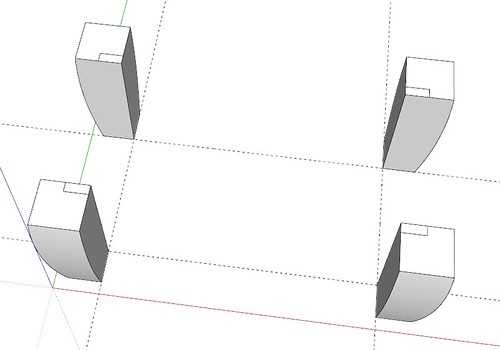
With the leg selected, get the Move tool and hit Ctrl on the PC or Option on Mac to invoke Copy. Move a copy of the leg down the red axis to make the front right leg. I used the Tape Measure tool to set out guidelines showing where the inside faces of the legs need to be. Right click on the copy of the leg and choose Flip Along>Component's Red to make a mirrored copy of the first leg. I put some marks on the top of the leg so you can see that the leg isn't merely rotated. (In this project rotating the leg 90° would work but often rotating creates issues so you might as well learn to do this the way I show.)
After the right front leg is flipped and in position, select both front legs and use the same process to make the rear copies. This time right click with both the rear legs selected and choose Flip Along>Green Direction.
Use the Rectangle tool to draw the cross section dimensions of the box side. I drew it using the top inside corner of the front left leg as the starting point.
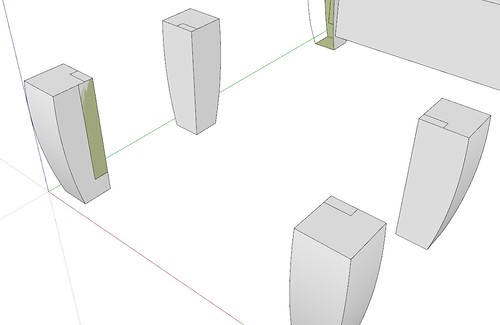
Use Push/Pull to extrude the rectangle over to the right front leg. Triple click with Select on the long box side to select it all and make it a component. Then use the Move tool to move it forward the desired distance. (3/8 in. in this model) Copy this box side to between the rear legs with Move/Copy and flip it along its green axis. It wouldn't look any different now but if you do something to modify the box side later, both sides will get the same treatment in the right location. Repeat the process for the short box sides only flip the right side compoennt along its red direction.

Now, for the lid. Since the lid is rectangular and the curves meet in the middle, they curves have to be different on the long and short sides. The easiest way to handle this is to start with a square. delete its face, and draw a profile or cross section of half the lid. Then select the edges of the square.
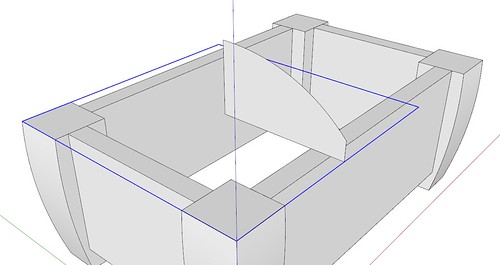
Get the Follow Me tool and click on the profile.
Triple click to select all of the lid geometry, get the Scale tool and grab the center handle on the end.
Move the cursor to the outside edge at the top of the right leg to make the box lid the right length.
While the lid geometry is still selected, hit G to create a component.
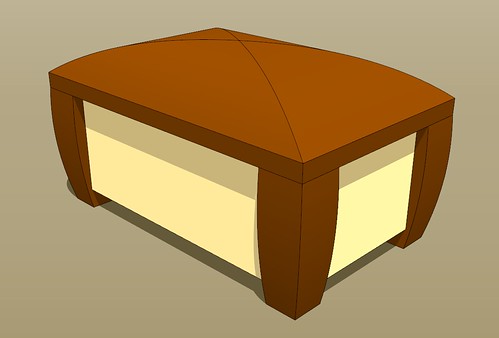
It still needs a bottom. And if you are going to use mortise and tenon joinery and want to show it, you could edit the components to add those details.
One key thing to notice here is that I drew everything in place. This eliminates the need to know all of the dimensions when you draw the model. If you place the legs correctly in the beginning, then the box sides must be the right length since they were drawn to fit between the legs. And the lid must be the right size for the same reason. Less room for errors and you can let SketchUp tell you what all of the dimensions are.
Start with the front left leg. Draw a slightly over sized blank. Draw the curve for the leg on the right side of it. Select the top front and left edges, shown in blue, below.
Get the Follow Me tool and flick on the waste side of the curve. Then triple click on the leg and make it a component.
With the leg selected, get the Move tool and hit Ctrl on the PC or Option on Mac to invoke Copy. Move a copy of the leg down the red axis to make the front right leg. I used the Tape Measure tool to set out guidelines showing where the inside faces of the legs need to be. Right click on the copy of the leg and choose Flip Along>Component's Red to make a mirrored copy of the first leg. I put some marks on the top of the leg so you can see that the leg isn't merely rotated. (In this project rotating the leg 90° would work but often rotating creates issues so you might as well learn to do this the way I show.)
After the right front leg is flipped and in position, select both front legs and use the same process to make the rear copies. This time right click with both the rear legs selected and choose Flip Along>Green Direction.
Use the Rectangle tool to draw the cross section dimensions of the box side. I drew it using the top inside corner of the front left leg as the starting point.
Use Push/Pull to extrude the rectangle over to the right front leg. Triple click with Select on the long box side to select it all and make it a component. Then use the Move tool to move it forward the desired distance. (3/8 in. in this model) Copy this box side to between the rear legs with Move/Copy and flip it along its green axis. It wouldn't look any different now but if you do something to modify the box side later, both sides will get the same treatment in the right location. Repeat the process for the short box sides only flip the right side compoennt along its red direction.
Now, for the lid. Since the lid is rectangular and the curves meet in the middle, they curves have to be different on the long and short sides. The easiest way to handle this is to start with a square. delete its face, and draw a profile or cross section of half the lid. Then select the edges of the square.
Get the Follow Me tool and click on the profile.
Triple click to select all of the lid geometry, get the Scale tool and grab the center handle on the end.
Move the cursor to the outside edge at the top of the right leg to make the box lid the right length.
While the lid geometry is still selected, hit G to create a component.
It still needs a bottom. And if you are going to use mortise and tenon joinery and want to show it, you could edit the components to add those details.
One key thing to notice here is that I drew everything in place. This eliminates the need to know all of the dimensions when you draw the model. If you place the legs correctly in the beginning, then the box sides must be the right length since they were drawn to fit between the legs. And the lid must be the right size for the same reason. Less room for errors and you can let SketchUp tell you what all of the dimensions are.
Jeff, get out your hand planes. 
thanks for the excellent tutorial Dave, very much appreciated. I use SU on a limited basis on a Macbook, but I hate the trackpad, so much more used to a mouse on Windows PC. However my Windows PC does not have the required graphics support needed by SU.
thanks for the excellent tutorial Dave, very much appreciated. I use SU on a limited basis on a Macbook, but I hate the trackpad, so much more used to a mouse on Windows PC. However my Windows PC does not have the required graphics support needed by SU.
You're quite welcome.
Go get yourself an inexpensive Logitech wireless 3-button mouse. It'll be plug and play and things will go much better for you.
You're quite welcome.
Go get yourself an inexpensive Logitech wireless 3-button mouse. It'll be plug and play and things will go much better for you.
That's what I use with mine. It works wonderfully.
- Status
- Not open for further replies.
Premier Sponsor
Our Sponsors
LATEST FOR SALE LISTINGS
-
 SOLD -- $75: Gast moa v113 Vacuum Pump Veneer, 60" bag and board
- Started by peterdnight
- Replies: 1
-
GONE: Gladiator 5 cleats, 10 hangers, Paper Towel and Shelf
- Started by peterdnight
- Replies: 3
-
SOLD -- $100 Makita mac700 portable air + grex pin nailer + 2 others + 50' hose
- Started by peterdnight
- Replies: 1
-
-
