Raleigh General Contractor Recommendations

Status
Not open for further replies.

Douglas Robinson

Doug Robinson
Corporate Member
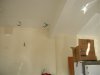
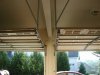
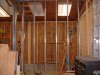
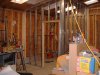
Well, the family is fairly well moved in and I am looking for bids to build the wall separating my "shop" from the rest of the garage. I have one recommendation for HomeWorx, the owner of which lives a few houses away. I am looking for other bids. Any recommendations?

Thanks,

Doug
 

Ray Martin

New User
Ray
Doug,

Any thoughts of building a wall yourself? This would not be a load bearing wall so could be built with 2 X 4s and some sheet material such as sheetrock. Some blocking in the wall would allow for heavy stuff such as shop cabinets to be hung from the wall. Insulation inside the new wall would allow for sound dampening and make shop HVAC more effective.

What are your design considerations?

Ray
 
T

toolferone

I agree with Ray on being a fairly easy DIY job. To make it even easier you don't have to use drywall (hard to mud and tape the seams) Just use some 1/4" hardboard or paneling, or plywood. I also would insulate for noise and HVAC.
I am sure there a few people here who could help you out some weekend and knock it out.
 

Joe Scharle

New User
Joe
Doug, put up some pix and I'm sure you'll get some input. Some of us are licensed general contractors and would be willing to give you suggestions and some hands on to get you started. Curtain walls aren't difficult if you can tie into the ceiling joist and the end walls. And you probably want a connector door.
 

Douglas Robinson

Doug Robinson
Corporate Member
Considerations

The wall will be approximate 22.5' long and about 10' high. The ceiling is 11.5' but there is about a 1.5' "soffet" like wall extending down from the ceiling that I plan to tie into. It will not be a load bearing wall. I do indeed want a door that swings into the shop. Further I want an opening above the door to install an AC unit in.

I plan to attach plywood to all of the inner walls of the shop to support cabinets wherever I want. As a result, the wall does not need to be sheetrocked and mudded. I thought It would look better if the wall facing the rest of the garage was sheet-rocked for appearances.

I know that some aspects of the project might be easy. but I am concerned about the wall being plum, the opening for the door being dimensioned correctly, and the opening for the AC unit being strong enough and sized right.

My freind is a licensed electrician, so we plan on doing the electrical together.

Thanks for the input.

Doug
 

Ray Martin

New User
Ray
Doug,

Since the wall will be a bit taller than the average, I'd spend the extra on longer 2 X 4s rather than put a knee wall on top of an 8-footer.

If you use a pre-hung door, you only have to add 2" to the width of the door to determine the rough opening. Add some beef to the header above the door since you want to put an AC unit there. The header itself would be 5" wider than the width of the door. The extra 5 is to allow for the jack studs on the sides of the rough opening which sit under the ends of the header and support it. (That's 2 " added to the rough opening for the pre-hung door and an additional 1.5" for each of the 2 X 4 jack studs.) So, if your door is 36" wide, you would frame the rough opening at 38" and the header would be 41" from end to end. For the header, I'd make it out of 2 X 8; 2 pieces at 41 inches long with a piece of half inch plywood or OSB between them. Nail the header from both sides with 12d or 16d nails. The jack studs go under the ends of the header to support it and a pair of king studs are installed next to them. Nail through the king stud into the ends of the header and nail the jack studs to the king studs.

I would also suggest blocking between the king studs to give you more support for the cabinets, racks or tools you'd like to hang on this new wall.

When your electrician works with you, he will drill holes in the studs to run wire to various places in the wall. These holes must be (your electrician already knows this part) at least 5/8" from the edge of the stud. I would also strongly reccoment metal shields on both sides of these holes so you can't drive a nail or screw through the wire at a later date.

I'll attempt to load a generic drawing to my album that offers some representation of the wall parts I've mentioned. I'd also be happy to chat with you on the phone if you'd like.

Ray
 

DaveD

New User
Dave
Can you show us a picture of this area? What is the 'soffit you talk about? Is it really a boxed in steel beam that supports a 2nd floor loft area?

What are you going to do with the heat that the AC unit puts out on the other side of the wall? The hot air has to go somewhere. What about a condensate line from the AC?

Building the wall is straight forward. Here is one way to do it. Nail a 2x4 up on the soffit where you want the wall to be. Drop a plumb bob from the ends of the 2x4 to find the matching points on the floor. Fasten a pressure treated 2x4 on the concrete floor with liquid nails and your favorite concrete anchoring method. Even concrete nails and a hand held sledge hammer will do the job. Dont't forget to leave the space for the door opening (or cut it out later).

Measure the distance between the two 2x4 to get the wall height. Its probably going to vary from one end to the other because the concrete probably isn't level. Cut your 2x4 studs 3" shorter than what you measure. Nail the wall together while its laying on the ground. If you want to cheat a little then build the wall to the shortest height and shim it at the top when you nail it up. Frame in for your door and AC as previously mentioned. Frame the opening for the AC just like you would for a window with two 'cripples' with a 2x4 laid across them and a 3rd cripple stud under the middle of the horizontal 2x4.

You could also just build the wall with the PT 2x4 on the bottom to start with and also forget the initial 2x4 on the soffit.

Build everything on 16" or 24" centers. Personally I like 16" centers. Start the measurement off the EDGE of the 1st 2x4 at the end of the wall. All other dimensions will be to the center of subsequent studs. Run your plywood and drywall horizontally. Start at the ceiling and work your way toward the floor. You can use drywall screws for both the drywall and the plywood. Taping the seams isn't that hard. The trick is to keep the knives/mud clean and scrape the mud flush with the drywall surface.

One guy that knows what he is doing + a competent helper should be able to knock this out in 1 good day if they have all the material on hand. Add some time to do the mudding on the drywall side.

You can buy everything at the Borg and rent their truck for $20 to haul it all home.
 

Ray Martin

New User
Ray
...
Build everything on 16" or 24" centers. Personally I like 16" centers. Start the measurement off the EDGE of the 1st 2x4 at the end of the wall. All other dimensions will be to the center of subsequent studs. Run your plywood and drywall horizontally. Start at the ceiling and work your way toward the floor. You can use drywall screws for both the drywall and the plywood. Taping the seams isn't that hard. The trick is to keep the knives/mud clean and scrape the mud flush with the drywall surface.
...

If you measure from the edge of the first king stud, make sure you subtract 3/4" before marking for the second stud. If your wall covering material also starts at that edge and you haven't allowed for the 3/4" (half the width of a 2 X 4), the sheet goods will not end up on the middle of a stud at the other end. All vertical seams should be on studs so you have a nailing surface for the sheet goods.

Ray
 

zippymbr

New User
Update your profile with your name
I agree, build it yourself. If you can build furniture a wall is no problem. Don't let the rough openings scare you off. If you live anywhere near me I would be glad to come over and give you and advice. I would even come over with my framming nailer and frame up the wall if you had all the stuff you needed to build it. Try to post some pics so we can give you some better advice and suggestions on how to layout the wall.
 

Douglas Robinson

Doug Robinson
Corporate Member
Pictures

OK. Attached are pictures of the garage. The first shows the "soffet" as it meets the back wall. The 2nd shows the "soffet" extending between the two garage doors.
 

Attachments

  • garage1.jpg
    garage1.jpg
    50.3 KB · Views: 164
  • garage2.jpg
    garage2.jpg
    113.8 KB · Views: 177

Douglas Robinson

Doug Robinson
Corporate Member
3rd picture

Here is a 3rd picture which is another look from the front of the garage looking in. You can see my piled up woodworking equipment in the garage on the right in the 3rd picture.
 

Attachments

  • garage3.jpg
    garage3.jpg
    104.2 KB · Views: 181

michaelgarner

New User
Michael
Friend if I were stateside i would come over on a weekend with you and swing some hammers and set you up right. That is some prime space for a shop! Any chance of convincing the better-half to let you keep the wall down? And use the whole area! Some people think those are garages though, silly people, we all know they are woodworking shops. Be blessed friend
 

D L Ames

New User
D L Ames
Doug, From the pictures it looks like it would be a very easy DIY project to add a partition wall between your garage bays. I am assuming you are planning to continue to use one of the bays for parking a car. Keep in mind though that as close as those doors appear in your photos that opening the car door nearest the new partition will be difficult. Unless of course those are double wide doors. I can't tell what width the doors are from your photos.

With regards to actually building the partition wall, another option you might want to consider is using metal studs. You can normally find these metal studs at either HD or Lowe's and they are easy to work with. Here are a couple pix of an area I walled off in my shop to create a small room in one corner.

D L
 

Attachments

  • DSCF0050.JPG
    DSCF0050.JPG
    164.1 KB · Views: 171
  • DSCF0051.JPG
    DSCF0051.JPG
    162.3 KB · Views: 161

Ray Martin

New User
Ray
The metal studs that D L suggests might be a good idea since you have more than 8' to work with. Ten or 12' sticks are a bit more expensive than the more standard 93" or 96" studs. And the longer they are, the more difficult it will be to find straight ones. Straight is not a problem with metal.

Since I don't use the metal studs, I'm not sure of the cost... may D L can remember.

Ray
 

D L Ames

New User
D L Ames
I can't recall the cost off the top of my head but I know they were much cheaper than buying the 10' & 12' lengths of 2x4's I would have needed for this project. The metal studs are very easy to work with and I simply attached the bottom channel (sole plate) with Tapcon screws to the concrete floor.

D L
 

Douglas Robinson

Doug Robinson
Corporate Member
Doin It Myself

Thanks for the replies. While I am more than willing to work on this project myself, I do not have enough knowledge to do it myself. I probably have the skills, but I definitely do not know enough as evidenced by the fact that I did not understand everything set forth in the advice. If anyone is serious about providing the guidance, I am willing to take you up on it.

Thanks again,

Doug
:)
 

Ray Martin

New User
Ray
Doug,

I'd be happy to meet with you and talk about what needs to be done in the garage / shop. If we meet at your place, we can take some measurements and sketch up some plans for the wall. From this we can develop a materials list and lay out the process of assembling and installing.

If there is someone who has worked with metal studs, we could use any pointers, hints, techniques. I haven't worked with them.

Ray
 

Joe Scharle

New User
Joe
Re: Doin It Myself

Thanks for the replies. While I am more than willing to work on this project myself, I do not have enough knowledge to do it myself. I probably have the skills, but I definitely do not know enough as evidenced by the fact that I did not understand everything set forth in the advice. If anyone is serious about providing the guidance, I am willing to take you up on it.

Thanks again,

Doug
:)

What's your address/contact #'s
Joe
 

D L Ames

New User
D L Ames
If there is someone who has worked with metal studs, we could use any pointers, hints, techniques. I haven't worked with them.

Ray

Ray, when I picked up my steel studs from Lowe's I also picked up a free brochure they had there. I am trying to find the link to another installation guide I downloaded a couple years ago but have not been able to find it yet.

Here is a PDF file that gives the some very basics of working with steel studs but does not cover how to frame a door. I will keep looking for the link to the other guide I used.
 

Attachments

  • InteriorWalls.pdf
    146.8 KB · Views: 176
Status
Not open for further replies.

Premier Sponsor

Our Sponsors

LATEST FOR SALE LISTINGS

Top