Miter saw dust collection & airflow

Bas

Recovering tool addict
Bas
Corporate Member
I'm going to build a dust collection for my new Bosch CM10GD glide saw (stealth gloat). I've read a bunch of articles and forum posts on the challenges of taming dust on the miter saw, and seen a lot of the solutions.

I plan to build a box behind the saw, with some inserts to block off the front of the box. Most of my cuts are at 90 degrees, so I'd only have to remove these inserts when making angled cuts. I'll have the dust port on the saw itself hooked up to a shop vac, but I want to use my cyclone to capture the dust that typically escapes to the sides.

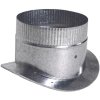
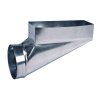
Option A is to create an rectangular opening at the back/ bottom of the box, optionally with some tapered sides to guide the dust. This appears to be the prevalent design, as demonstrated in this video. I could use an HVAC fitting such as the one shown below to make it easy to go from rectangle to round, or use a regular takeoff in the center.
register-boxes-erb12x4x6-64_1000.jpgstarting-collars-take-offs-satto6-64_1000.jpg

Option B is to capture the dust at the top of the box. This is not as common, but looking at this video it appears quite effective. The design is also simpler. However, any dust that doesn't get captured would accumulate in the back.

Option C would be combining these two options. That then leads to the question on how large to make the openings. I have a 3HP cyclone with 6" PVC duct work. Should I run 6" to both top and bottom (maximizing volume), or would two 4" ports (maximizing velocity) be better?

My gut tells me option A is probably the most effective, but why enjoy woodworking and life in general when you can agonize over this? :)
 

FredP

Fred
Corporate Member
you could do what I did. go get yourself a Powermatic 20" planer, take off the dust shoot as it's pretty much useless unless you want to spend countless hours emptying the dust collector. mount it in the saw bench and build a hood to direct the dust to it. connect a hose to the hood and get some work done!:gar-Bi easy peasy huh?
 

MarkE

Mark
Corporate Member
This is my temporary liter saw dust collection hood. Cobbled it together in 2013.

It's just a box made from masonite and a few pieces of 1/4" plywood. Dust collection is with a hvac floor fitting, I think it's 4" x 12" with a 6" output to the DC.
I hung some rubber pieces in front that are easily moved out of the way for bevel/miter cuts. It works fine, just need to brush some of the leftover dust into the colllector in the bottom from time to time.

You can stop by and take a closer look if you get down this way.

Miter saw dust collection 005.JPG
Miter saw dust collection 006.JPG
Miter saw dust collection 008.JPG
Miter saw dust collection 002.JPG
Miter saw dust collection 001.JPG
 
Last edited:

wooduser

New User
Lecil
Years ago I built this dust collection box, 24” x 48”. Just recently I installed this screen on the front using a 24” x 48” fluorescent light diffuser. There is also a 4” hose connected to my dust collector.
9A0F628E-7DB4-4421-BAA6-AAE518E0F733.jpeg

Lecil Alexander
 

Mrfixit71

Board of Directors, Treasurer
Rich
Staff member
Corporate Member
I have had a Bosch CM12GD for several years and enclosed it in a box (temporarily - 2 years ago) when I installed my dust collection system. I ran the 6" PVC up into the bottom - behind and to the left of the arm. There is no transition, just the round pipe. I've tried removing the dust chute from the saw and that did not help with dust collection, and I've tried a few other tweaks. The most successful was to attach a hose to the top of the dust chute and put the hose down into the PVC dust collection system. With the dust collection system running, it will capture probably 90-95% of the sawdust. Even if you are just making a quick cut and don't turn on the dust collection, the hose will still direct most of the sawdust into the pipe.
 

bobsmodels

Bob
Senior User
I have a sliding miter I built for my collection system. The sliding miter is documented on pages 27 through 29 of my installation document in the Library (https://www.ncwoodworker.net/forums/downloads.php?do=file&id=423). I used both a bottom and top collection, as well as the hose off the back of the saw, designed a special box underneath. It handles left and right 45 degree cuts. It uses a combination flow on / off splitter box. Here is pic of finished version. I used cardboard for the covering so it would be easily modifiable. It performs very well. The only place I get any debris is to the right and that is not very much.

It makes an otherwise really dirty cut into a non issue.


Bob


Miter-Saw-Dust-System-1.jpg
 

JimD

Jim
Senior User
I opened this to get ideas, I have not done this successfully yet but I blame my old DC for being too small (Delta AP400). I decided to comment on your two 6 inch lines, one to the top and the other to the bottom option. I don't think this is wise. If you transition a 6 inch trunk to two 6 inch drops the air velocity will be cut in half. I think it would be better to maintain about the same cross sectional area. The formula is just the radius squared times Pi. Two four inch drops off a 6 inch trunk would be a little less area in the drops. A 5 inch and a 4 inch would be slightly more area but pretty close.
 

bobsmodels

Bob
Senior User
Please do take into account Jim's comment on air flow. Especially with the miter saw as it is hard to control the dust flow. The last thing you want is to slow down the air speed by increasing the cross section of the duct work. I have an 8" (50 sq inches) duct going to my Y splitter for the top and bottom. My top is a 4" (12 sq inches), the bottom is a 6" (28 sq inches) for a total of 40 sq inches. I could have used a 5" on the top but I guessed my splitter was actually going to add some resistance so opted for the 4". I think the key to collecting dust from a miter saw is to maximize both air volume moved and air speed. Between the two I think air volume is the more important in this application, yes you need speed but the volume helps with such a large opening.

Good Luck

Bob
 

JimD

Jim
Senior User
If trying to choose between above or below, I will pick the design that involves the least pipe especially turns. I plan to come in from the top with a 5 inch line and probably will not have a line on the bottom. I could go two 4 inch drops, one above and one below but the bottom one would need to have 180 degrees of turn and I don't think it would have great airflow. Pulling only from the top might leave me with a little more debris but I doubt it when the turn is factored in.

All the performance curves show DC air movement is very strongly a function of the pressure loss in the duct. We need a decent sized DC but it also has to have efficient duct work or we might just as well as bought a smaller DC.
 

Bas

Recovering tool addict
Bas
Corporate Member
Thanks for all the suggestions - even yours Fred :)
After much consideration I think I'm going to go with a single 6" port to the bottom. That way, gravity is on my side. Plus, that's the most difficult part of the build. If I am not satisfied, it's fairly easy to add a Wye to the dust collection pipe and put another port on top.

Incidentally, I've made zero progress on the new miter saw bench since my last post, so I may change my mind in 6 months or so :)
 

Premier Sponsor

Our Sponsors

LATEST FOR SALE LISTINGS

Top