Larry Williams side escapement plane DVD: wedge angle?

Scott H

Scott
User
Has anyone else followed this DVD? I am trying to work out a detail about the wedge angle. I might just be chasing my own tail, though.

The plans he gives, the difference between the bed and breast angle is identical to the wedge angle. However, the iron is tapered; Lie-Nielsen sells blade blanks that I imagine are supposed to go with this DVD and they go from 1/8 to 1/16 over 8" which is approximately 1/2 a degree.

So I would imagine the wedge angle would actually have to be about 1/2 degree larger than the bed/breast angle difference, but in the DVD it is not. If I am doing my math right this is going to result in about a 1/32" gap between the wedge and body at the top (not on the left or right side of the wedge, but front to back.)

I realize this is a pretty small amount and could be tweaked out during final wedge/iron fitting but that seems out of place in a DVD where he's talking about sawing the escapement at an angle specified down to quarters of a degree. So I feel like I am missing something.

I have done the math on how much the leaning iron design affects the required wedge angle vs the bed/breast angle layout lines on the flat sides of the body and it seems insignificant.

I vaguely remember someone saying that a small gap in that area is OK because the wedge really only needs to fit left-to-right at the top of the plane, and the front-to-back contact should be near the mouth. But I can't remember if it's in this DVD or the Tod Herrli one or some random youtube video.

Is there something I am missing or forgetting here?
 

creasman

Jim
Staff member
Corporate Member
I recently completed a pair of snipe bill planes following Larry's video. The ten degree angle for the wedge is just the starting angle. When you get to the stage where you're fitting the wedge, iron and plane you'll adjust the wedge angle until everything is tight. The order of steps looks something like this:
  1. Cut the bed and breast angles and remove the waste in between on the escapement side.
  2. Mark and cut the mortise so that the two angles proceed through the body in a straight line all the way out the top. Take time here to make sure the front and back of the mortise are straight and true.
  3. Once the mortise is cut, size the thickness of the wedge. This may involve removing hight spots inside the mortise and planing the wedge thinner. Goal is that it slides in without much effort.
  4. Last step is to adjust the wedge angle to the iron. As you point out the taper of the iron will mean you have to increase the angle of the wedge. Do this by removing material from the front of the wedge. I used a block plane for this with the wedge held in the face vise on the bench. Use a piece of scrap crossways to support the thin end of the wedge as you plane.
Larry mentions in the video about opening up the mouth by a half degree. Not sure if that's what you're referring to. He recommends using the chisel that is 1/10" wide during the layout of the mouth opening. Obviously, this won't let a 1/8" iron go in so he then opens the front of the mouth a bit more. He's doing this to keep the mouth opening tight.

Hope this helps. You and I are both in the Raleigh area. If you like we can meet up and compare notes. I made the snipe bills after watching Larry's video, then took Stephen Slocum's planemaking class at the Woodwright's school last weekend. It was interesting that each instructor followed slightly different processes. The take away for me is to learn and use the process that works best for you.

Jim
 

Scott H

Scott
User
Thank you Jim. It does help. What you described is much more like what I would have naturally done, I was just kind of mystified because in the DVD Larry doesn't ever seem to tweak his wedge after he makes it, thickness or angle. He even puts the finial on the wedge before doing anything to the body. The angle discrepancy might come out in the wash at the stage where he is tuning his wedge mortise. It's just surprising that the bed/breast angles and wedge angles he quotes don't quite add up with the tapered iron because he is very meticulous otherwise, it's possible I have missed something but I think I've done enough rewatching for now.

The part where he saws the bed angle biased by 1/4 degree so the back of the mouth opening ends up forward of its final position -- I do understand that, but I don't think it explains this particular issue directly. I am still figuring out my 1/10th chisel situation though.

I would be interested in meeting some time, I am just back to being a hermit again with covid case rates and variants being what they are right now.
 

creasman

Jim
Staff member
Corporate Member
I found that section of Larry's video confusing as well. He seemed to be very meticulous at the beginning then a couple of sections towards the end seemed to be rushed. In the class with Stephen last week he was very fussy (in a good way) about making sure the back of the wedge rested firmly against the plane iron and equally that there was no gap between the front of the wedge and the breast -- especially at the bottom where the wedge must secure the cutting end. Any gap there could result in chatter and a loose iron.

Stephen didn't fret the gap at the mouth. We marked this using the iron itself plus a pencil width while the bed angle gauge was still in place. No readjustment later. Once both angles were cut we were finished with the mouth gap.

No worries on meeting up. We can wait until the situation improves. I'm also available to discuss over Zoom if you want.

One other take away from Stephen's class was this little furnace. It's made from a coffee can and some miscellaneous hardware. I used a Pringles can as the form for the hole, then poured a mix of 1/3 plaster of Paris, 1/3 sand and 1/3 water around this to make the fire proofing. The pipe on the side holds the nozzle for the MAPP gas torch. We used this setup in the class to preheat and then heat the irons before quenching. It worked great. The little round magnet at the front is a way to verify you've heated the steel sufficiently to quench.

Furnace.jpg


Jim
 
Last edited:

Scott H

Scott
User
We used this setup in the class to preheat and then heat the irons before quenching.

Do you actually do a preheat/soak cycle in this? I know it is recommended for O1 to let it sit at ~1200-1250 F for a while before you raise it to critical, but how do you actually accomplish it in a furnace like this?
 

creasman

Jim
Staff member
Corporate Member
We did preheat the irons in this furnace. The flame from the torch is focused such that the hot spot is on the far side, opposite the pipe opening. We placed the iron here to raise it to the full 1800 degrees. The focus of the flame was on the iron just where the tang and flag meet. It's important to let the heat move up towards the edge so you don't overheat this cutting edge. Also, when quenching we only dipped the bottom two thirds of the flag into the oil (vertically) for a few seconds before releasing the entire iron into the oil. This way you don't make the tang brittle.

To preheat an iron we placed it on the side right below the pipe opening. This is out of the direct flame from the torch and is not as hot. The heat here is from the reflected flame and general warmth of the furnace. We kept one iron in this location while another was heated and quenched and then rotated it over into the flame.
 

Scott H

Scott
User
That is a really good tip about not quenching the full flag. Wouldn't want to have it crack off at the junction with the flag.

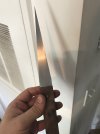
I'm getting closer with my first side float. I got in some Norton Blaze 40 grit 1x30 belts today that actually let me get to my layout lines before the heat death of the universe. I am not very confident with my accuracy with angle grinder cut-off wheels and I ended up cutting pretty wide of my lines. Inexpensive 60 and 80 grit belts were not cutting it to remove the amount of material I left.

I have a second side float almost to this stage as well, one will be push and one will be pull. Next is a lot of tooth filing and then epoxy, handle shaping and oiling.

I have enough O1 and handle stock left to do one more float afterward, a pull cheek float. I think I have reached the point in this exercise where I appreciate why the L-N floats are $60 each but unfortunately it seems like they are out of stock for the near future. At least I will have a nice looking matching set at the end.
 

Attachments

  • IMG_0966.jpeg
    IMG_0966.jpeg
    1.5 MB · Views: 104

Premier Sponsor

Our Sponsors

LATEST FOR SALE LISTINGS

Top