Help with a Compass Rose

Mark Johnson

Mark
Corporate Member
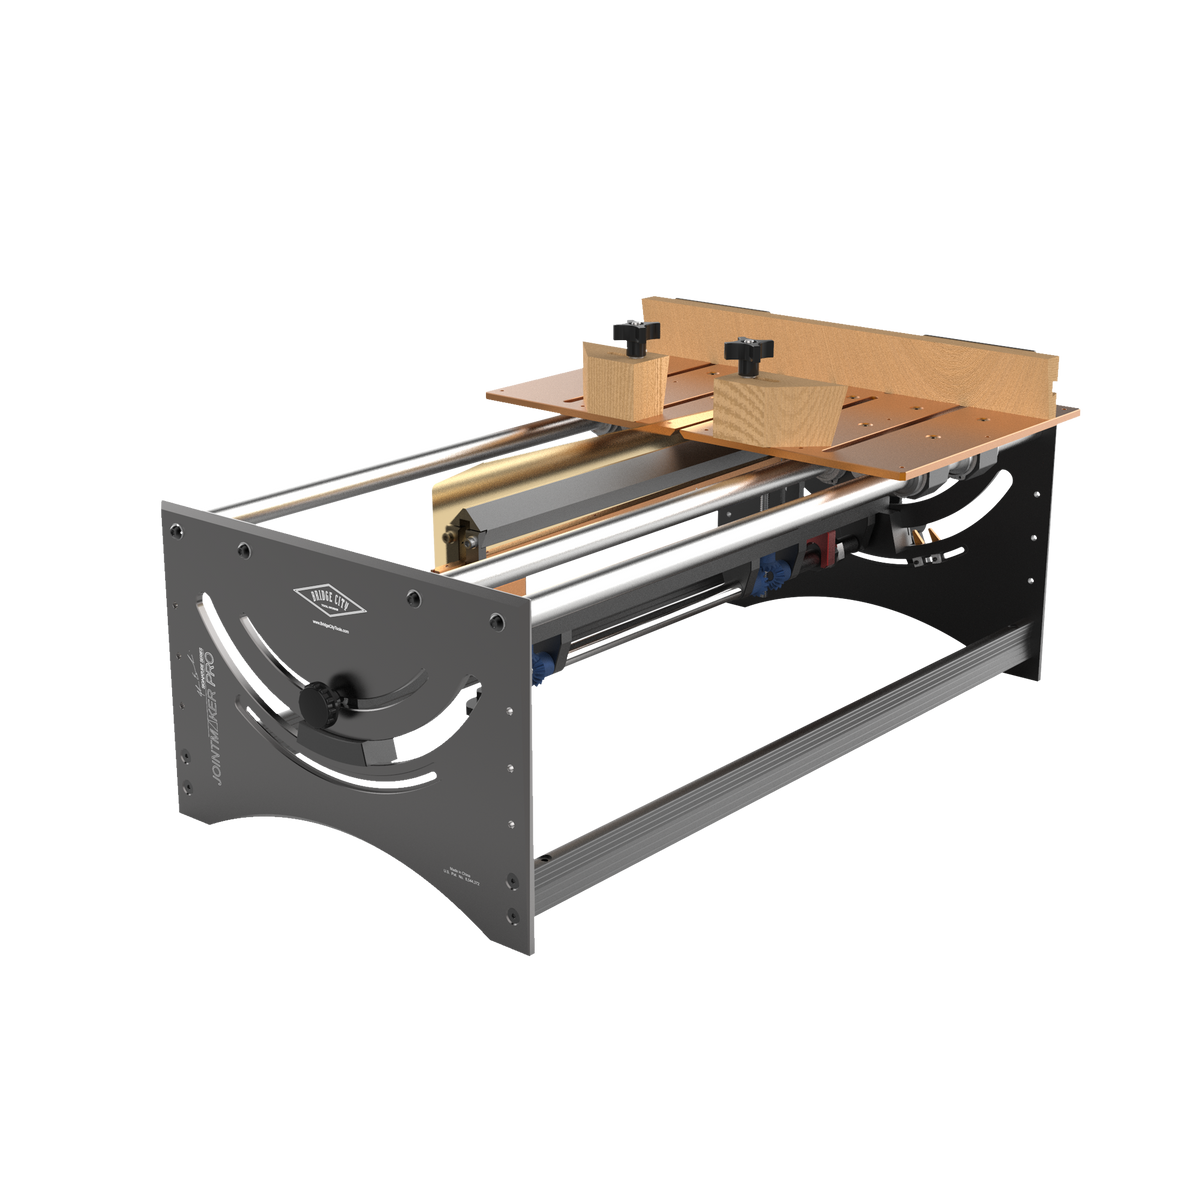
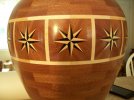
I am playing with making a compass rose design (NOT VENEER) that will end up as part of the top of a turned box or pepper mill. I built a jig to get the angles correct which you can see in the pictures below. I'm having trouble when cutting the 12 degree angle in that the pieces are not coming out the same length even when using a stop block (which is beside the blue tape in the picture). As of this moment, I haven't figured out how this is possible. I checked for flex in the wood strip being cut, but cannot account for the difference. I suspect that several of you have done this before, and would like any ideas you might have. Thanks!

1666826701214.png
1666826701214.pngcompass rose - just checking angles.
1666826786317.png
jig with cut off piece in place -long after the cut
1666826930844.png
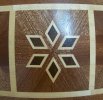
The problem. Note how different the lengths are.
 

Rick Mainhart

Rick
Corporate Member
Hi Mark,

From what I can see, the thickness of your 12° pieces dictate the overall length. Check with a set of calipers to ensure all the pieces are the same thickness. From this, your lengths should match.

Otherwise, cut the pieces long and trim the non-pointy™ ends for a matching length.

Regards,

Rick
 

JNCarr

Joe
Corporate Member
This sounds like a challenge that Charlie has solved (with great success) a hundred times!
 
  • Like
Reactions: drw

Mark Johnson

Mark
Corporate Member
Hi Mark,

From what I can see, the thickness of your 12° pieces dictate the overall length. Check with a set of calipers to ensure all the pieces are the same thickness. From this, your lengths should match.

Otherwise, cut the pieces long and trim the non-pointy™ ends for a matching length.

Regards,

Rick
You are right that the thickness determines the length. Those pieces were exactly the same width and were in fact consecutive cuts. Trimming the non-pointy ends (other than perhaps with a plane in a jig is not practical from a safety standpoint with the techniques I know. These pieces are about 1 inch long. Thanks for commenting.
 

Mike Davis

Mike
Corporate Member
 

JonB

Jon
User
Print out templates of each piece on paper, glue to the stock, trim close, sand on a disk sander to the line. I'm sure he'll chime in but this is the way Charlie makes pieces like that.
 

ssmith

New User
Scott
Can tell for sure from your pix, but you're using a TS? If so, I'd suggest trying a miter saw.

Use sacrificial boards that are clamped to the bed and fence on both sides to a) prevent tearout and b) keep the cutoff piece from being kicked thru the fence.

Probably cut the all 12 degree pieces deliberately long with the point away from the fence (i.e. set saw to 78 degrees). Then do the other cut (57 degrees?) to get proper length - a stop block would be a good idea.

I'd suggest you find some way to hold the pieces during the 2nd cut - fingers less than an inch from the blade is too close for me!
 

Mark Johnson

Mark
Corporate Member
Interesting tool. A little more than I can spring for right now though.
Thanks!
 

Charlie

Charlie
Corporate Member
Print out templates of each piece on paper, glue to the stock, trim close, sand on a disk sander to the line. I'm sure he'll chime in but this is the way Charlie makes pieces like that.
Thanks JonB,
That's the way I do it. Trim close with band saw. 100 grit paper on sander. for me it is much faster and more accurate than using table saw.
 

Gotcha6

Dennis
Staff member
Corporate Member
Can tell for sure from your pix, but you're using a TS? If so, I'd suggest trying a miter saw.

Use sacrificial boards that are clamped to the bed and fence on both sides to a) prevent tearout and b) keep the cutoff piece from being kicked thru the fence.

Probably cut the all 12 degree pieces deliberately long with the point away from the fence (i.e. set saw to 78 degrees). Then do the other cut (57 degrees?) to get proper length - a stop block would be a good idea.

I'd suggest you find some way to hold the pieces during the 2nd cut - fingers less than an inch from the blade is too close for me!
Maybe double sided tape to another piece and slooooooow feed.
 

Mark Johnson

Mark
Corporate Member
These were all done using the paper template and disc sander method.
They are approx. 2 1/2" in diameter.
OK. I have tried the sanding system and it is MUCH better. However, another question is how do you eliminate the rotational sanding inconsistencies along the pointed edge. I'm sanding at center height on my disk sander (which is a shopsmith: table checked for square against the disk.). There is obviously some fundamental I don't know. Thanks!
1666969406308.png
 

Charlie

Charlie
Corporate Member
Mark,
Each time after sanding one side I slide the bottom of the piece across a sanding board to remove any "fuzzies". Any small amount of sawdust under the piece will kick it out of square. Be certain that your sanding table is true and flat. For small pieces I double tape them to a longer piece of wood for a "handle" for better control. As for checking the table squareness against the disc, take a piece of wood 2-2 1/2" wide that has know parallel sides and sand the end with the piece on edge. Then lip over 180* and see if it is still square with the disc.
I see you are only about an hour from me and you are welcome to come over for a shop visit. I am retired so I have no schedule. Lol. I will send yo a PM with my phone #.
 

Gotcha6

Dennis
Staff member
Corporate Member
It's not a bad practice to get some 1-2-3 blocks used by machinists. The make perfect benchmarks for square as well as height.
 

Premier Sponsor

Our Sponsors

Top