I have completed a black walnut hope chest that I built for my niece Sophia. She is a little over one year old. Hopefully this will be something that she can use her entire life.
Rough cut black walnut for the case sides and base.

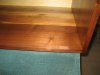
The walnut after it is planed down.

Glue up of one of the sides.

Four panels squared up.

I had to build a stand to elevate my dovetail jig so that the long panels wouldn't hit the floor. I had to stand on a stool to route them.

Tapping together the last piece of the case. It fit very well.

I used a router to flush up the joint. This was the first time I have done this operation and the first time I have made a base for my router.


Templates for the base. I used a french curve to try and get something that was pleasing.

I used the template to draw a line, removed most of the bulk on the bandsaw and then used a pattern bit on the router table. I had to use a chesel to get into the corner.


I saw this trick for clamping miters on Rough Cut. I glued angled blocks to the base and clamped across the miter. Knock the blocks off with a hammer and plane/sand when done.

This seemed to work very well. I then glued some support blocks to the base to hold the case bottom and screwed a piece of plywood onto the blocks to make the bottom.


I decided to finish the bottom and case before attaching them. This is the first time I have done any pre-finishing. This was also my first time playing with HVLP. I sprayed amber shellac. I need some more practice spraying. I have also learned that spraying in direct sunlight on a hot day is not a good idea. I eventually fell back to something that I am more familiar/comfortable with and ended up wiping on the last coats of thinned shellac. Maybe 10-20 coats of ~0.25# cut.


Lid glue up.

There were a few surface imperfections so I decided to use some curly maple butterflies/dutchmen. This was my first time doing any kind of inlay. It was pretty easy with an inlay kit for my router. I made the template myself out of some scrap MDF. I made a few practice butterflies then batched out the butterflies on the lid (2 on the lid bottom and 3 on the lid top). The practice butterflies fit perfectly, but the ones for the lid didn't fit as well. The butterflies were just a tad too big. I think the MDF template started to wear from the bearing pressing against it and changed the dimensions slightly. Against my better judgement, I got a scrap piece of wood and pounded them in with a hammer. Luckily, this did not turn out in a disaster. My wife was NOT a fan of the butterflies and still gives me crap about them. Good things this chest is not for her!")


I was really happy that I was able to keep the rough cut walnut at a finished thickness of 7/8". This led to a complication with the Lid Stay Torsion Hinges, since they are made for 3/4" thick stock. Some mortises solved that issue. I traced the hinge onto a scrap piece of MDF and cut/rasped to the line. The rasp worked well for this task. The hinge fit well and I could use the template with a pattern bit in a small router to make perfectly fitting mortises.


The lid has three battens on the bottom to keep it flat. The holes on the outside of the batten have over sized counter bores to allow for movement.


I made a simple jig to help locate holes for the handles on the side of the chest. I clamped a board on the inside of the chest to prevent blow out.


Here we have a completed chest.

I really like the way the Lid Stay hinges will hold the lid in place.

My wife can almost fit inside the chest. :wsmile: It should be able to hold a lot of stuff.

Rough cut black walnut for the case sides and base.
The walnut after it is planed down.
Glue up of one of the sides.
Four panels squared up.
I had to build a stand to elevate my dovetail jig so that the long panels wouldn't hit the floor. I had to stand on a stool to route them.
Tapping together the last piece of the case. It fit very well.
I used a router to flush up the joint. This was the first time I have done this operation and the first time I have made a base for my router.
Templates for the base. I used a french curve to try and get something that was pleasing.
I used the template to draw a line, removed most of the bulk on the bandsaw and then used a pattern bit on the router table. I had to use a chesel to get into the corner.
I saw this trick for clamping miters on Rough Cut. I glued angled blocks to the base and clamped across the miter. Knock the blocks off with a hammer and plane/sand when done.
This seemed to work very well. I then glued some support blocks to the base to hold the case bottom and screwed a piece of plywood onto the blocks to make the bottom.
I decided to finish the bottom and case before attaching them. This is the first time I have done any pre-finishing. This was also my first time playing with HVLP. I sprayed amber shellac. I need some more practice spraying. I have also learned that spraying in direct sunlight on a hot day is not a good idea. I eventually fell back to something that I am more familiar/comfortable with and ended up wiping on the last coats of thinned shellac. Maybe 10-20 coats of ~0.25# cut.
Lid glue up.
There were a few surface imperfections so I decided to use some curly maple butterflies/dutchmen. This was my first time doing any kind of inlay. It was pretty easy with an inlay kit for my router. I made the template myself out of some scrap MDF. I made a few practice butterflies then batched out the butterflies on the lid (2 on the lid bottom and 3 on the lid top). The practice butterflies fit perfectly, but the ones for the lid didn't fit as well. The butterflies were just a tad too big. I think the MDF template started to wear from the bearing pressing against it and changed the dimensions slightly. Against my better judgement, I got a scrap piece of wood and pounded them in with a hammer. Luckily, this did not turn out in a disaster. My wife was NOT a fan of the butterflies and still gives me crap about them. Good things this chest is not for her!
I was really happy that I was able to keep the rough cut walnut at a finished thickness of 7/8". This led to a complication with the Lid Stay Torsion Hinges, since they are made for 3/4" thick stock. Some mortises solved that issue. I traced the hinge onto a scrap piece of MDF and cut/rasped to the line. The rasp worked well for this task. The hinge fit well and I could use the template with a pattern bit in a small router to make perfectly fitting mortises.
The lid has three battens on the bottom to keep it flat. The holes on the outside of the batten have over sized counter bores to allow for movement.
I made a simple jig to help locate holes for the handles on the side of the chest. I clamped a board on the inside of the chest to prevent blow out.
Here we have a completed chest.
I really like the way the Lid Stay hinges will hold the lid in place.
My wife can almost fit inside the chest. :wsmile: It should be able to hold a lot of stuff.