Accent table-first attempt at mortise and tenon joints

Status
Not open for further replies.

BenBen

New User
Ben
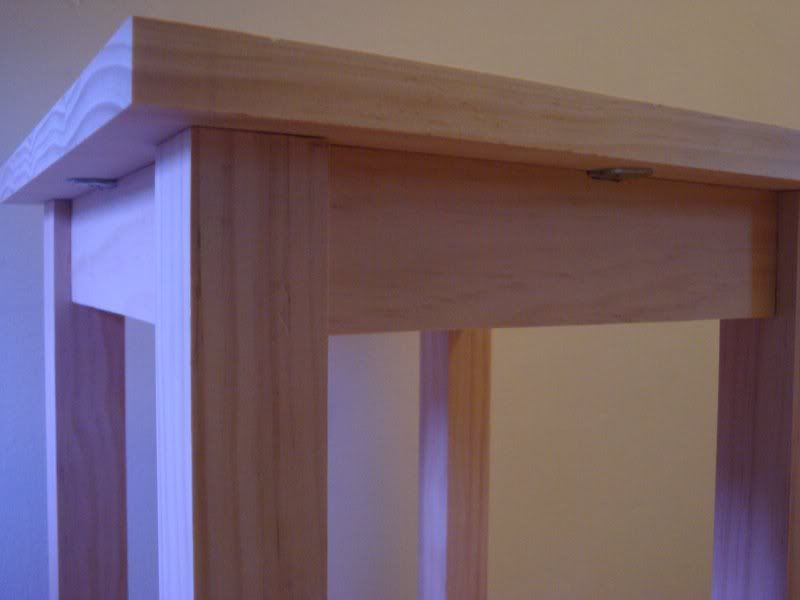
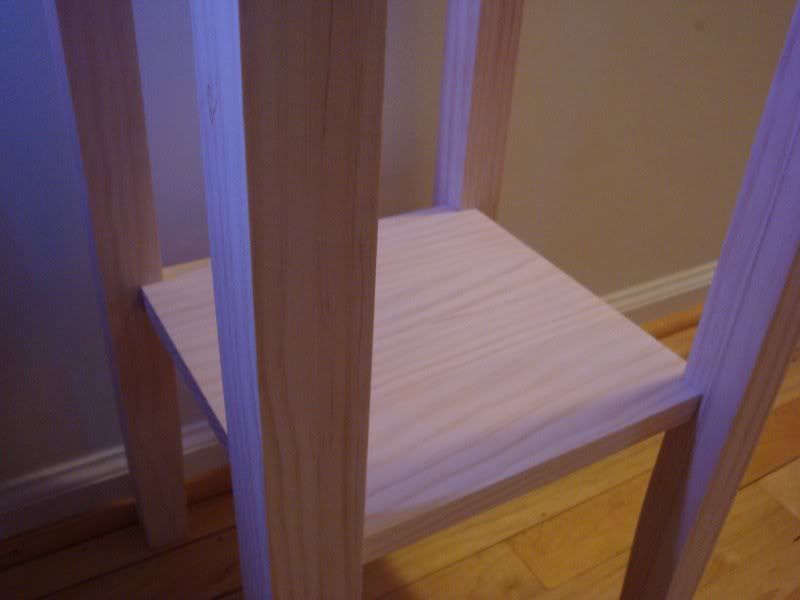
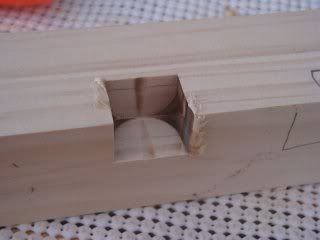
This table was made as a pine prototype I made before I make two more, one out of black walnut and one out of cedar (outdoor use as a plant stand), in order to try out my ability at mortise and tenon joinery. I cut them all on my router table and they turned out pretty clean I thought. The only thing in hindsight I would have done differently is put the table-top fasteners to the insides of the rails.

DSC02881.jpg


DSC02884.jpg


DSC02883.jpg
 

ptt49er

Phillip
Corporate Member
The design looks good, the joinery looks great!

I'm with you thought, I'd put the attachments for the top on the inside of the rails.

Keep us posted with the final finished products!
 

Trent Mason

New User
Trent Mason
That's a nice looking table Ben! :icon_thum There are lots of ways to make those joints. Just find which ever one works the best for you and roll with it. Looks great to me! :icon_thum

Trent
 

Charles Lent

Charley
Corporate Member
You can put the top fasteners on the inside if you want, but I have seen commercially made tables and desks with them mounted the way that you did it. I would put them on the inside too, but wanted you to know that it's not wrong to put them where you did.

That's a very nice table and the joints look like they came out perfect. You did good. :icon_thum :icon_thum

Charley
 

pcooper

Phillip Cooper
Corporate Member
That looks fine to me, very clean and neat. The joinery looks fine!!! I want to see the other versions when you get them done, I know they'll look fine too.
 

Canuck

Wayne
Corporate Member
Nice n' tidy joinery you got there!!!:thumbs_up:thumbs_up:thumbs_up

How is the bottom shelf supported? Sure looks nice and clean!

Done in walnut should really look super.

Thanks for sharing!

Wayne
 

BenBen

New User
Ben
Nice n' tidy joinery you got there!!!:thumbs_up:thumbs_up:thumbs_up

How is the bottom shelf supported? Sure looks nice and clean!

Done in walnut should really look super.

Thanks for sharing!

Wayne

Basically force and wood glue...I cut a square 'pocket' with a 3/4" straight bit, one pass to square off one side, flipped the leg and another pass to square off the other side, finished with a chisel. Here it is before I hit the inside corners with a chisel to square them off:

DSC02873.jpg


I then band clamped the rails to the legs and then slowly worked the bottom shelf into place. Once it was roughly set with each corner in a leg, I seated it the rest of the way by tapping on the legs with a mallet on side of the legs. Quite a snug fit I thought when it was done.
 
Status
Not open for further replies.

Premier Sponsor

Our Sponsors

LATEST FOR SALE LISTINGS

Top