
-
-
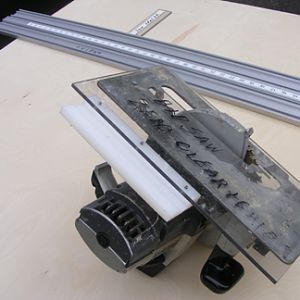
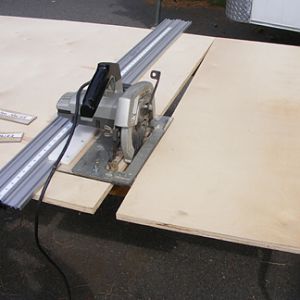
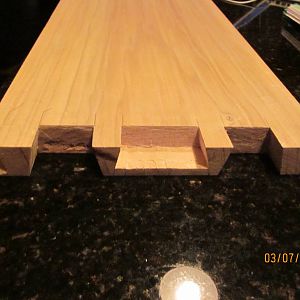
Cutting Table For Plywood Sheets - HDPE guide
You can make this piece to fit whatever brand of straightedge you may have. Mine, both the 4' and 8' came from Peachtree Woodworking in Atlanta. They are both identical except for the length and they lock in place from underneath much like the other straightedge clamps on the market.- Charles Lent
- Media item
- - 8 cutting for plywood sheets table
- Comments: 0
- Category: Member Galleries
-
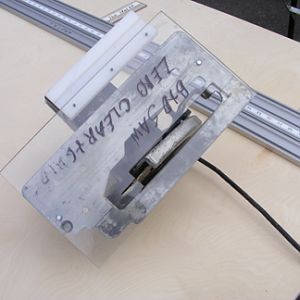
Cutting Table For Plywood Sheets -2nd view zero clearance foot
A full view of the zero clearance base. Notice the piece of HDPE on the facing edge. It has grooves in it that match the top of my straightedge so the saw is quided during the cut. This isn't necessary, but makes it easier the saw in alignment with the straightedge during the cut.- Charles Lent
- Media item
- - 7 cutting for plywood sheets table
- Comments: 0
- Category: Member Galleries
-
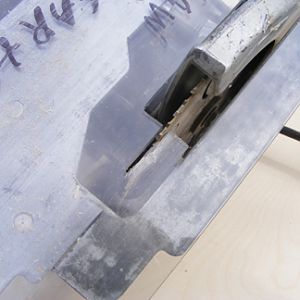
Cutting Table For Plywood Sheets- zero clearance foot
This is a piece of 1/8" Lexan that I have cut to make a zero clearence type base for my saw. It is bolted to the saw's foot and has a narrow kerf for the blade to pass through. This almost completely eliminates chip-out. I use a thin kerf carbide blade for plywood- Charles Lent
- Media item
- - 6 cutting for plywood sheets table
- Comments: 0
- Category: Member Galleries
-
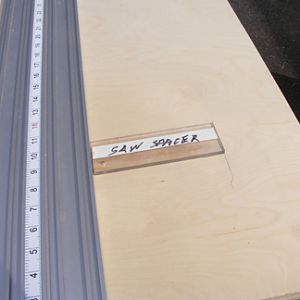
Cutting Table - Straightedge in place for the cut
I use an aluminum straightedge plus homemade plastic spacers to position it for the correct offset of the fence so the saw cut is on my mark. It is accurate to about 1/32". I always cut the panels slightly large and finish cut them on my table saw.- Charles Lent
- Media item
- - 5 cutting for plywood sheets table
- Comments: 0
- Category: Member Galleries
-
Cutting Table - Table Tipped Up and Ready For Cutting
Saw and Straightedge in place. Set the saw depth of cut to the material thickness plus about 1/4". This is a staged photo as I did not actually cut the plywood for this shot, but notice how both pieces of plywood remain in position without falling.- Charles Lent
- Media item
- - 4 cutting for plywood sheets table
- Comments: 0
- Category: Member Galleries
-
Cutting Table - With plywood loaded ready for lifting
The plywood is against the table and sitting on the cleats, prior to lifting upright. This is a staged photo. A full sheet of plywood could be placed, but it's possible to load and tilt smaller pieces this way.- Charles Lent
- Media item
- - 3 cutting for plywood sheets table
- Comments: 0
- Category: Member Galleries
-
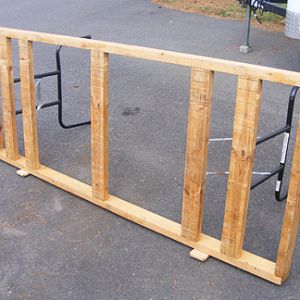
Cutting Table - Table open with Cleats Turned Out
The table is ready to place plywood against it on the turned out cleats (bottom) prior to lifting the table and plywood upright together. This is more of a tilting process than a full lift and goes easy.- Charles Lent
- Media item
- - 2 cutting for plywood sheets table
- Comments: 0
- Category: Member Galleries
-

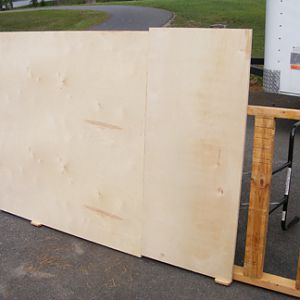
Cutting Table - Table folded in carrying position
A table to break down plywood and other construction lumber that is much more comfortable to use than saw horses. It is 84" long and 34" wide, but these dimensions aren't critical. It can be made to any size that suits you. For the next top I will use 1X4 pine for the table edges and...- Charles Lent
- Media item
- - 1 cutting for plywood sheets table
- Comments: 0
- Category: Member Galleries
-
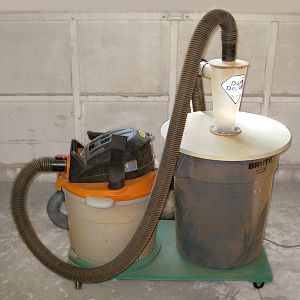
Dust Deputy
Dust Deputy - Shop Vac Combo- PeteM
- Media item
- - deputy dust shop vac
- Comments: 0
- Category: Member Galleries
-
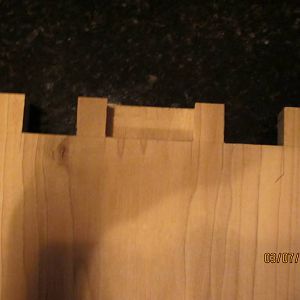
dovetail 5
- jlimey
- Media item
- - bench dovetail joint makore practice
- Comments: 0
- Category: Member Galleries
-
dovetail 4
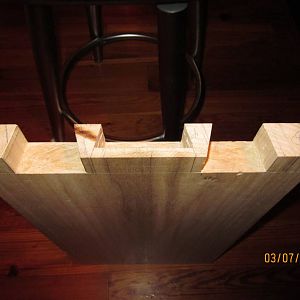
Inside facing up.- jlimey
- Media item
- - bench dovetail joint makore practice
- Comments: 0
- Category: Member Galleries
-
dovetail 3
- jlimey
- Media item
- - bench dovetail joint makore practice
- Comments: 0
- Category: Member Galleries
-
dovetail 2
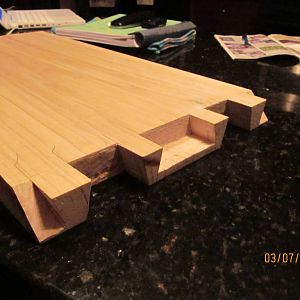
Inside of joint- jlimey
- Media item
- - bench dovetail joint makore practice
- Comments: 0
- Category: Member Galleries
-
dovetail 1
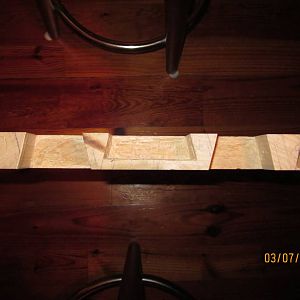
Outer edge of joint mitered as the center will also be. Inside of joint facing up.- jlimey
- Media item
- - bench dovetail joint makore practice
- Comments: 0
- Category: Member Galleries
-
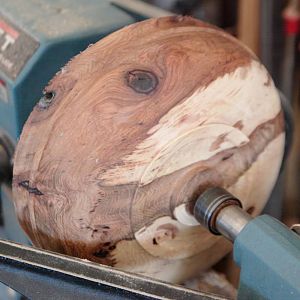
hickory bowl - rough turned
hickory bowl - rough turned- eyekode
- Media item
- - bowl hickory rough turned
- Comments: 0
- Category: Member Galleries
-
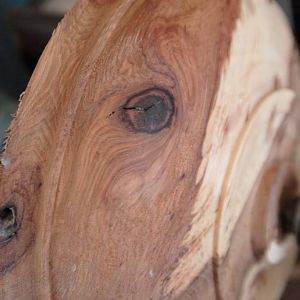
hickory bowl - rough turned
hickory bowl - rough turned- eyekode
- Media item
- - bowl hickory rough turned
- Comments: 0
- Category: Member Galleries
-
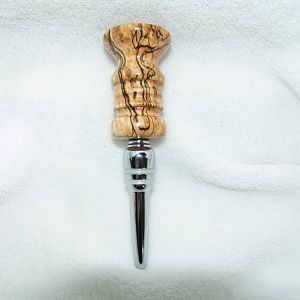
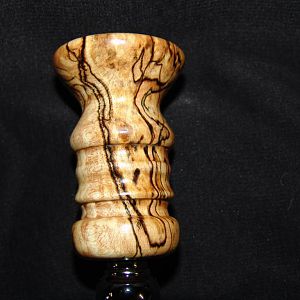
Bottle Stopper - Spalted Elder - Tall 2
Bottle Stopper - Spalted Elder - Tall 2- Cathy Ports
- Media item
- - bottle elder first spalted stopper
- Comments: 0
- Category: Member Galleries
-
Bottle Stopper - Spalted Elder - Tall 3
Bottle Stopper - Spalted Elder - Tall 3- Cathy Ports
- Media item
- - bottle elder first spalted stopper
- Comments: 0
- Category: Member Galleries
-
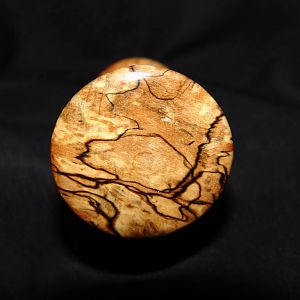
Bottle Stopper - Spalted Elder - Top View
Bottle Stopper - Spalted Elder - Top View- Cathy Ports
- Media item
- - bottle elder first spalted stopper
- Comments: 0
- Category: Member Galleries
Premier Sponsor
Our Sponsors
LATEST FOR SALE LISTINGS
-
-
Graco 395 FinishPro air assisted airless sprayer for sale
- Started by RobH
- Replies: 1
-

-
-